
A while back when reviewing the Tailfin Mini Panniers and Cargo Cages, I spied some photos of the Tailfin R&D Team with fork mounted panniers. It was a somewhat secret project, but now they are available to the public and I’m excited to share all the details of the gear.
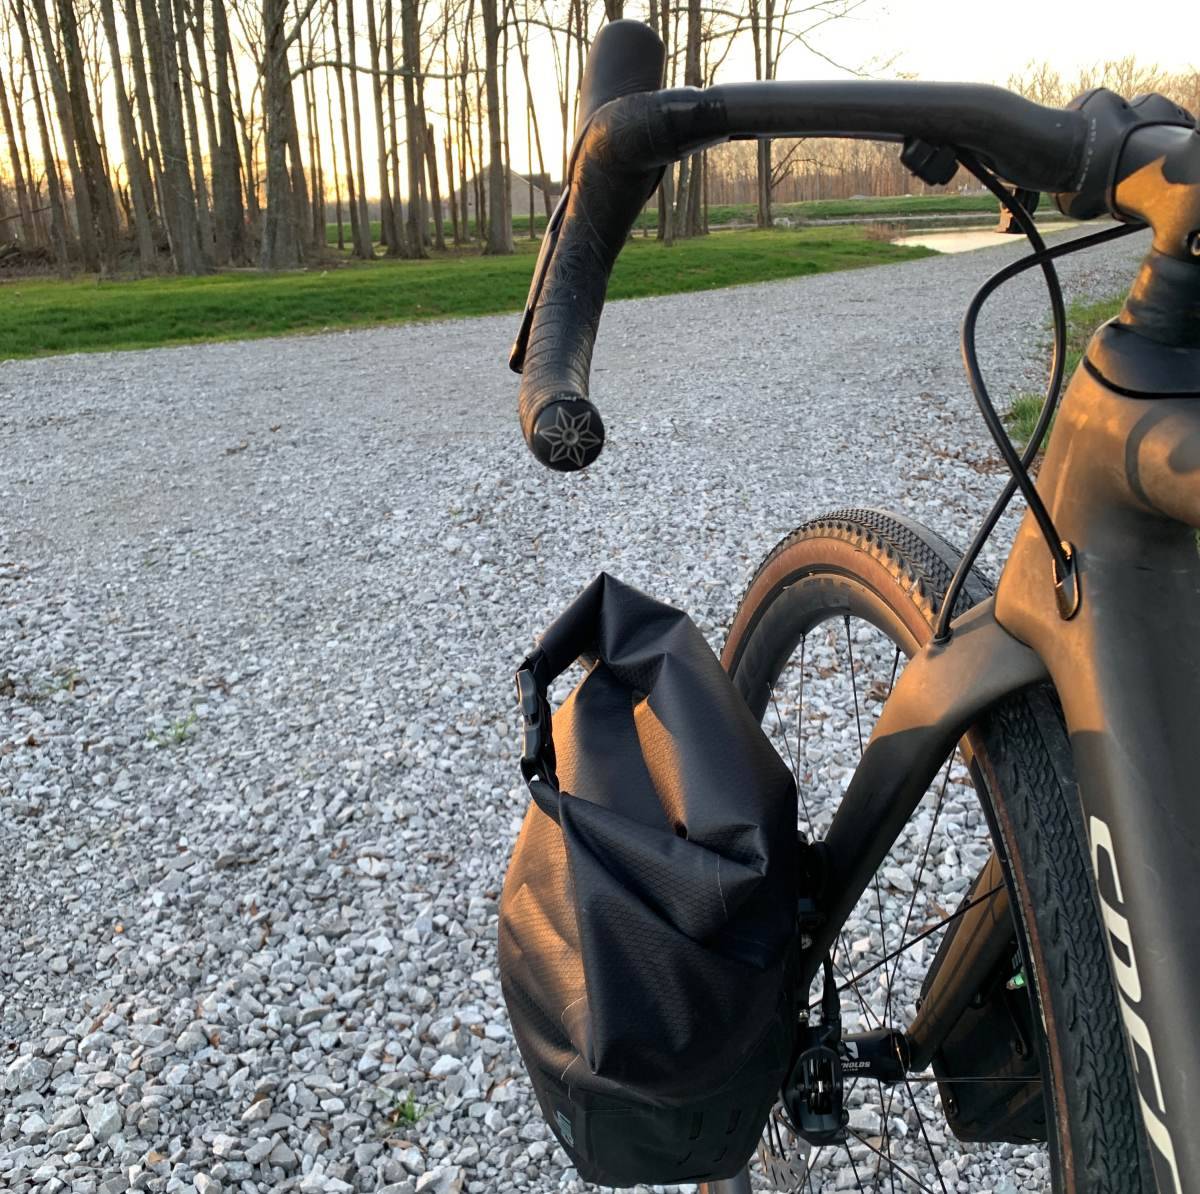
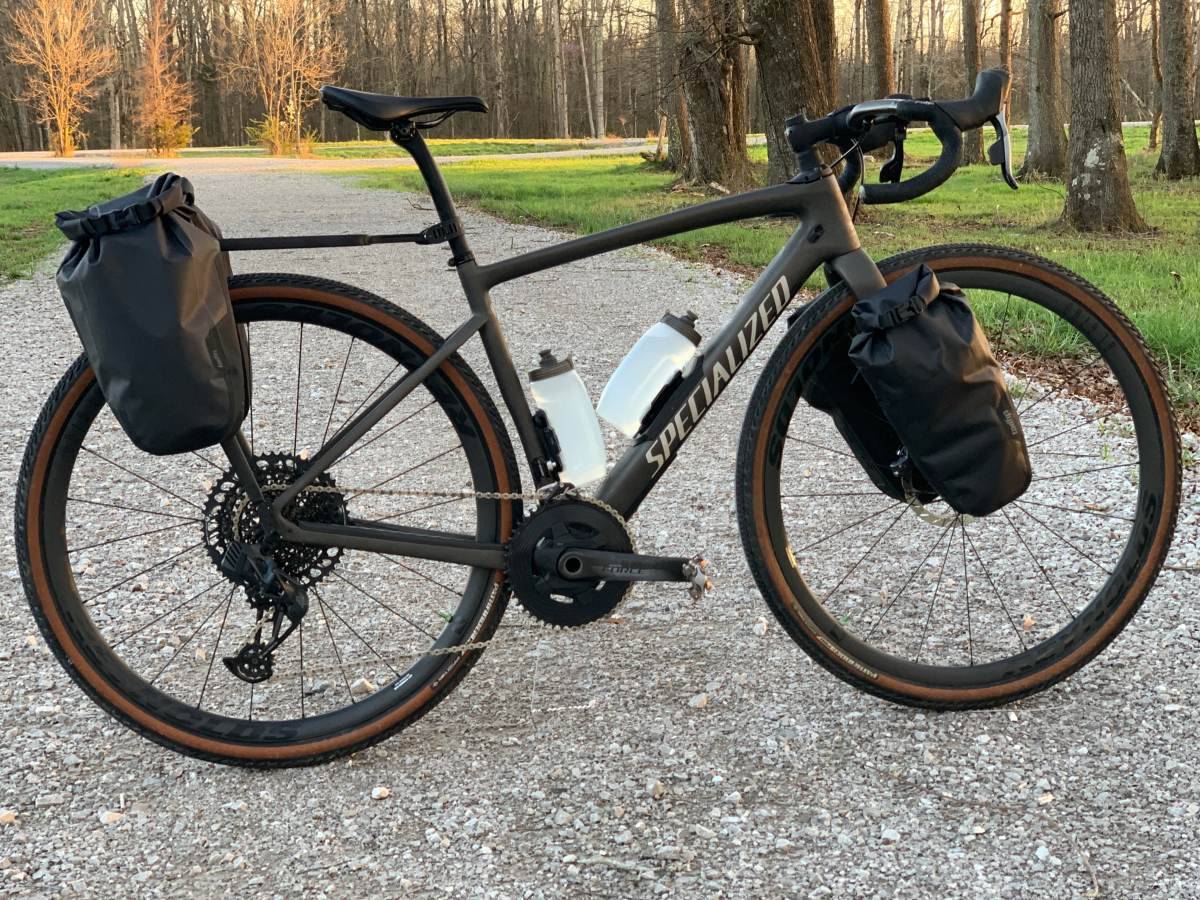
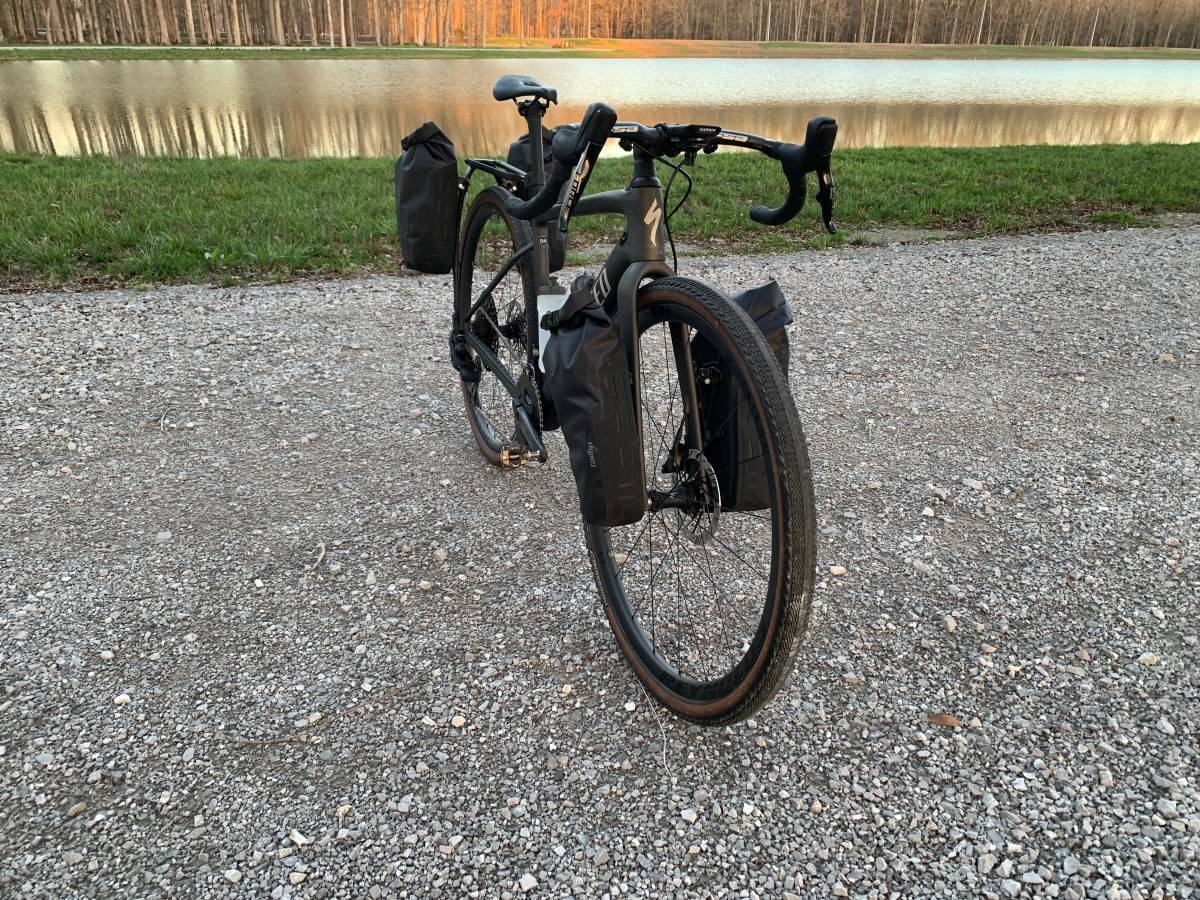
These new fork mounted packs/panniers are called Fork Packs and Tailfin has two sizes available: 5L and 10 L. They are sold individually, so you can purchase one of each size, two of the same size, or just one pack.

Unboxing
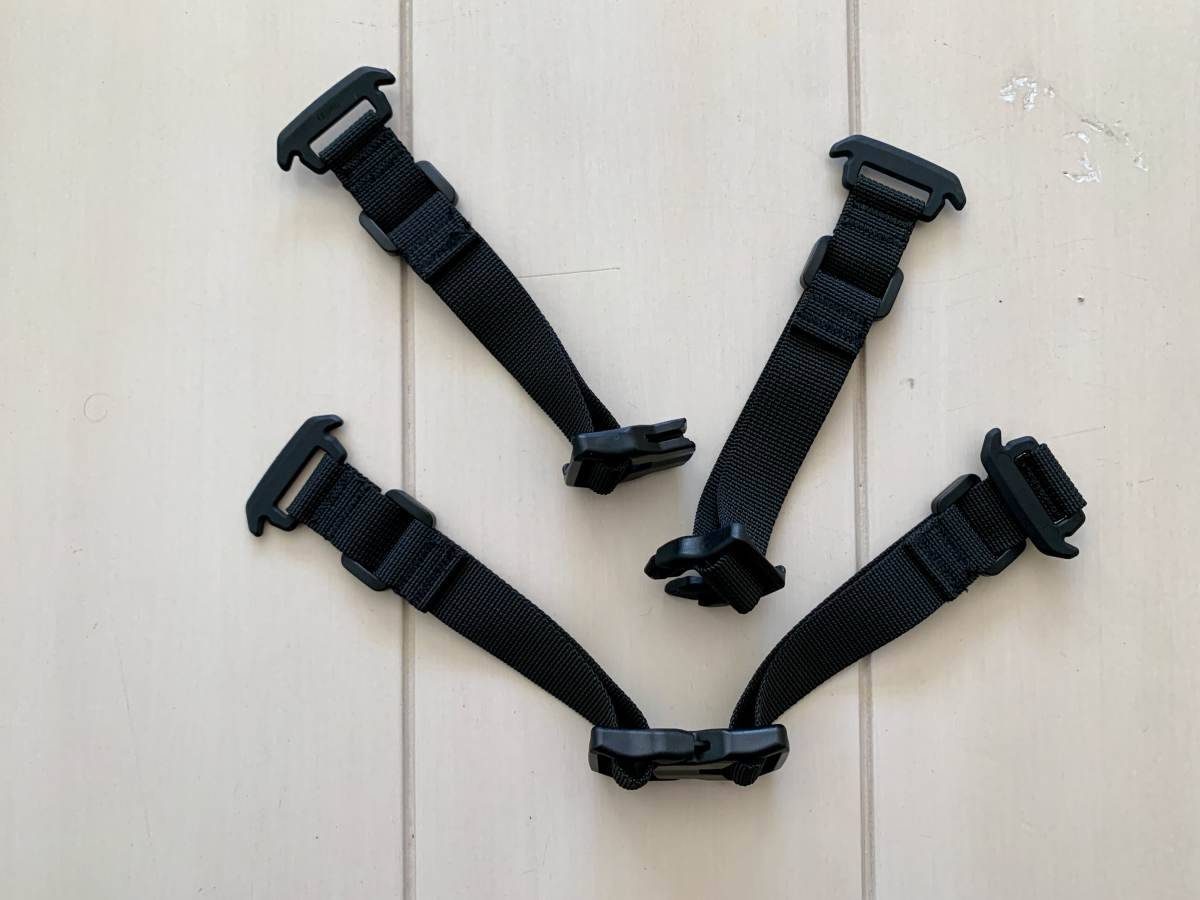
Each Fork Pack comes neatly packed in plastic bags to protect them during shipping. Though, these bags need little protection because they are quite durable. Pulling the Fork Pack out of the bag and opening the Fork Pack you will find all the necessary hardware to mount the pack to the fork. The set also comes with compression straps to allow for different closure options.
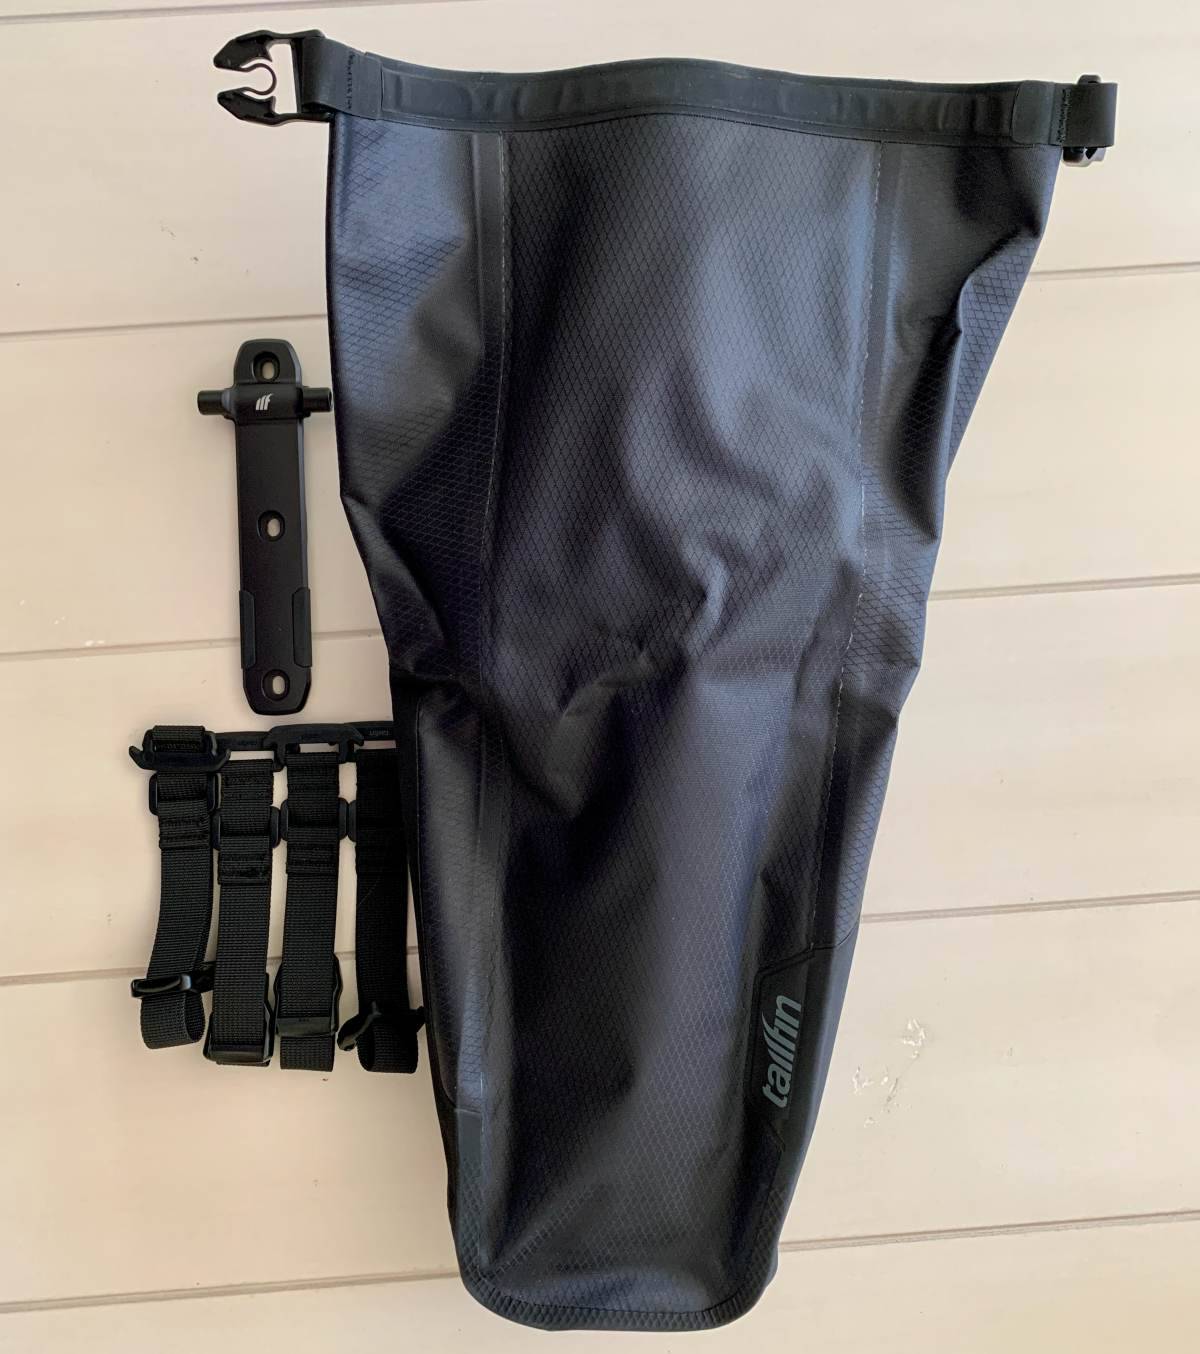
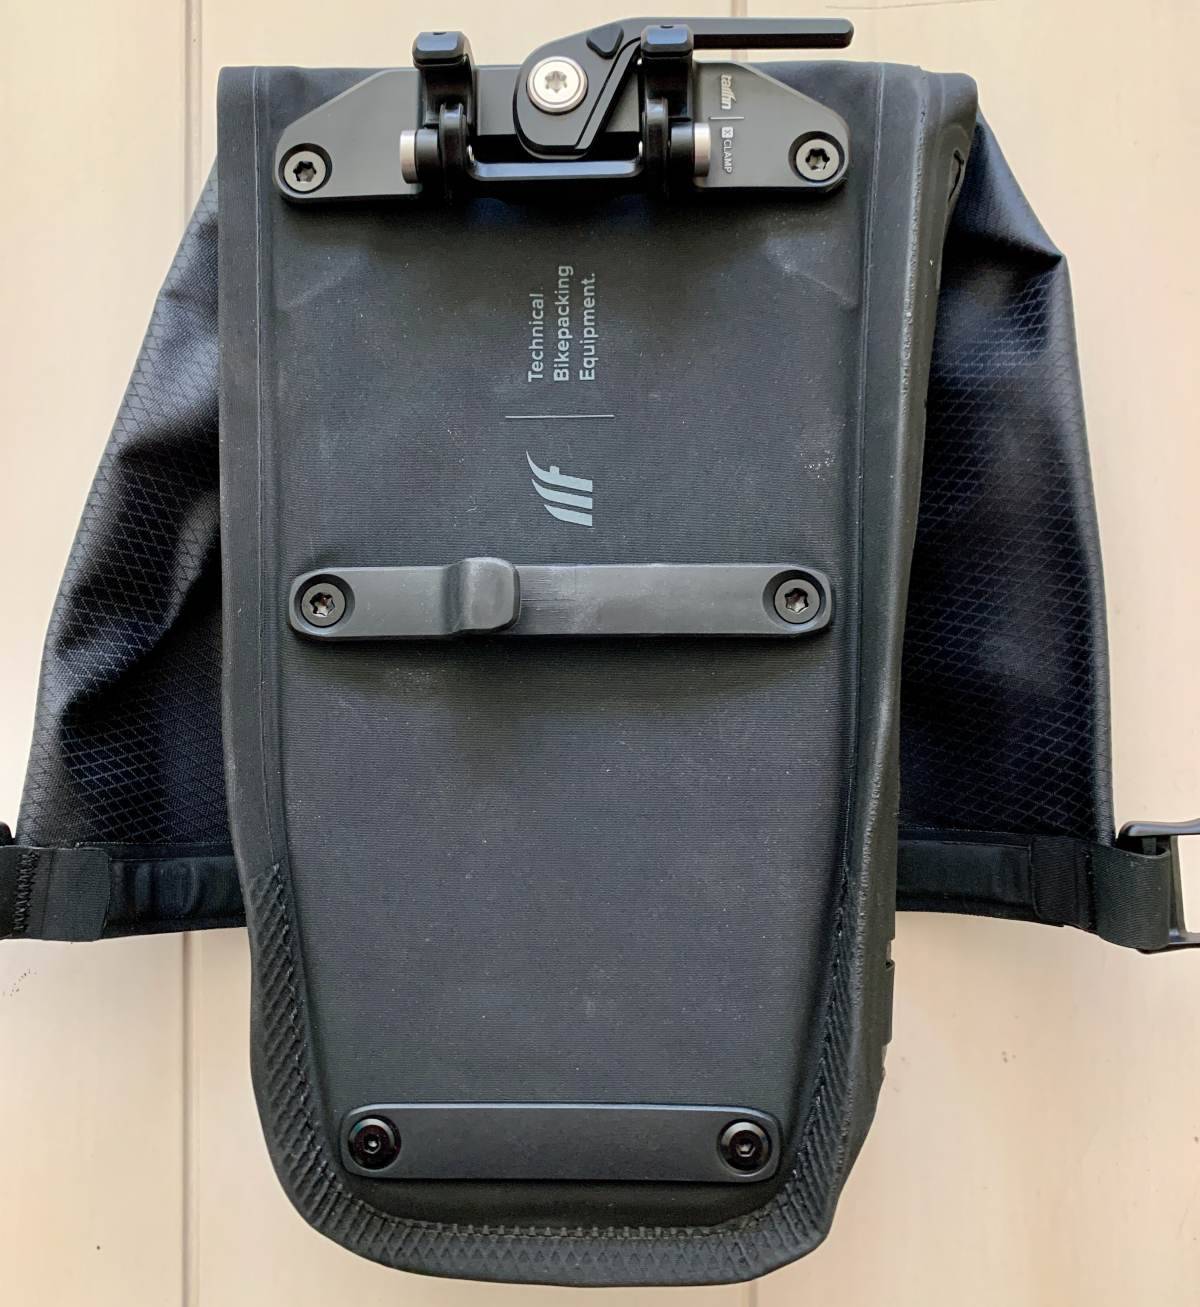
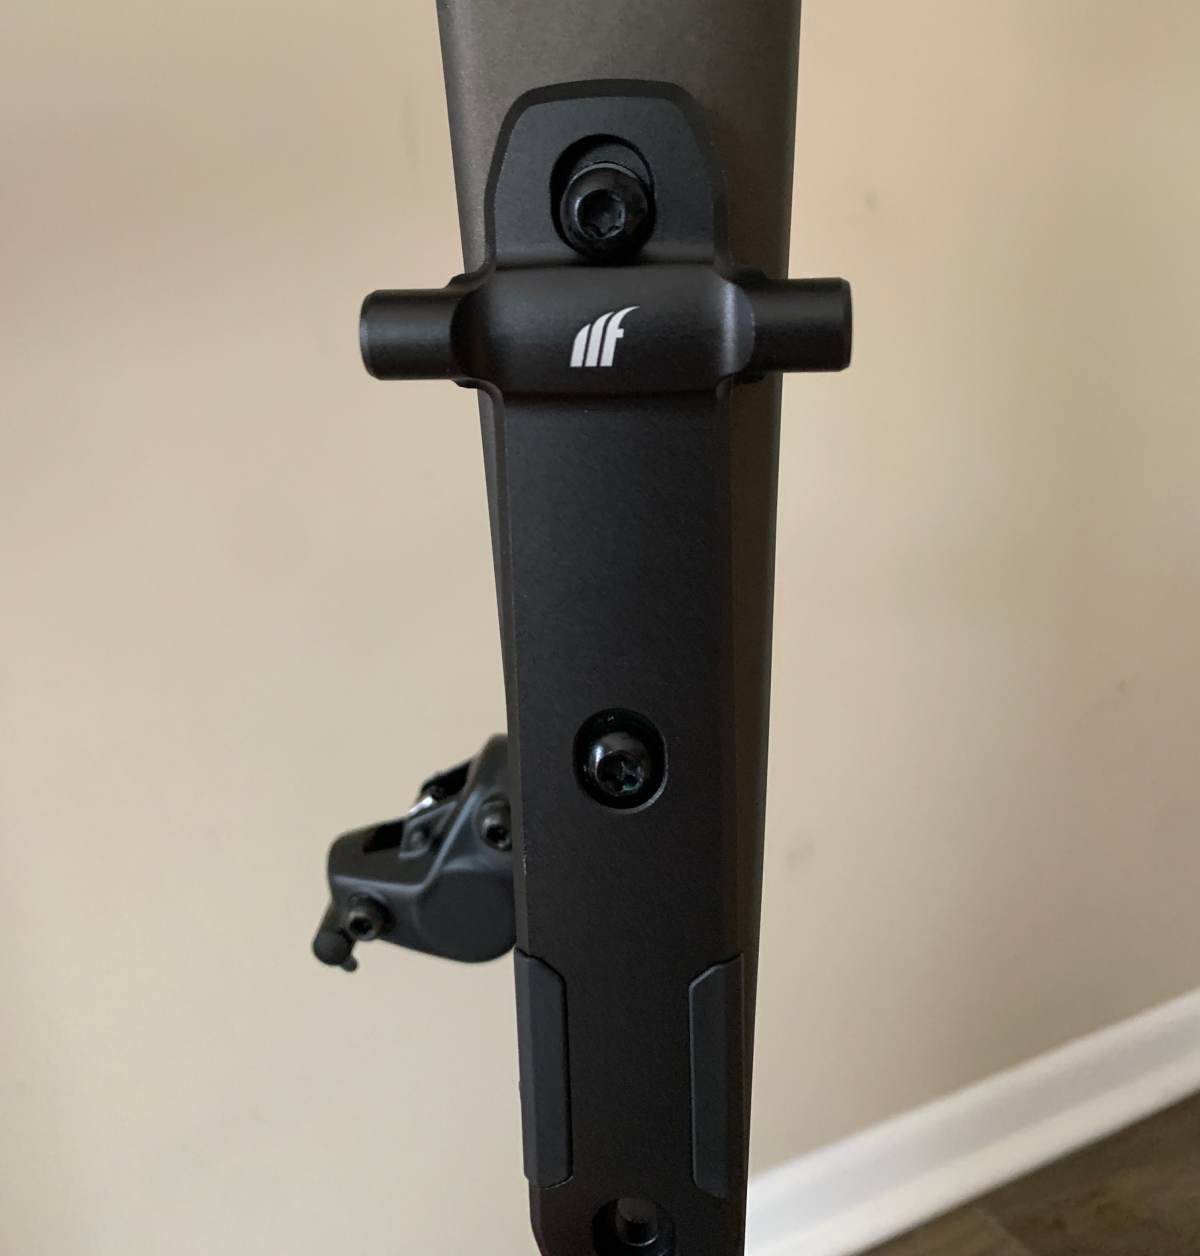
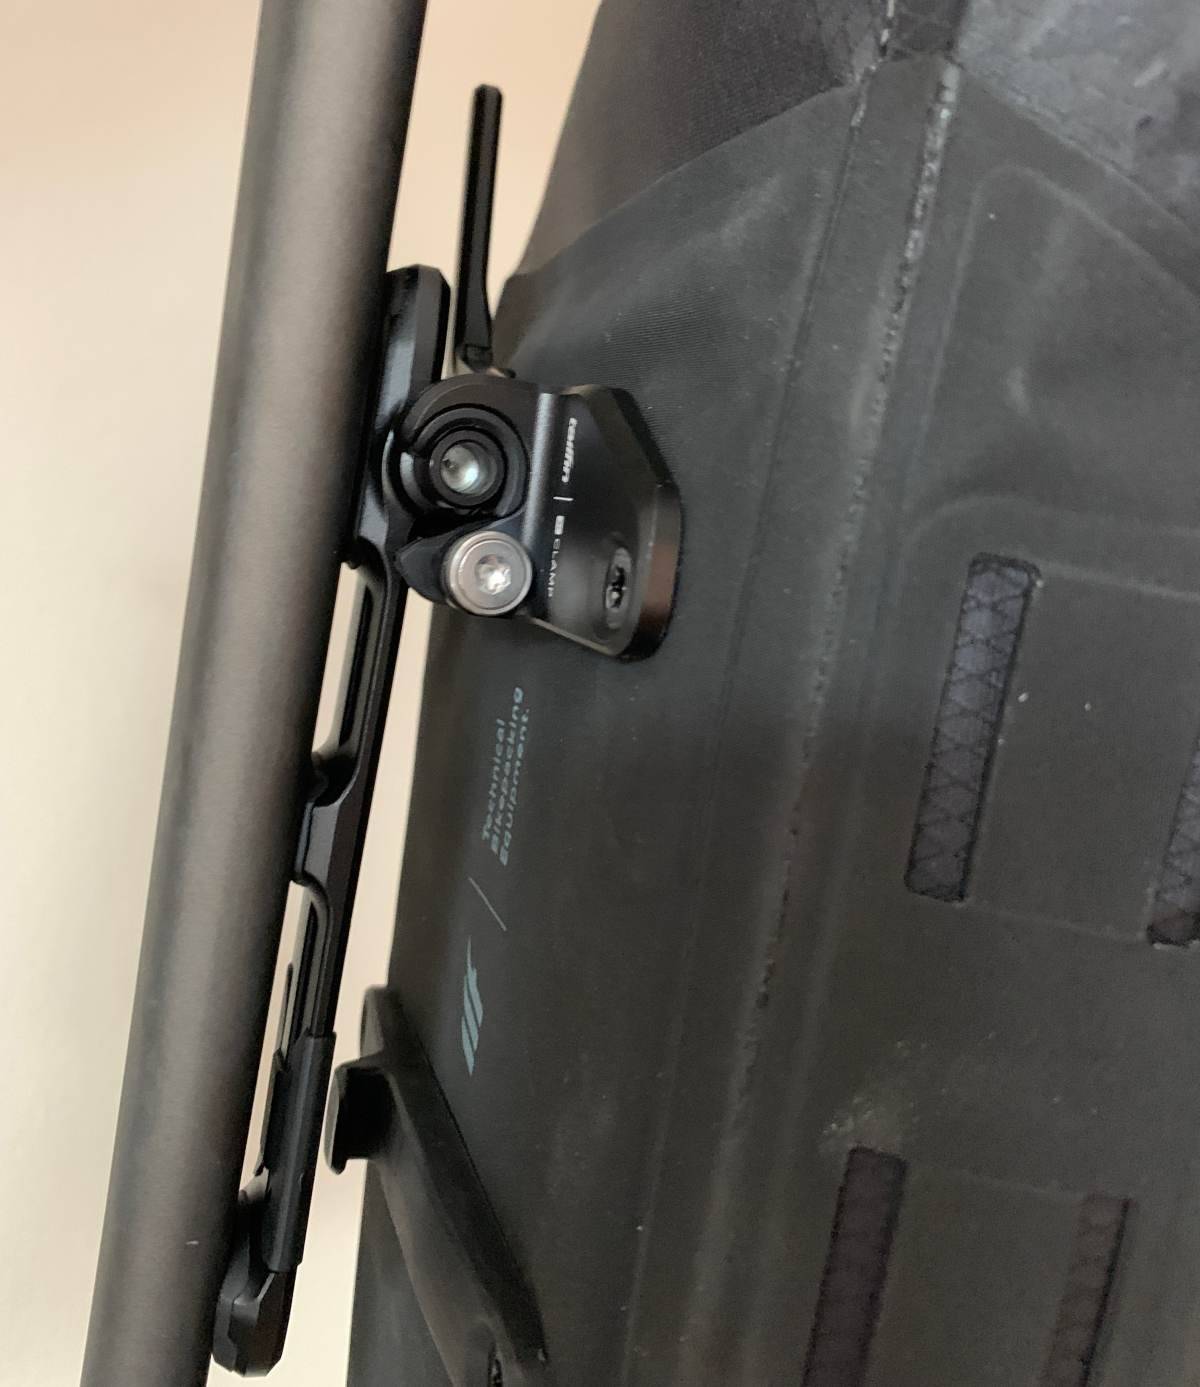
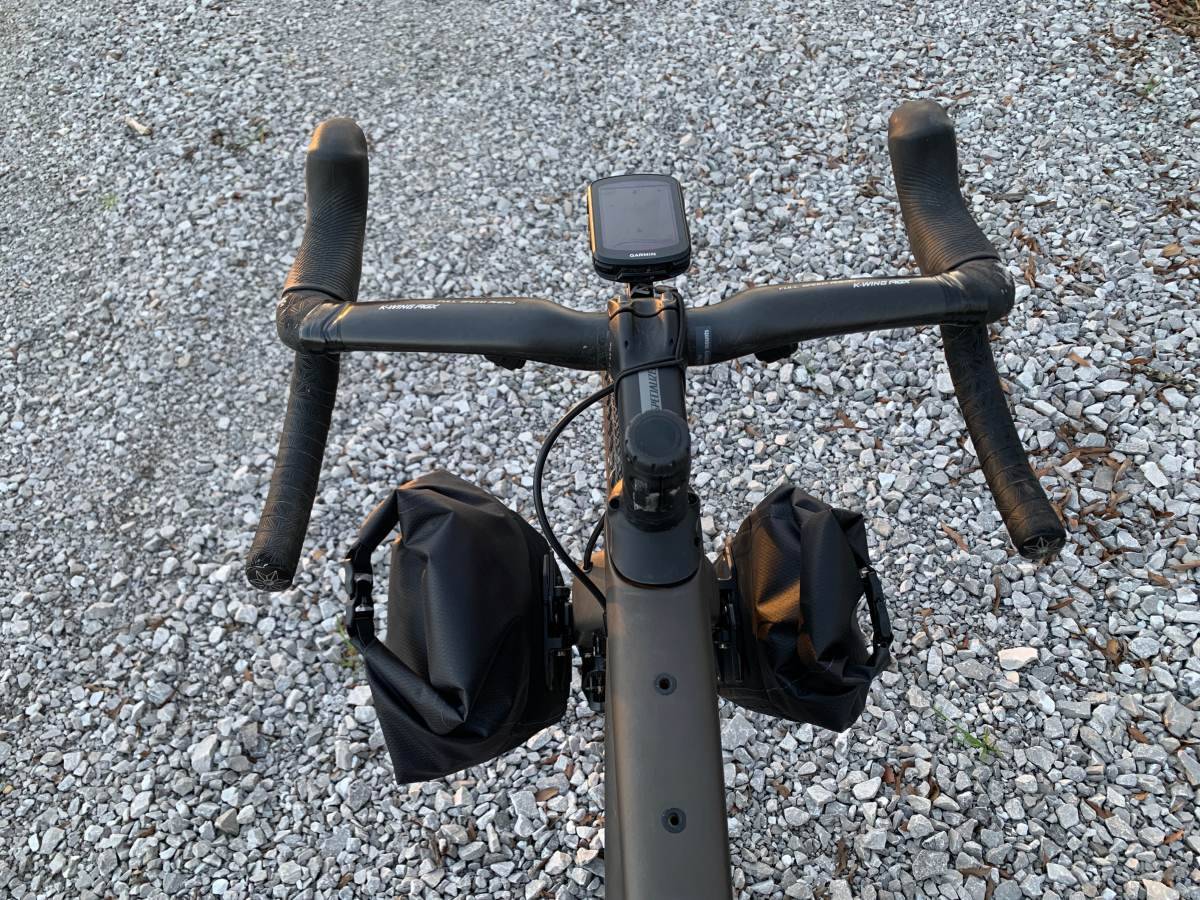
The Fork Mount
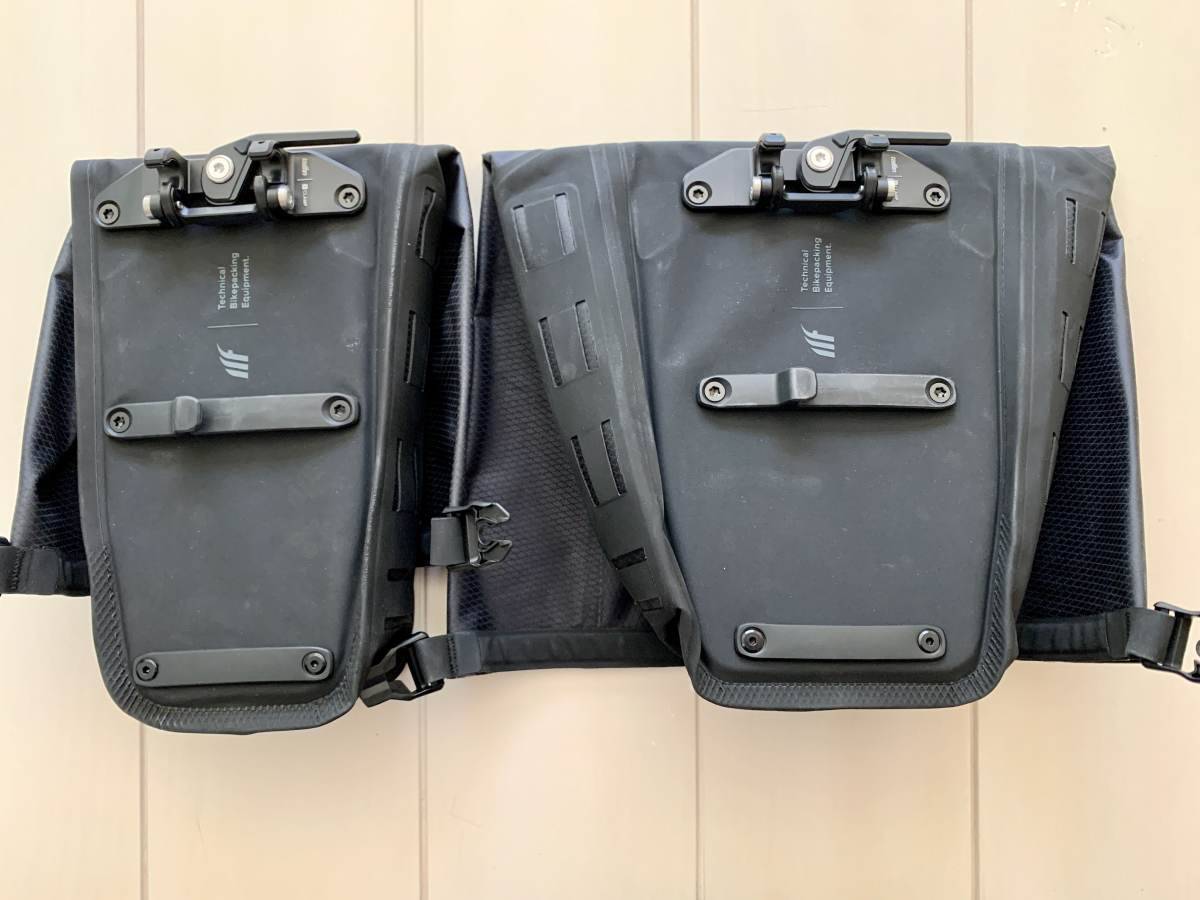
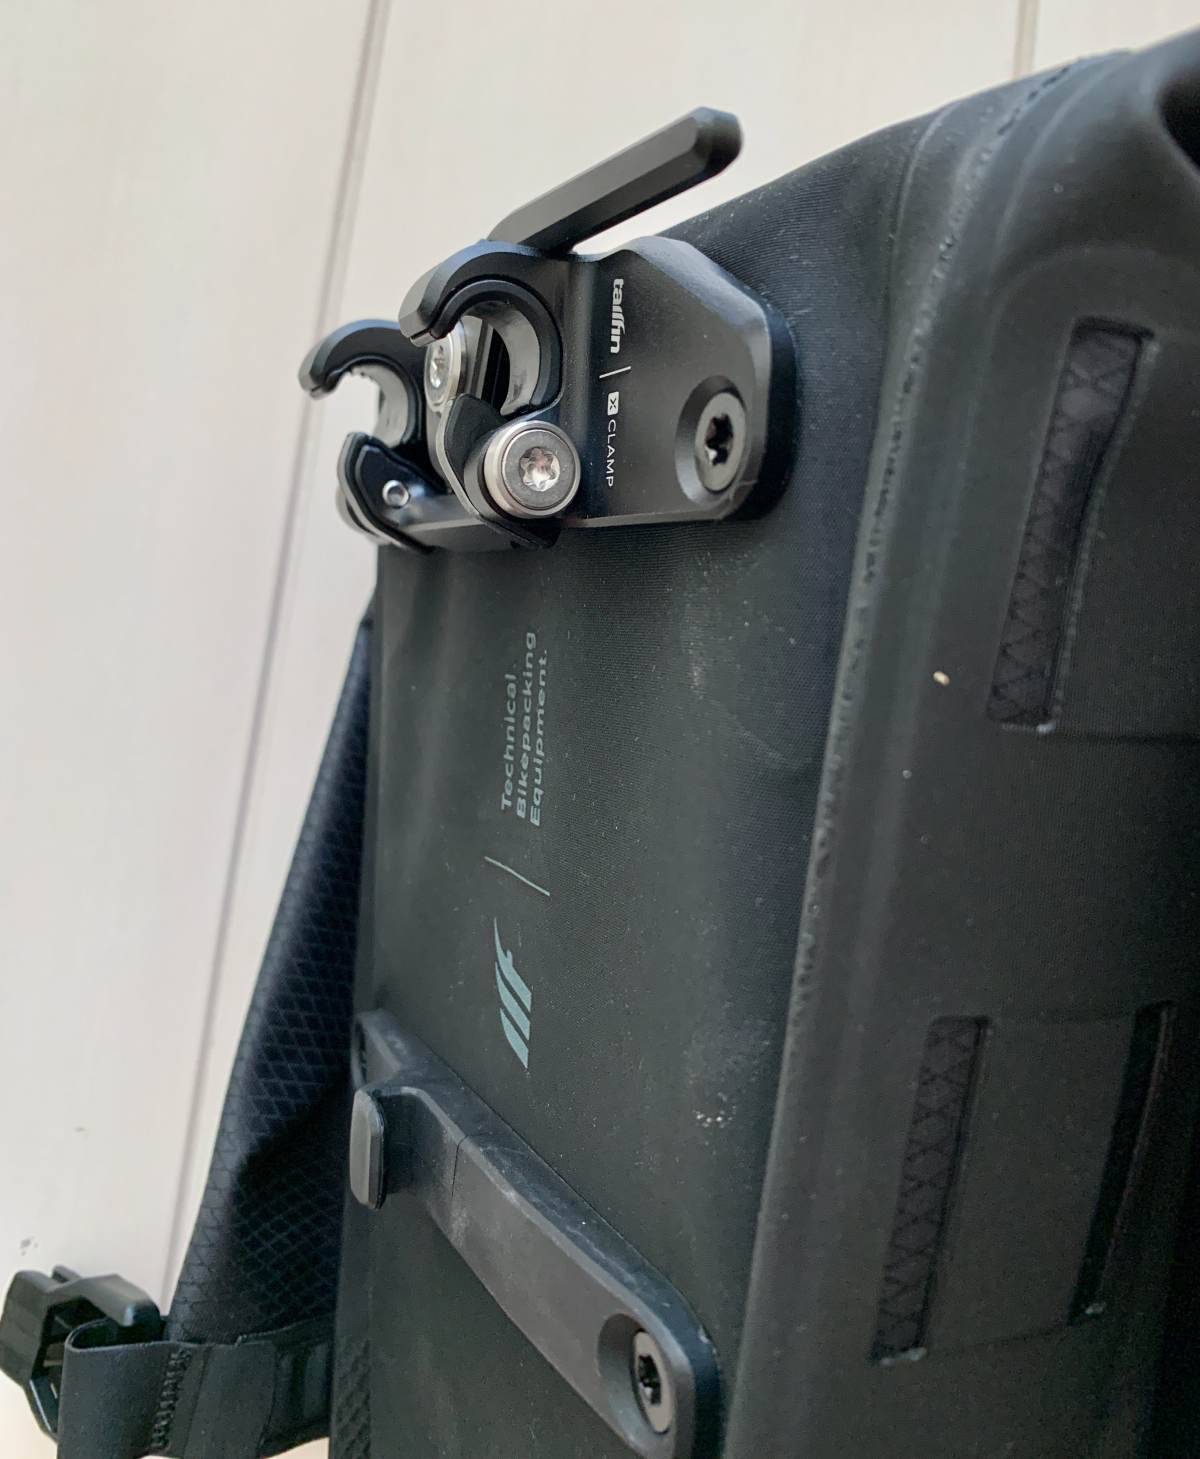
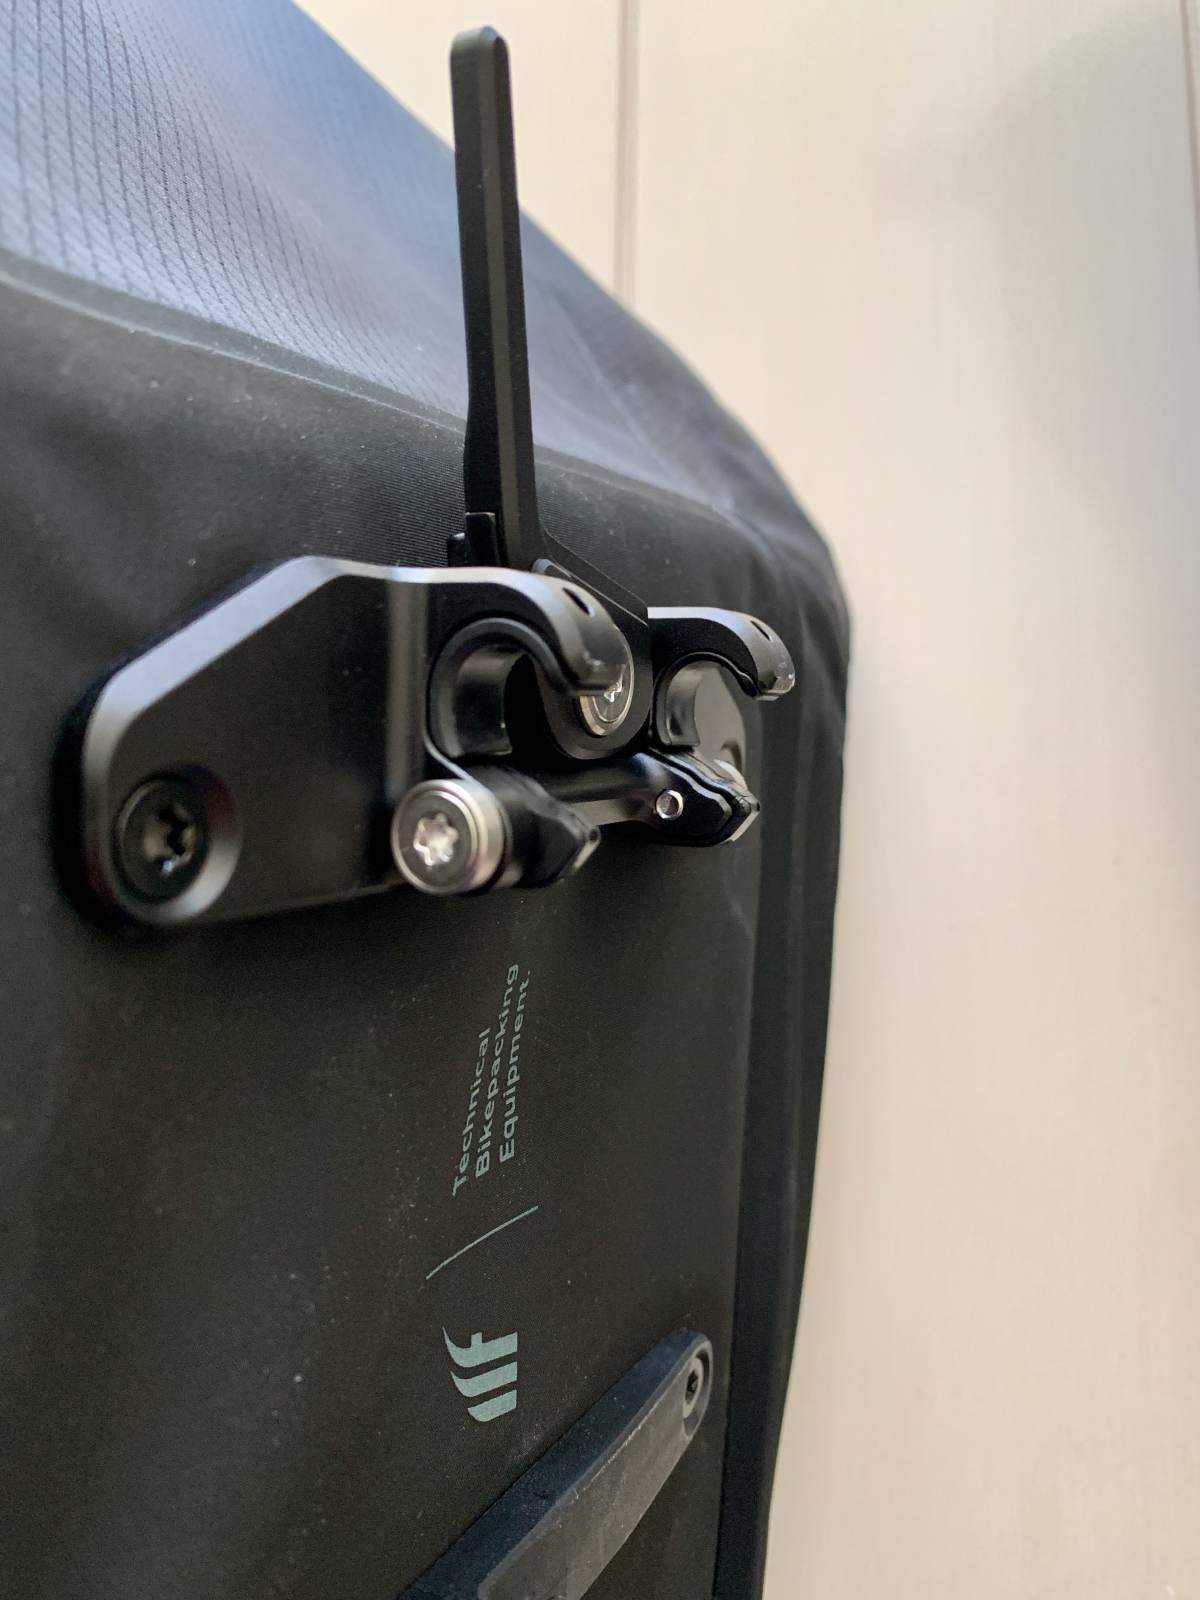
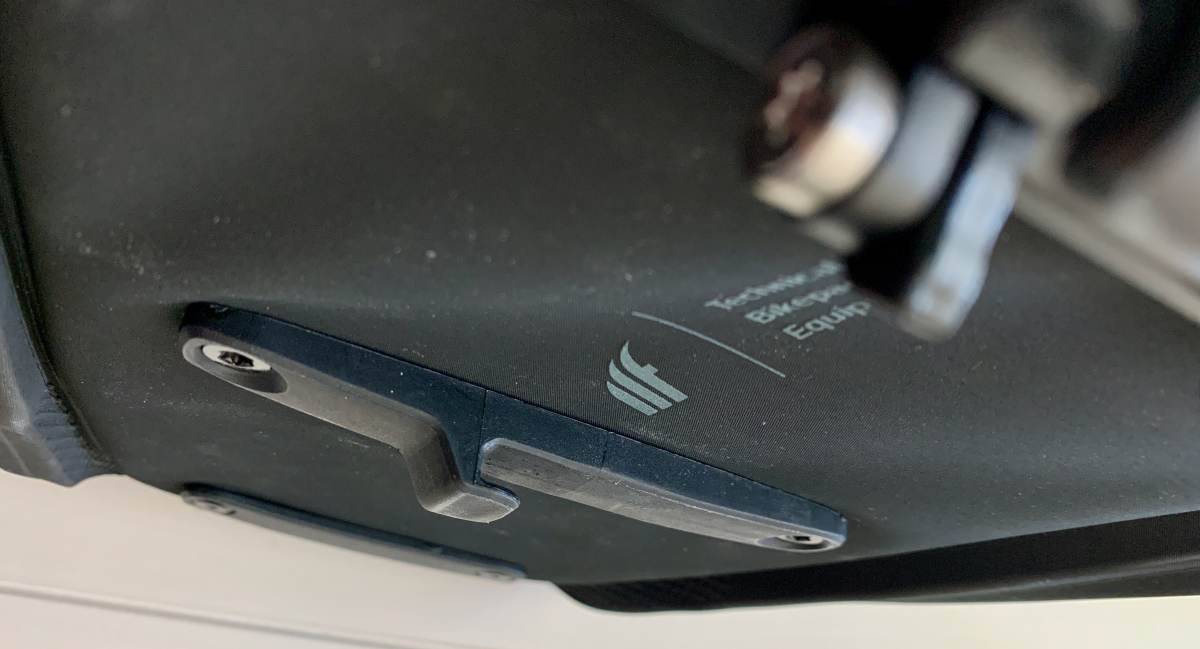
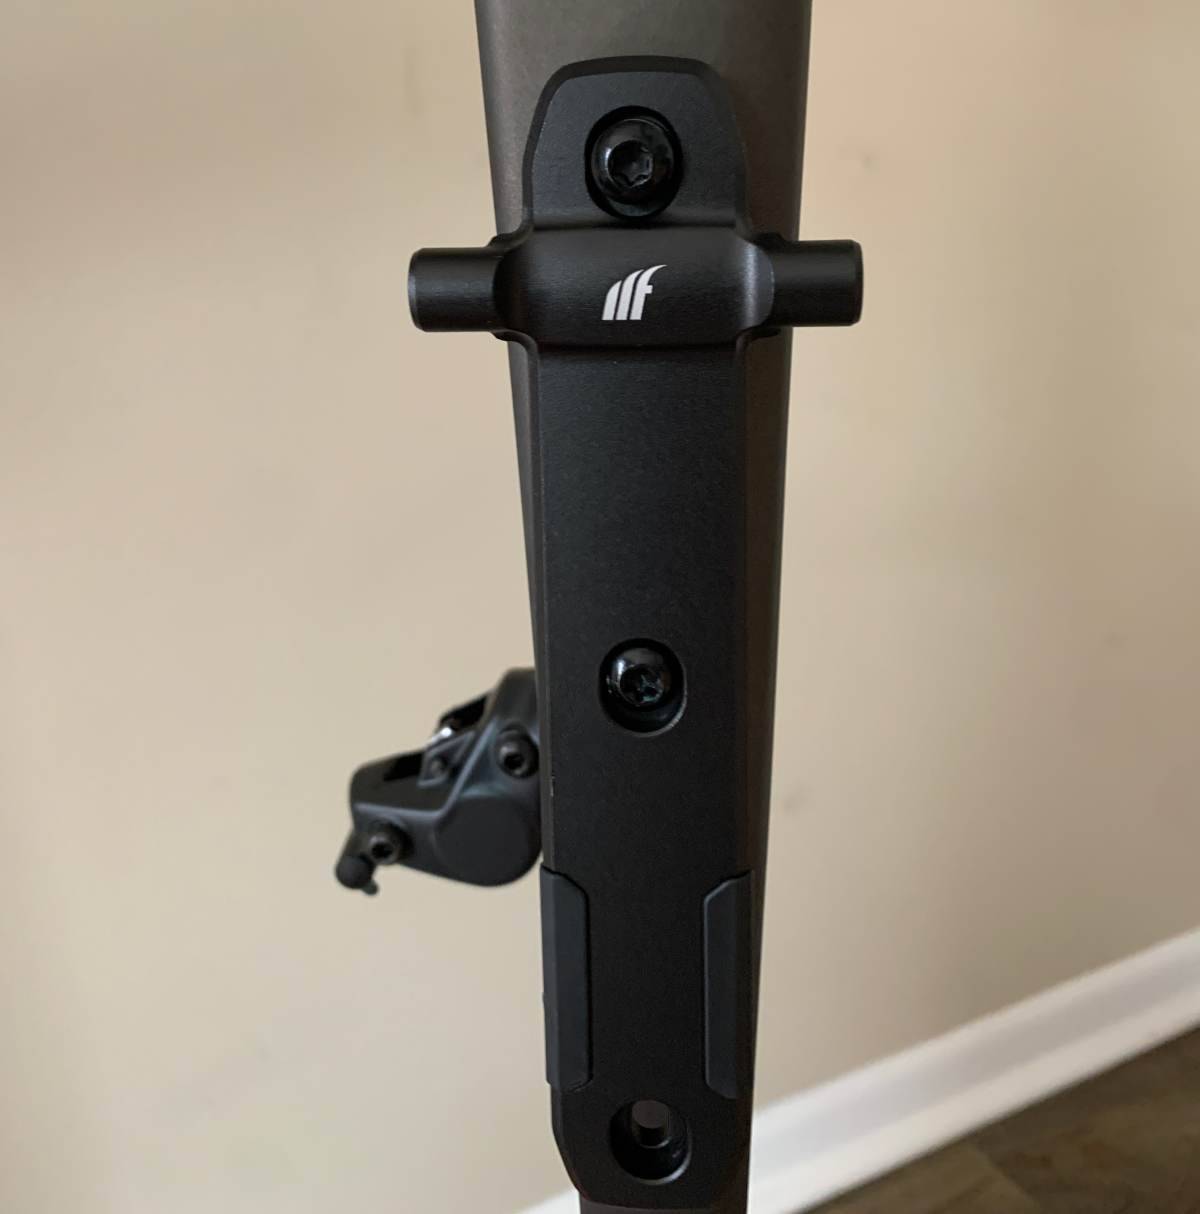
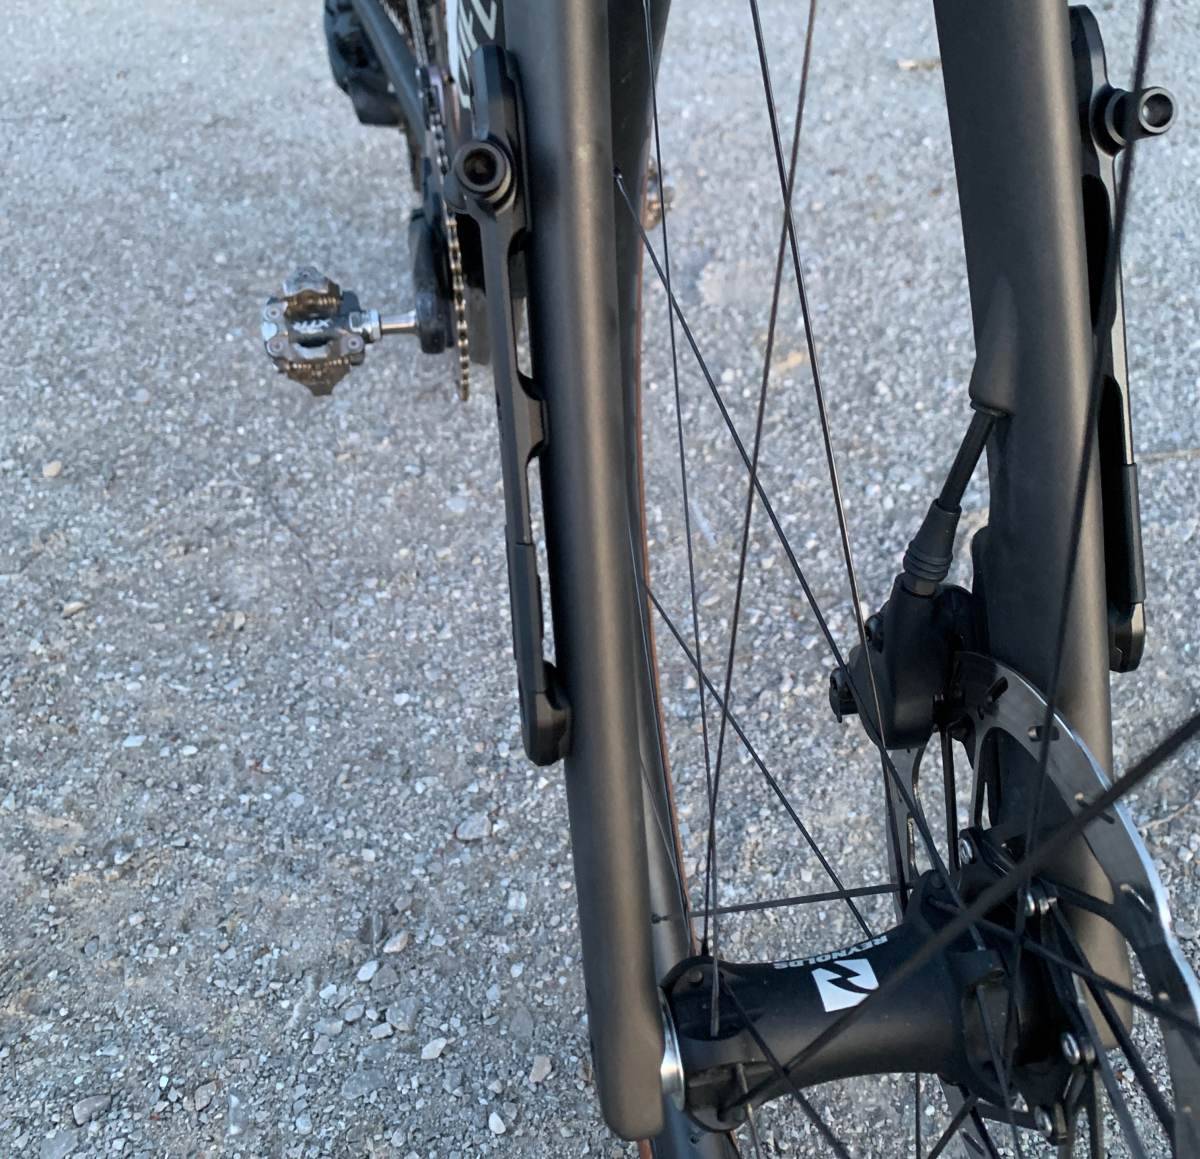
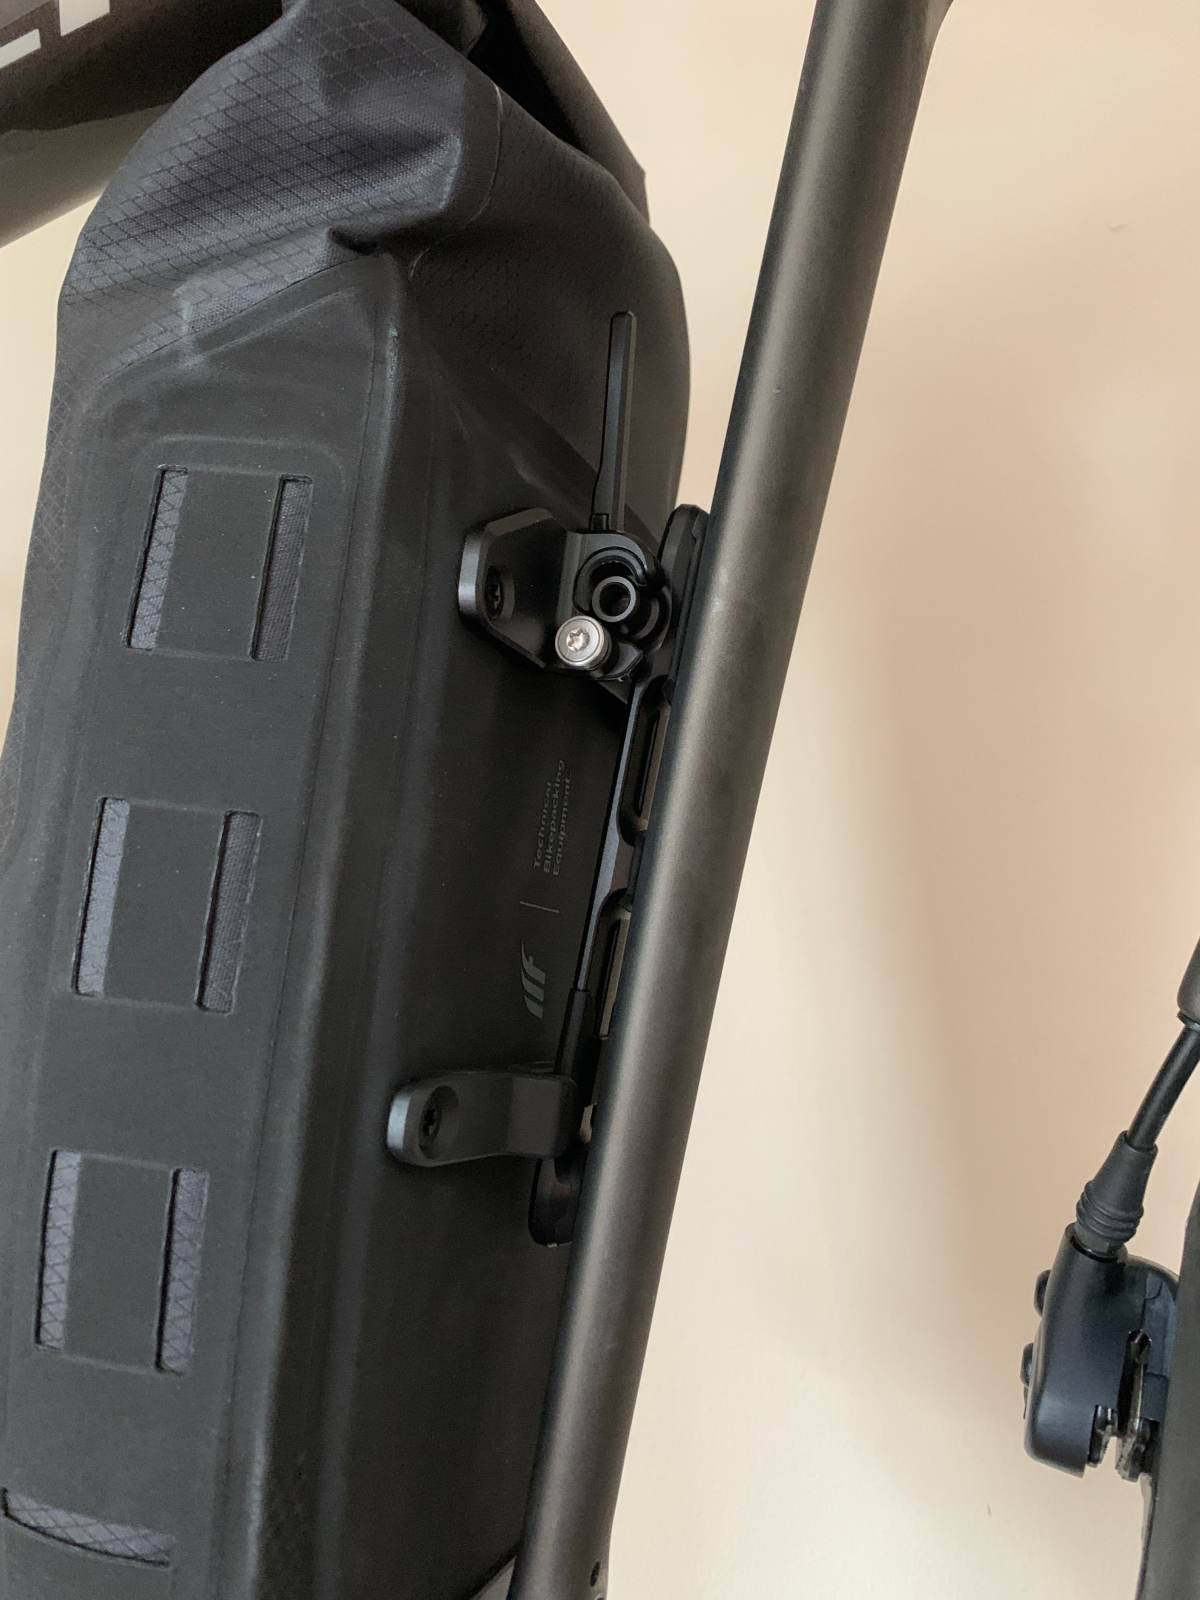
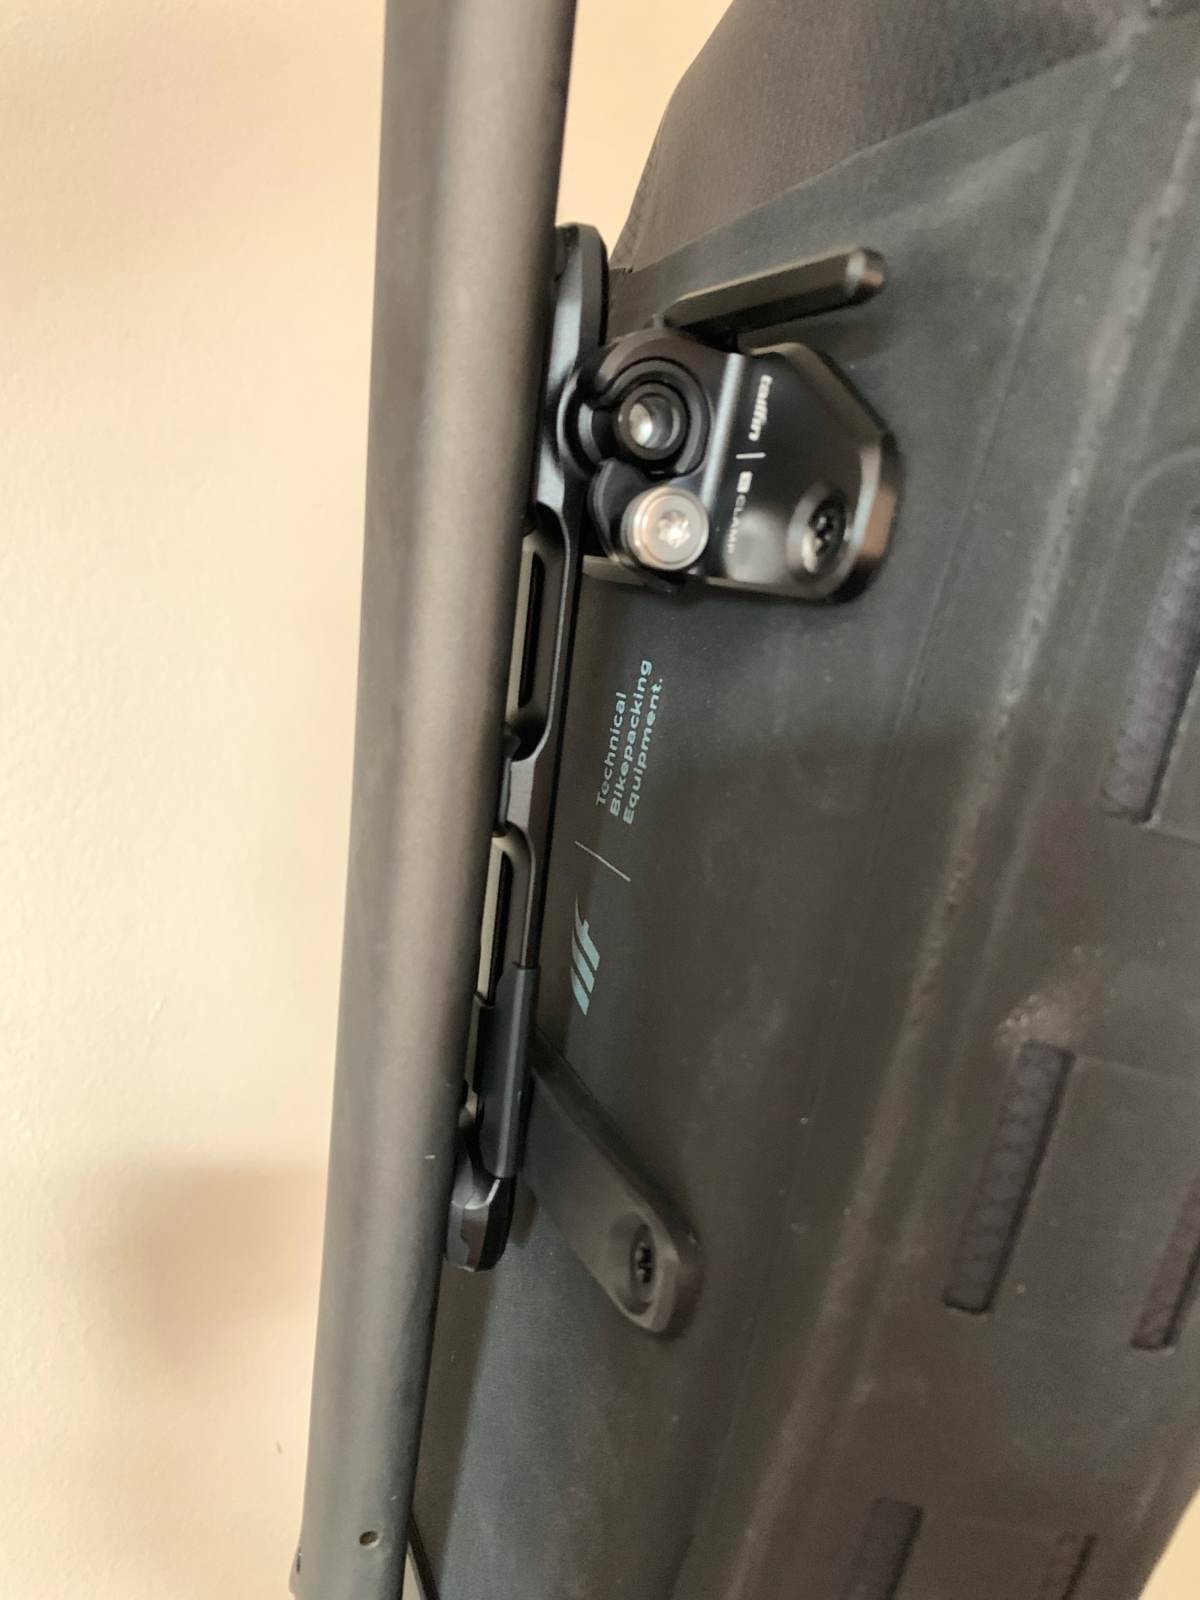
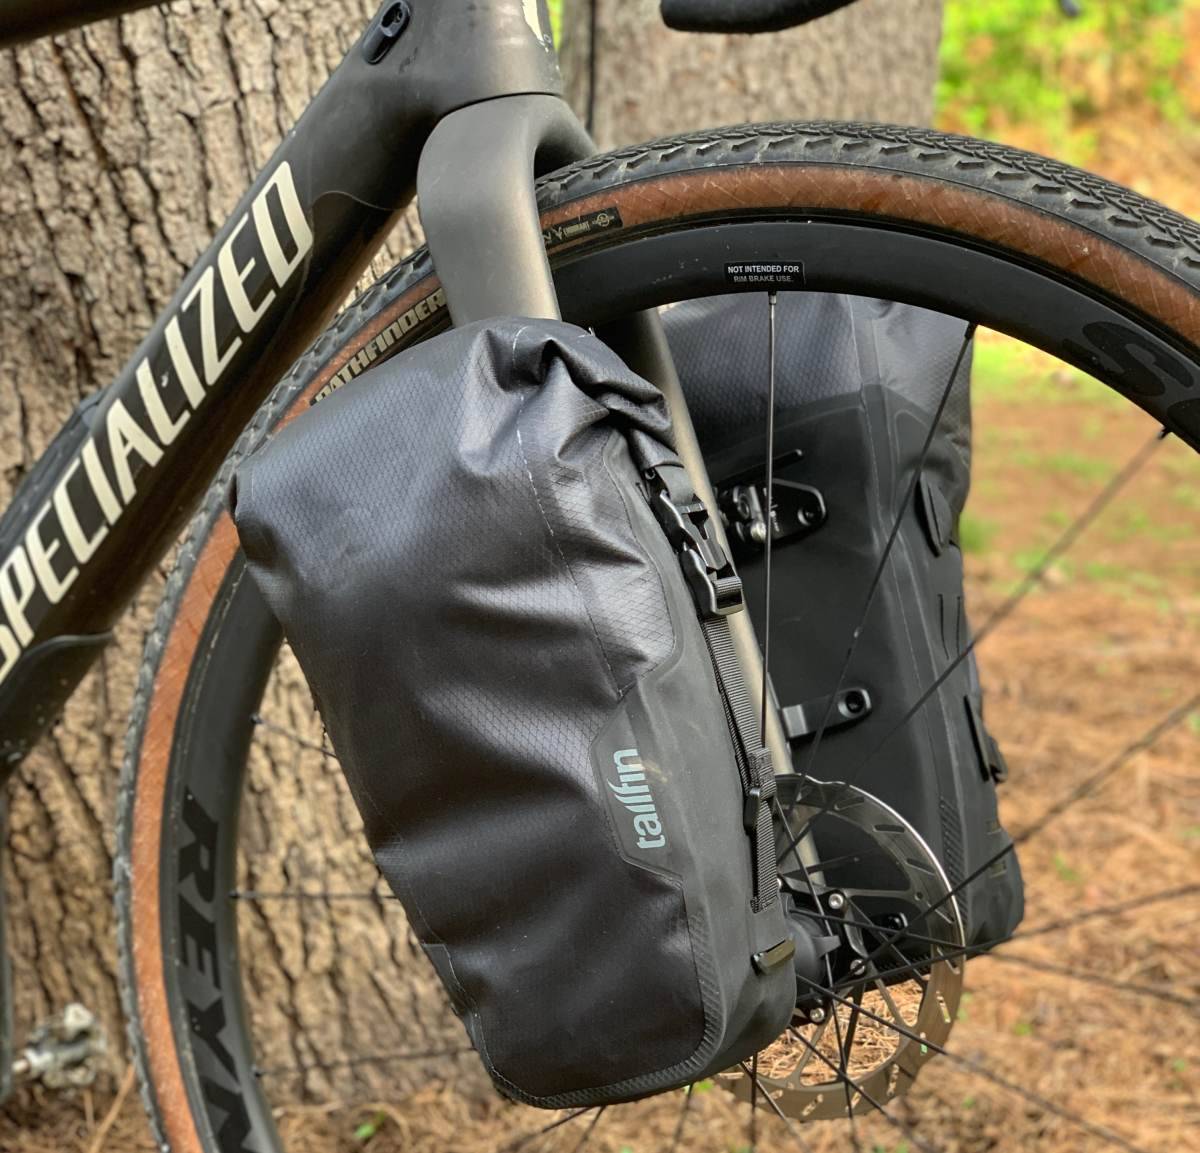
The novel Fork Mount is made from anodized aluminum and has three holes for mounting. Provided with the mount are three T-25 screws to secure the mount in place. At the top of the mount there are two nubs that stick out, this is where the newly designed X-Clamp locks down to the mount.
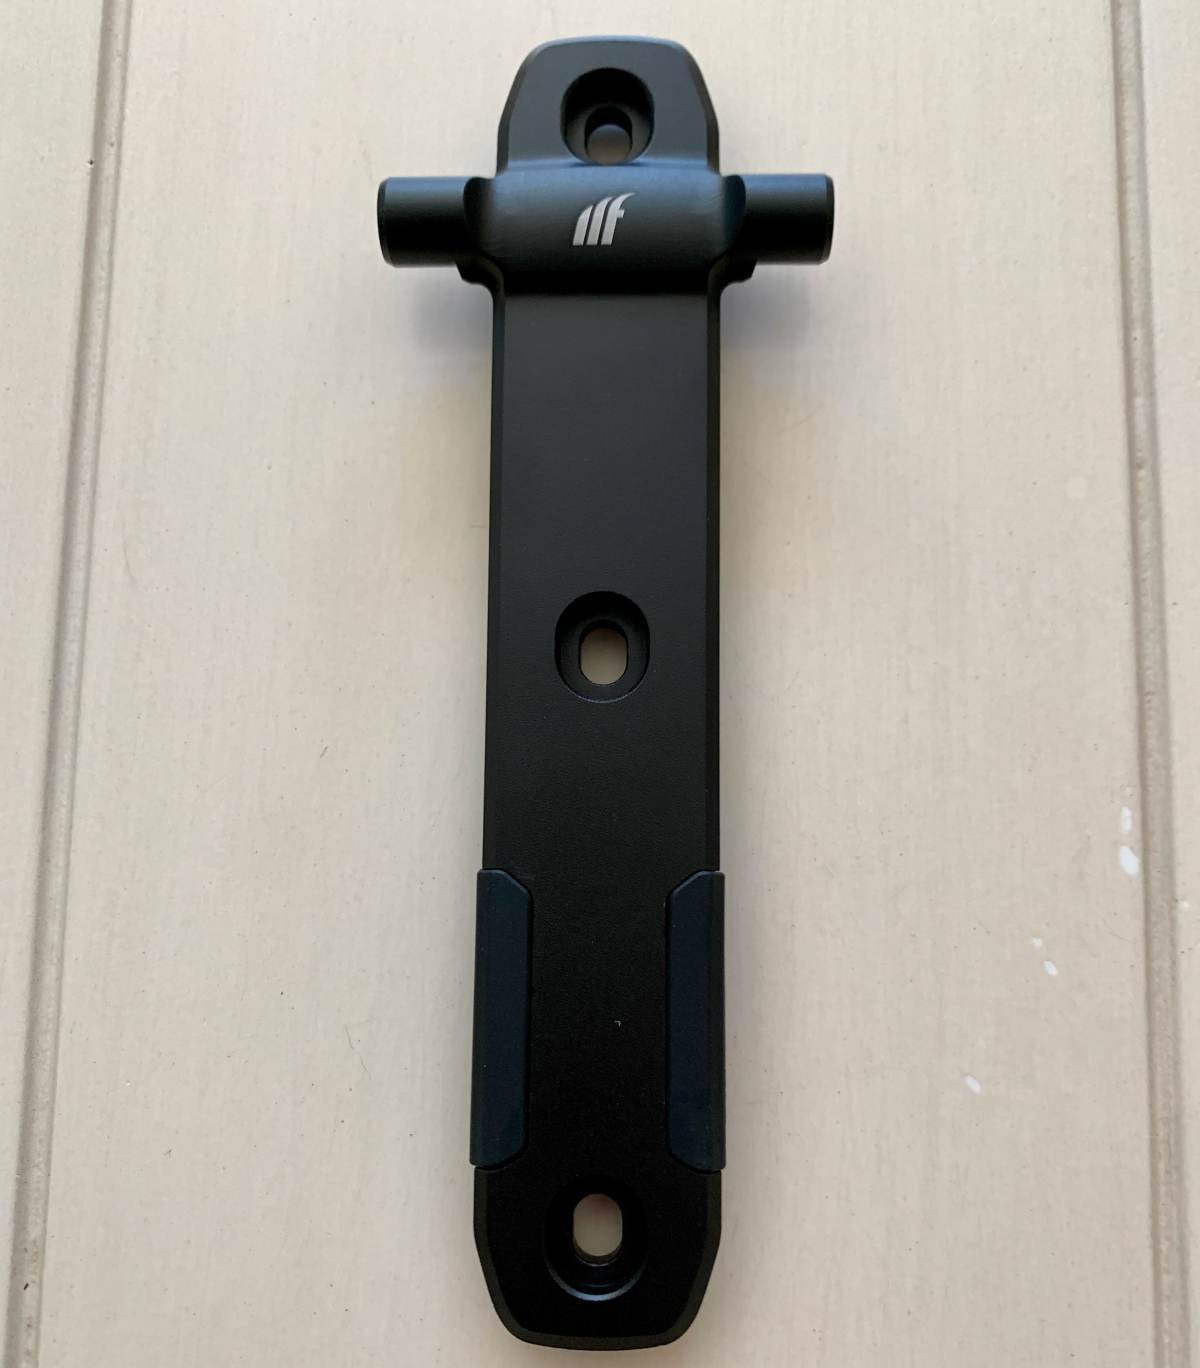
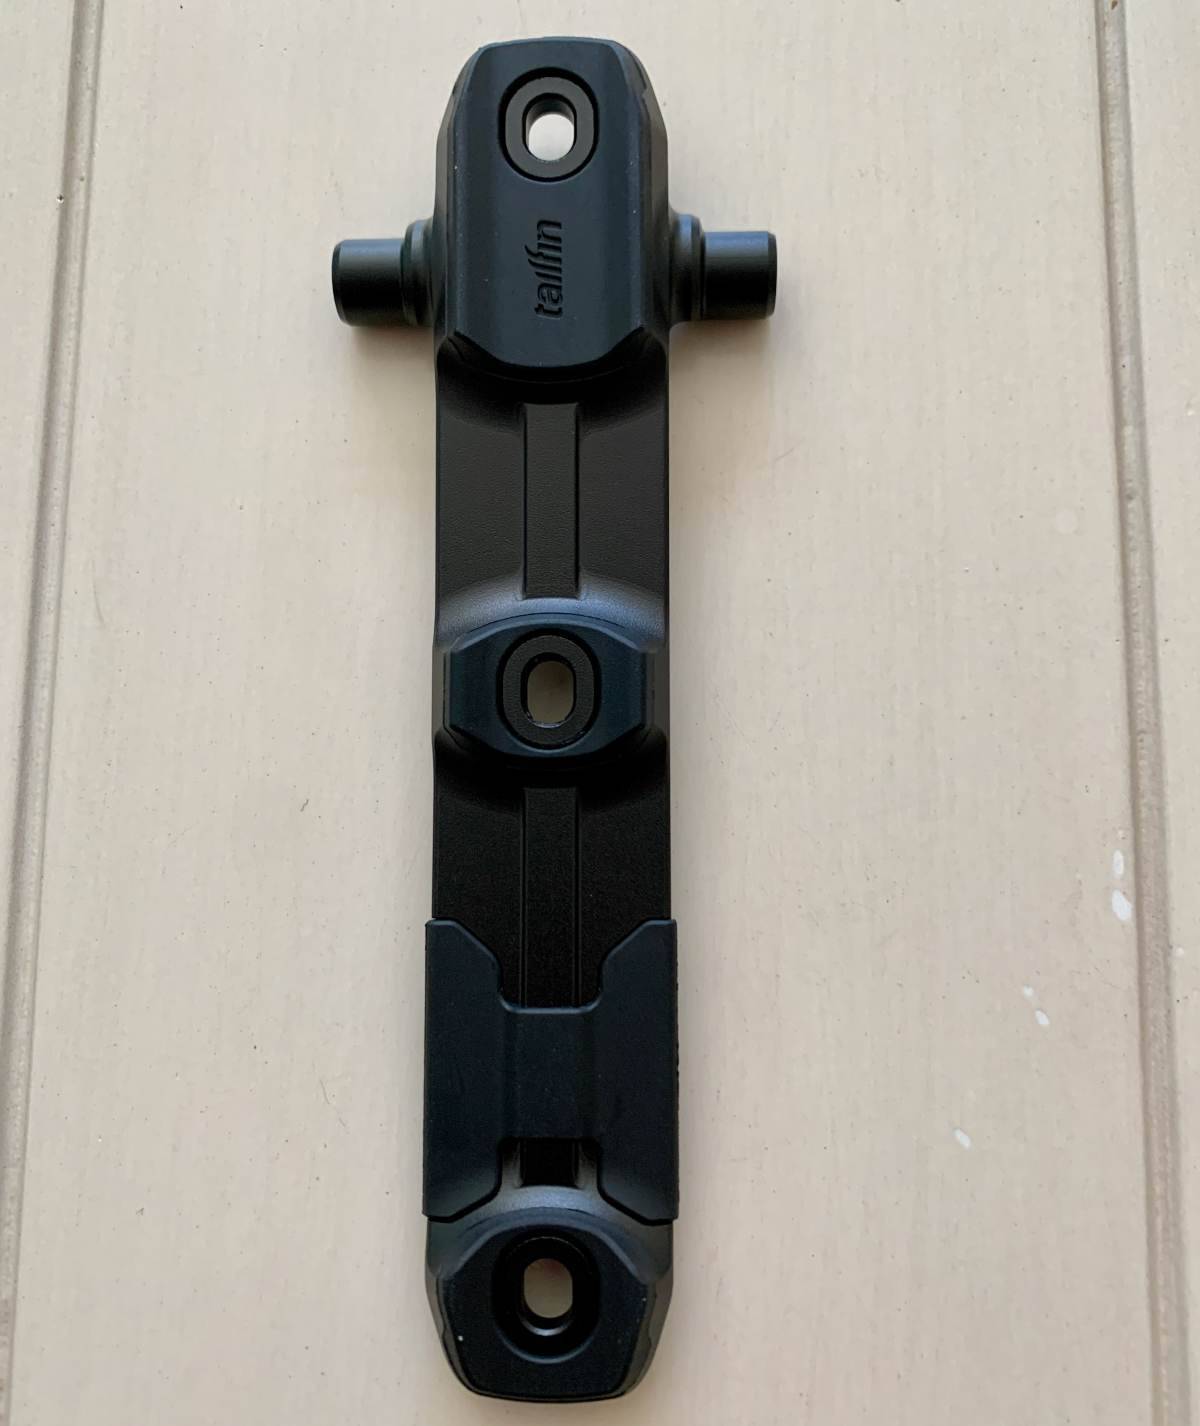
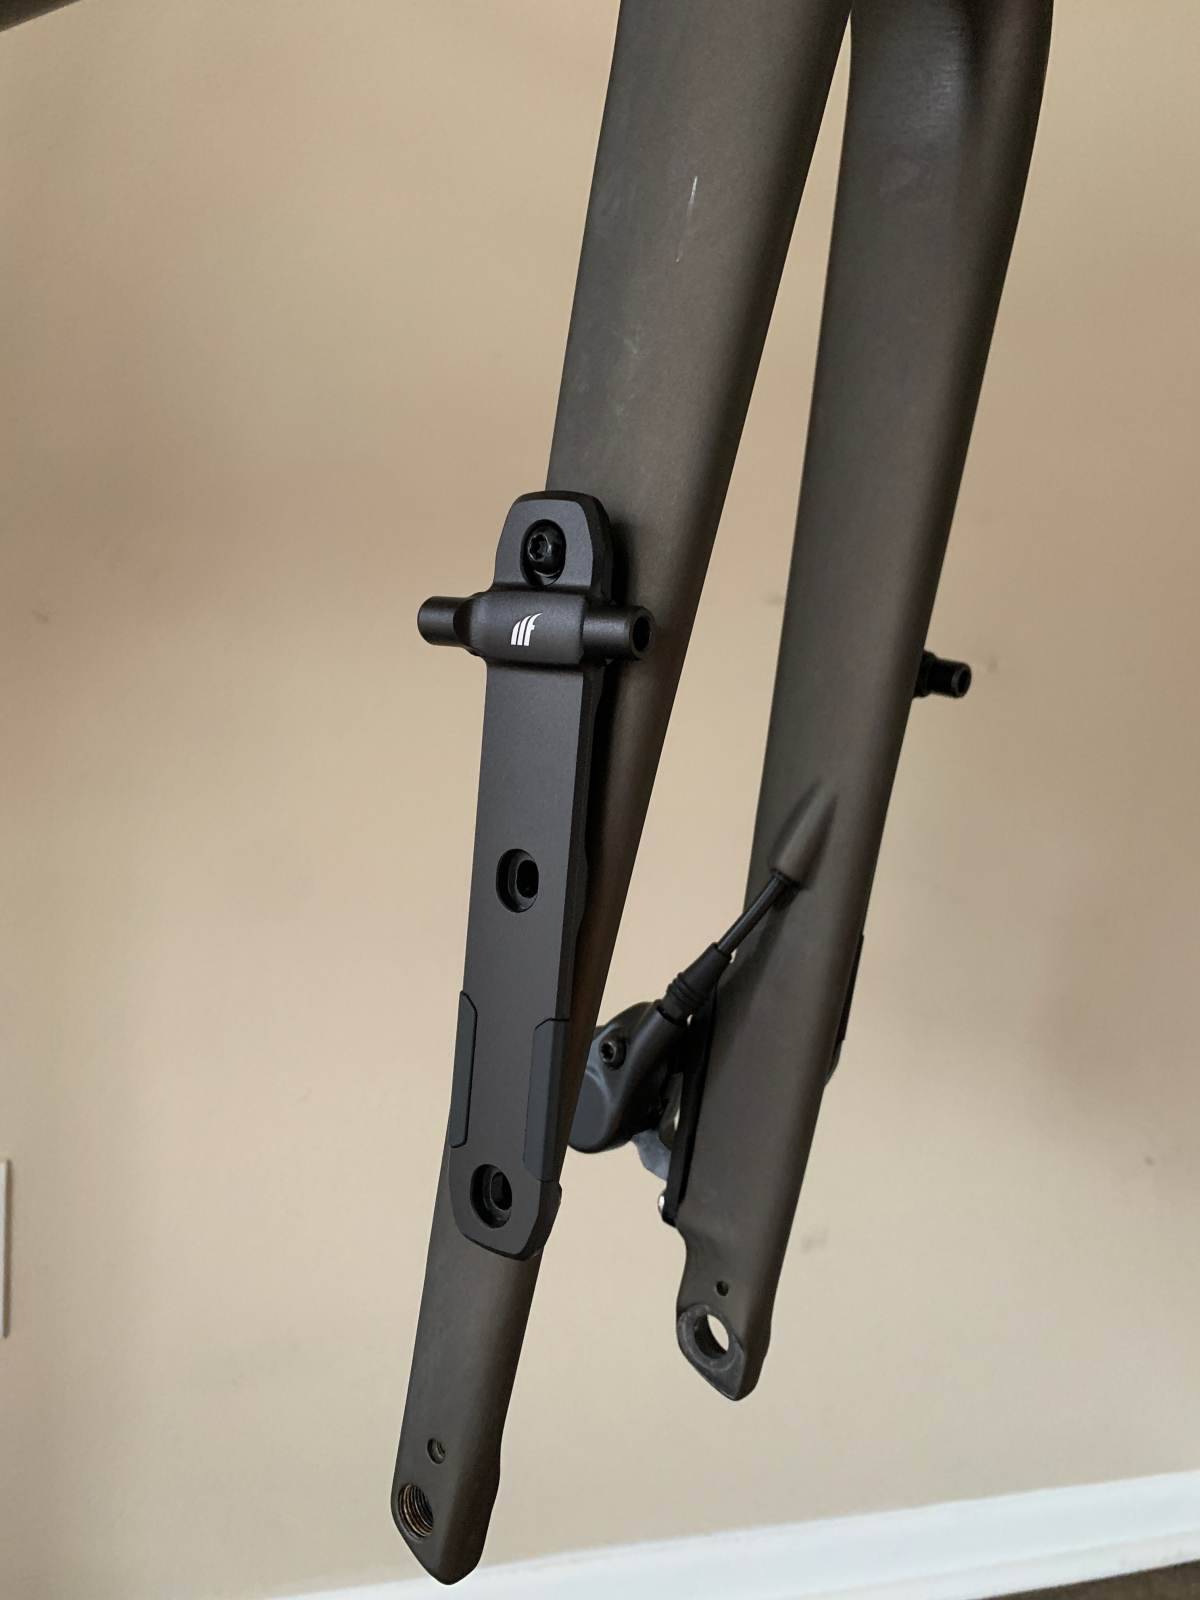
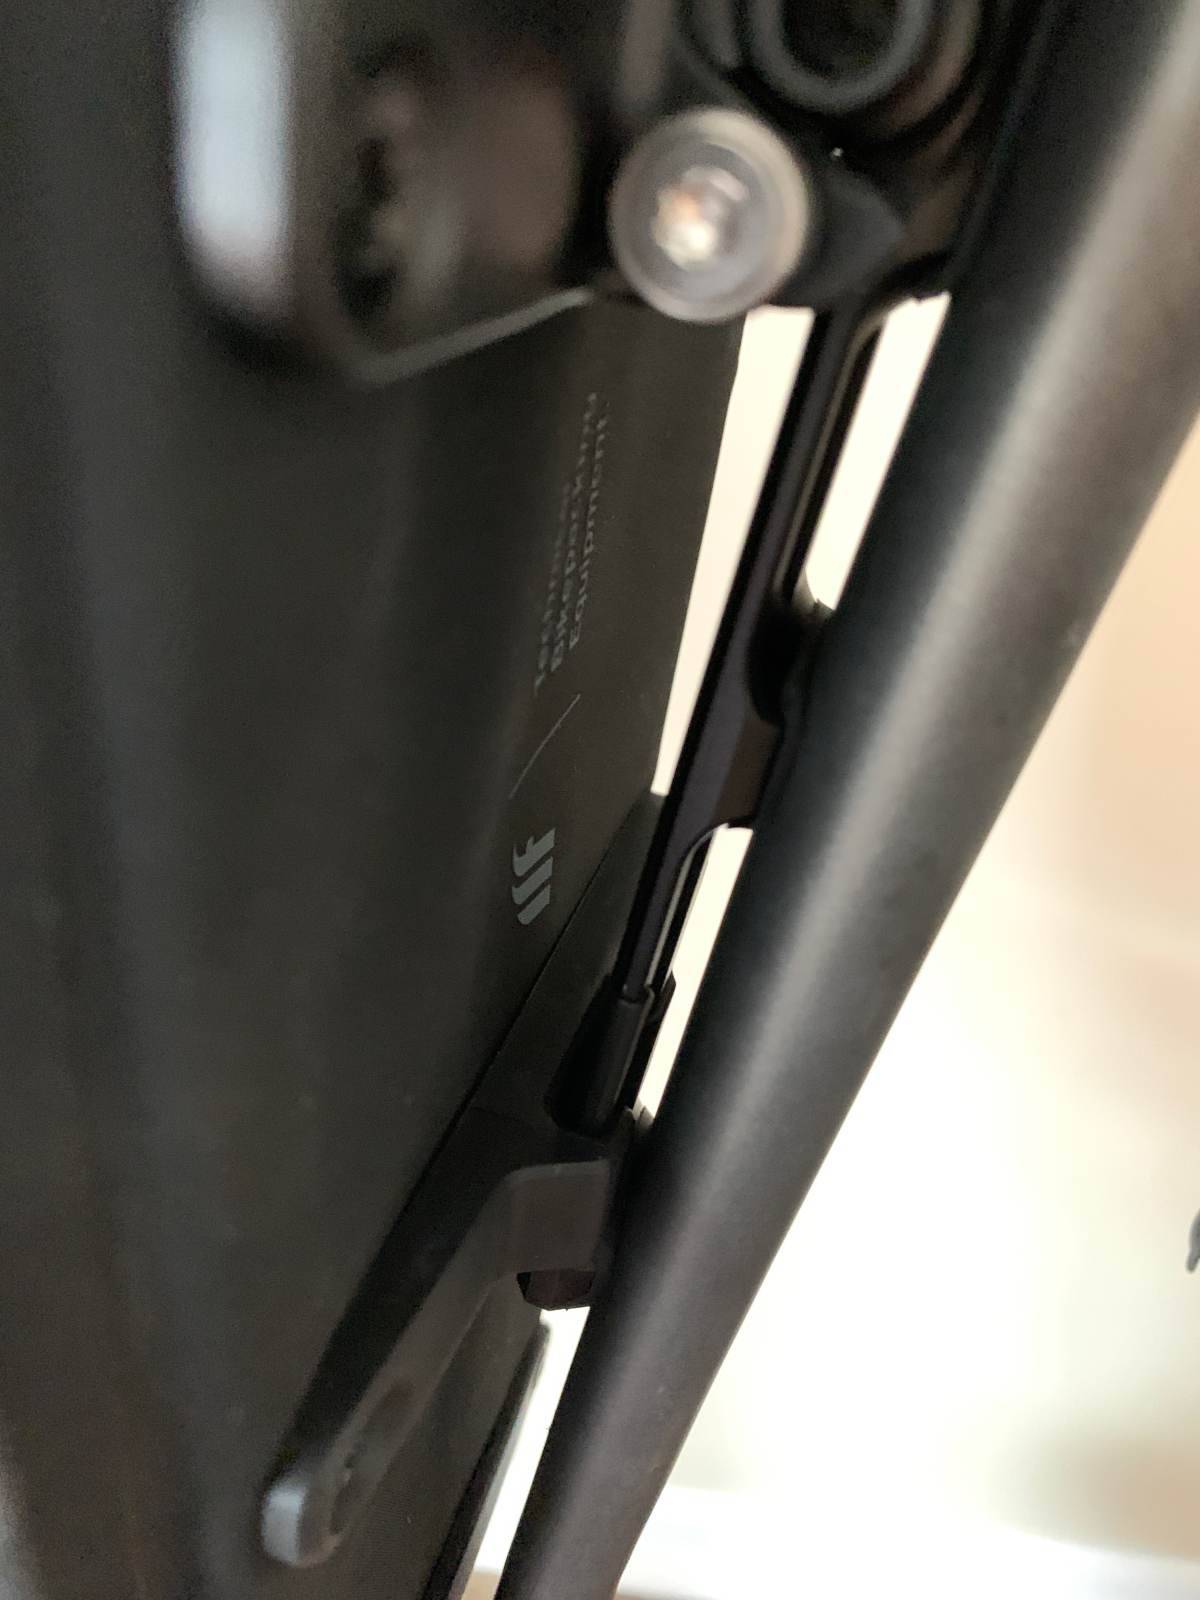
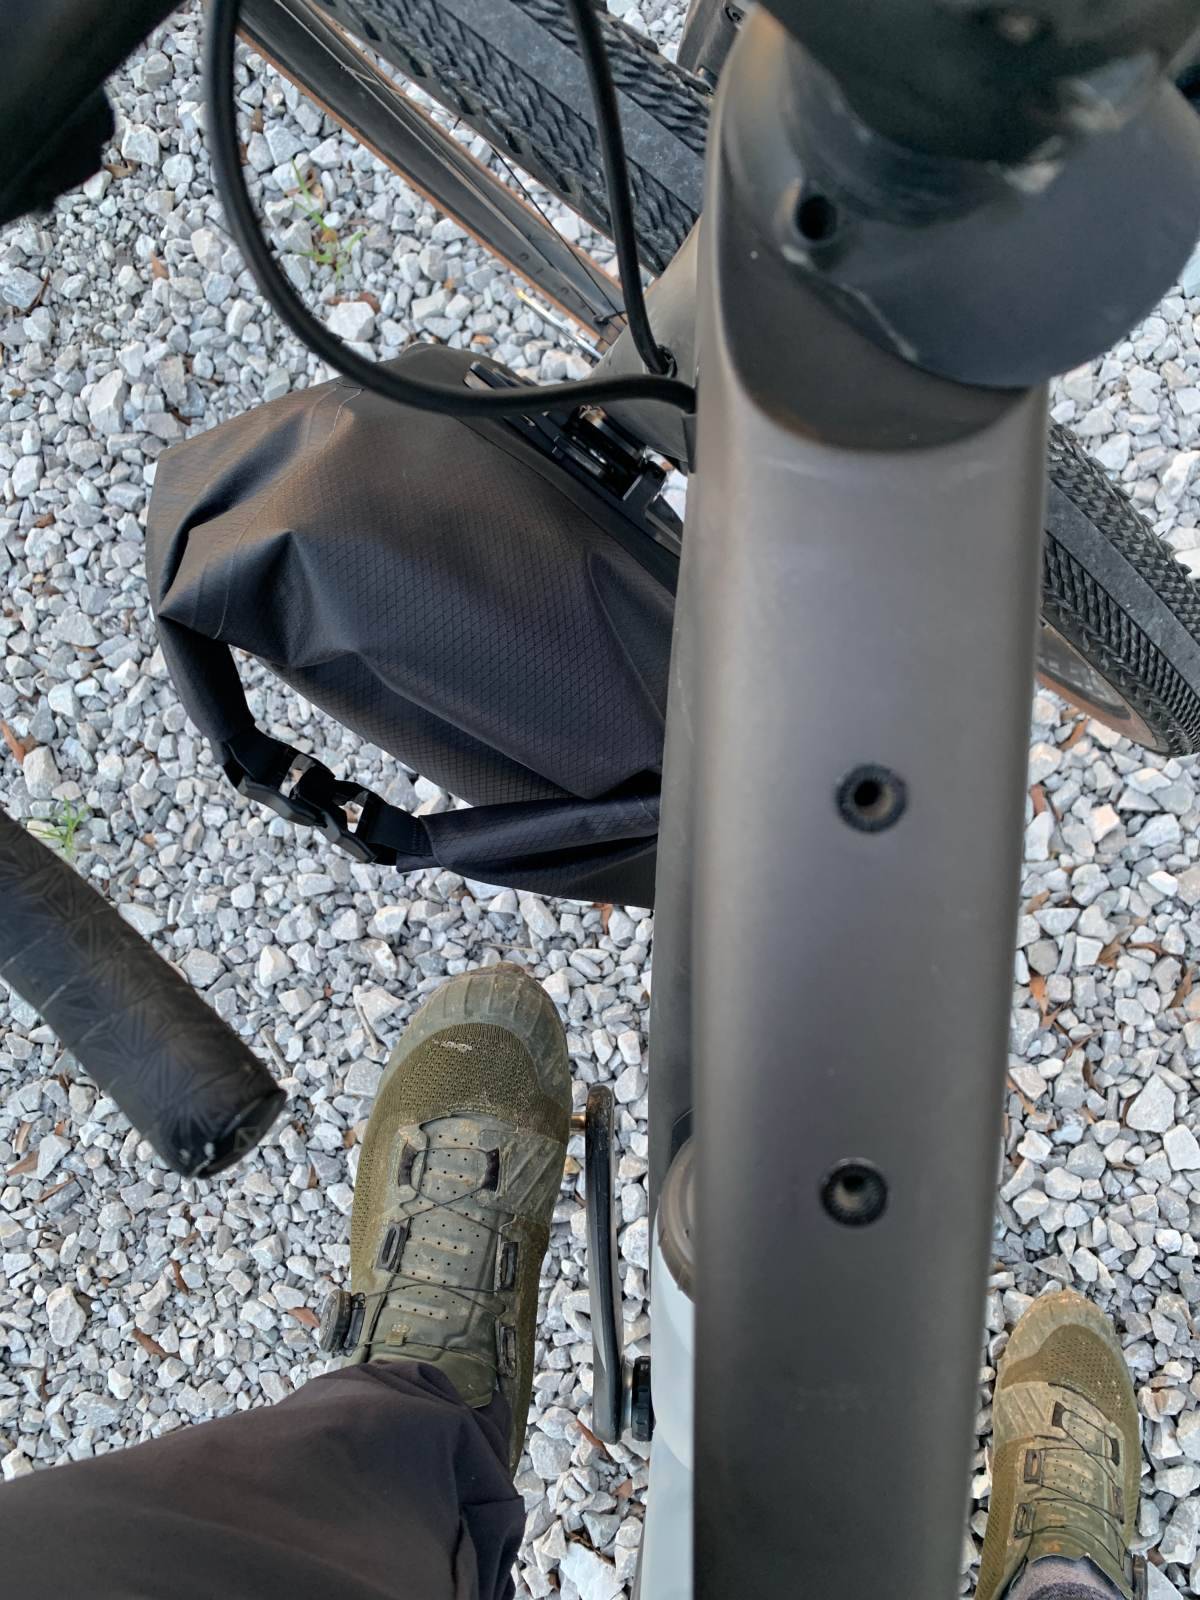
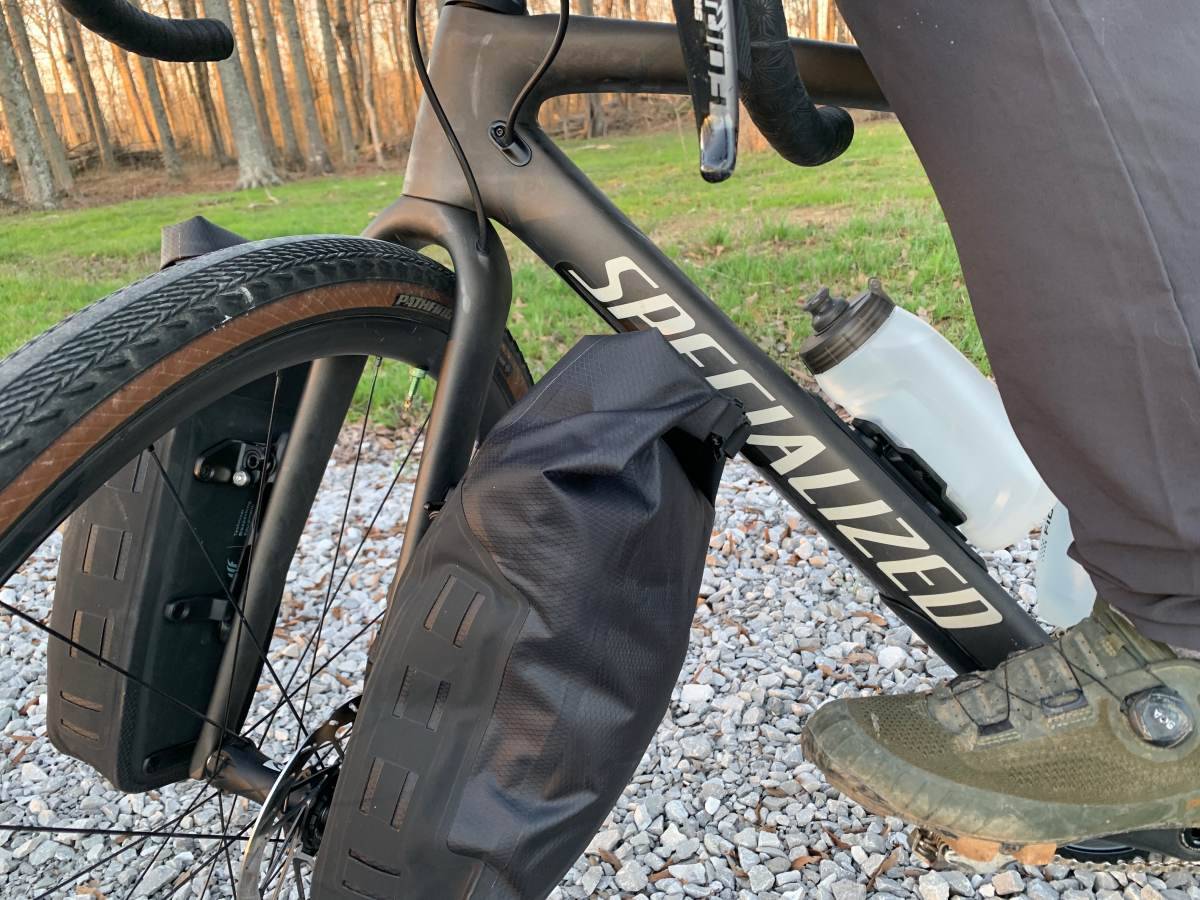
The mount has three legs that stick out a little leaving two small gaps between the fork and the mount. This gap is where the hook on the Fork Pack engages the mount (more on this below). The lower part of the mount has a piece of rubber on each side where the hook on the Fork Pack engages the mount.
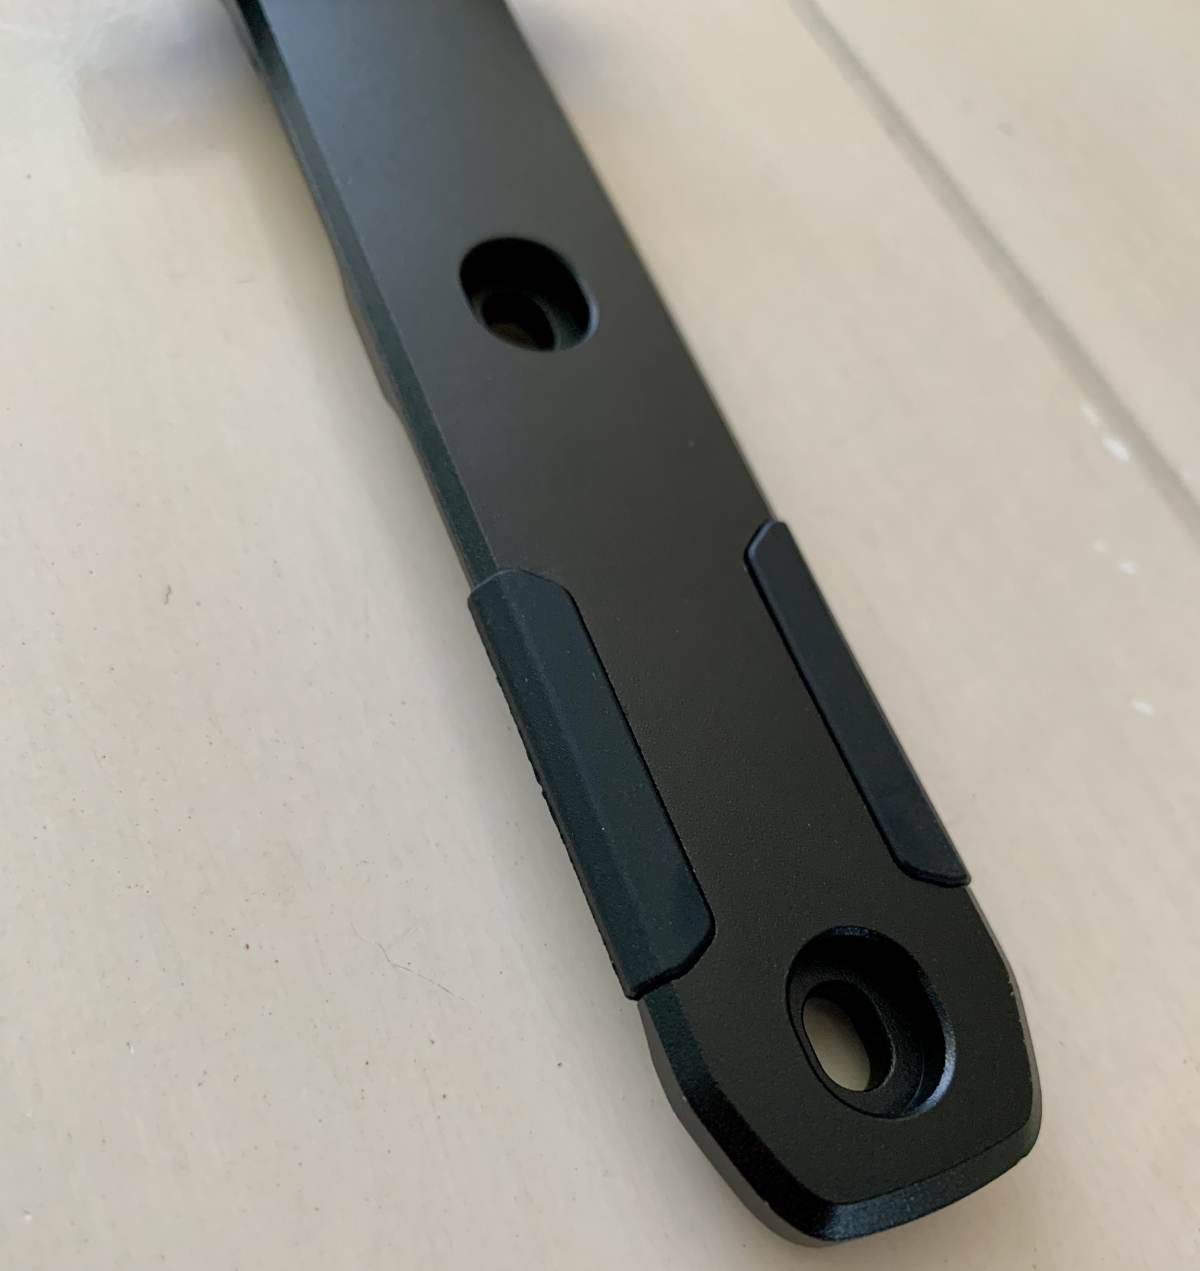
The Fork Mount mounts to bosses that are spaced at 64 mm and mounts to double or triple setups. The Fork Mount is 59.3 g (2.09 oz), and each screw and washer are 3.2 g (0.11 oz).
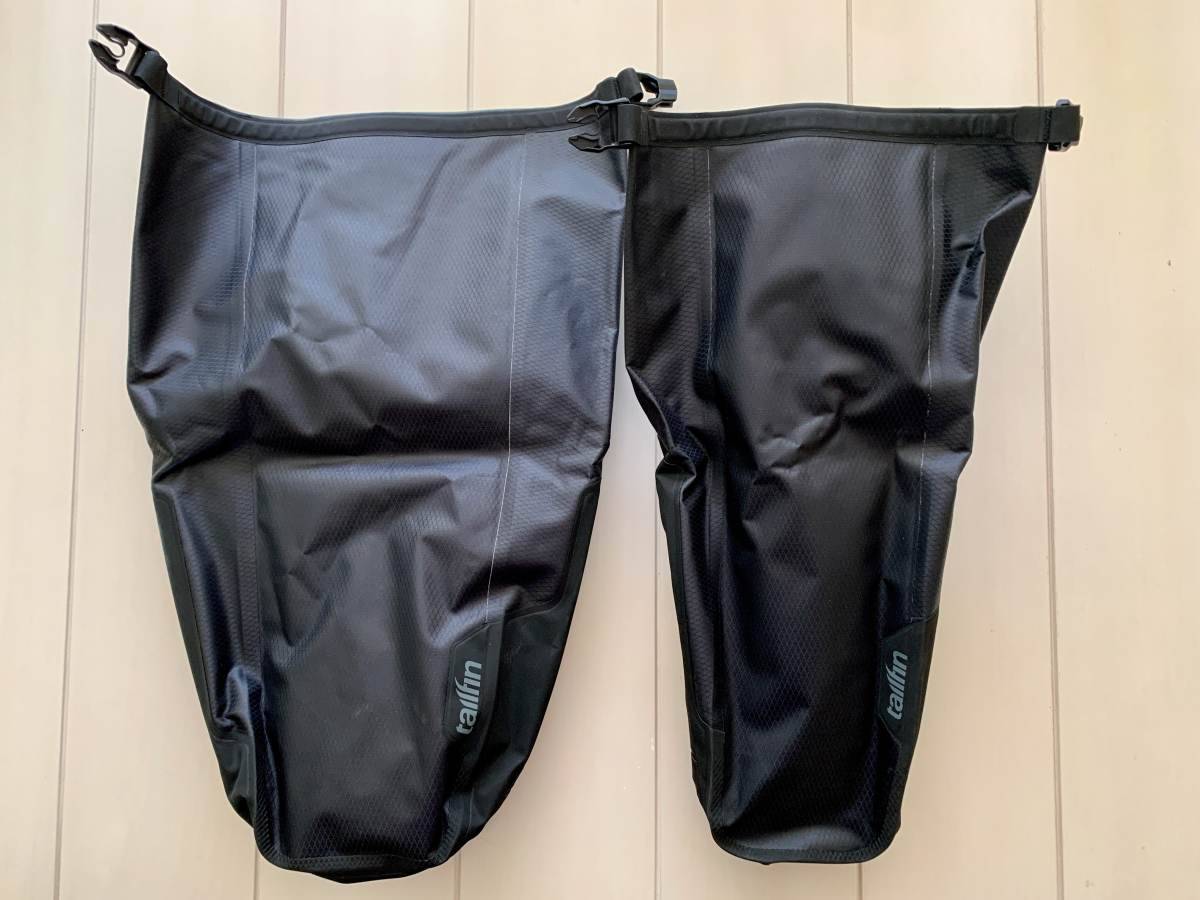
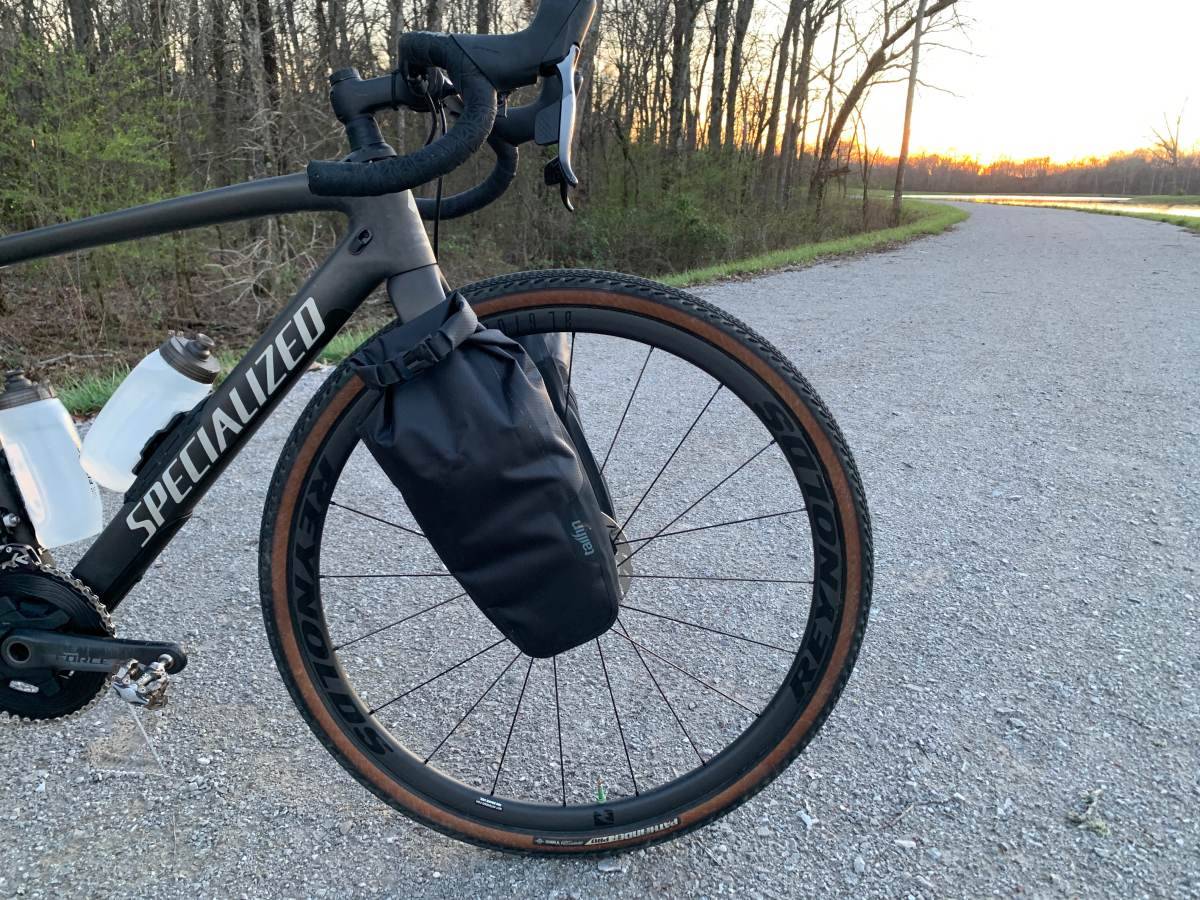
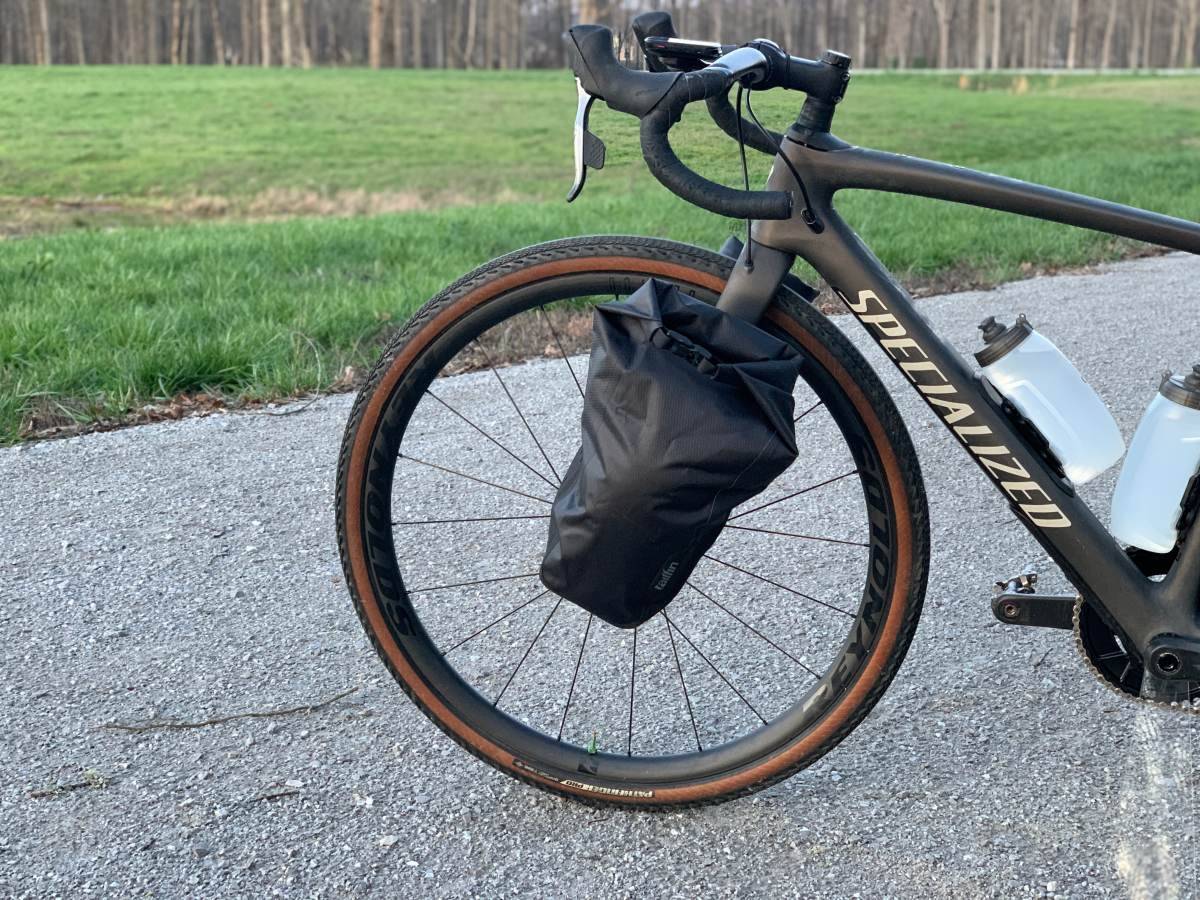
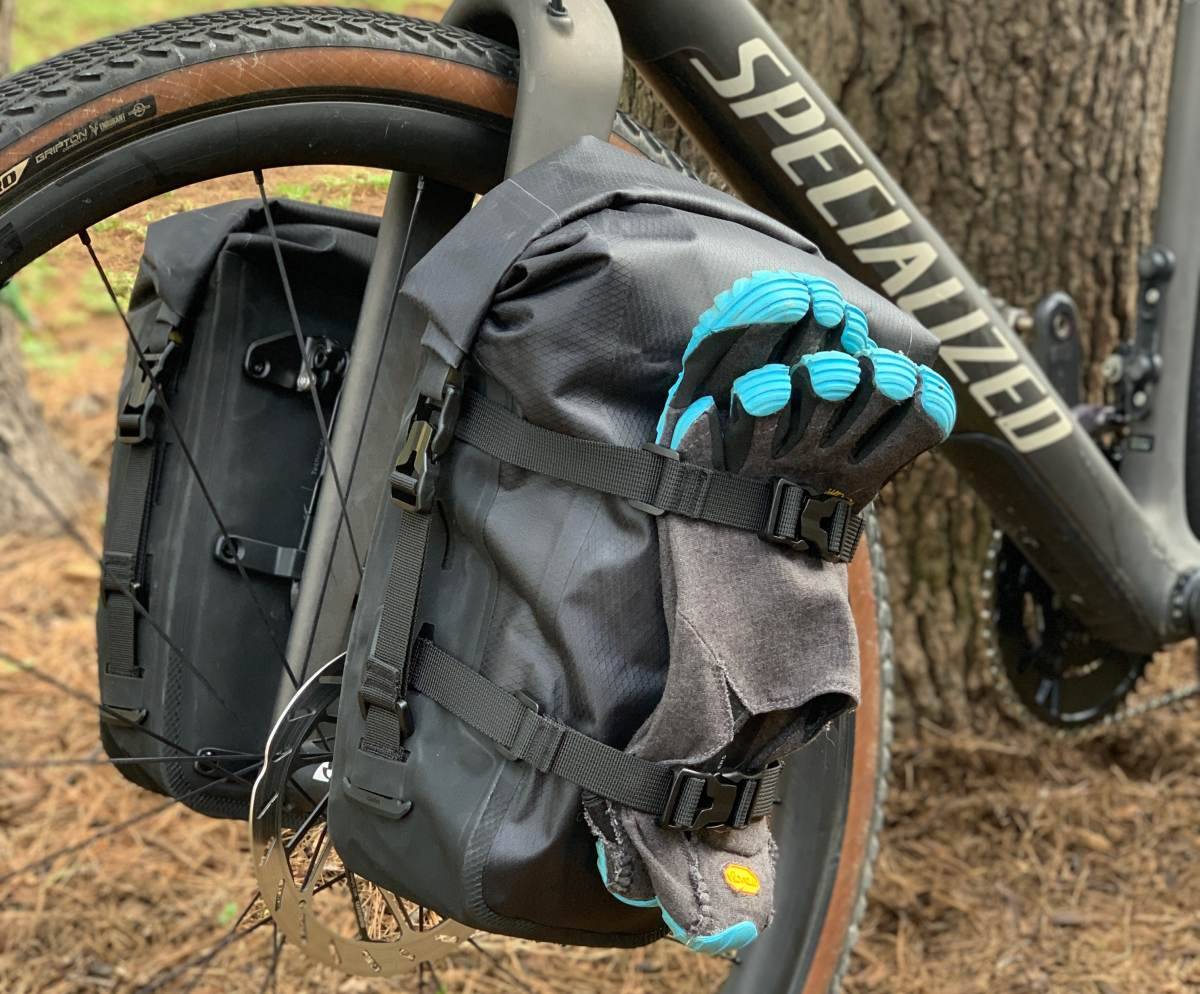
The Fork Pack
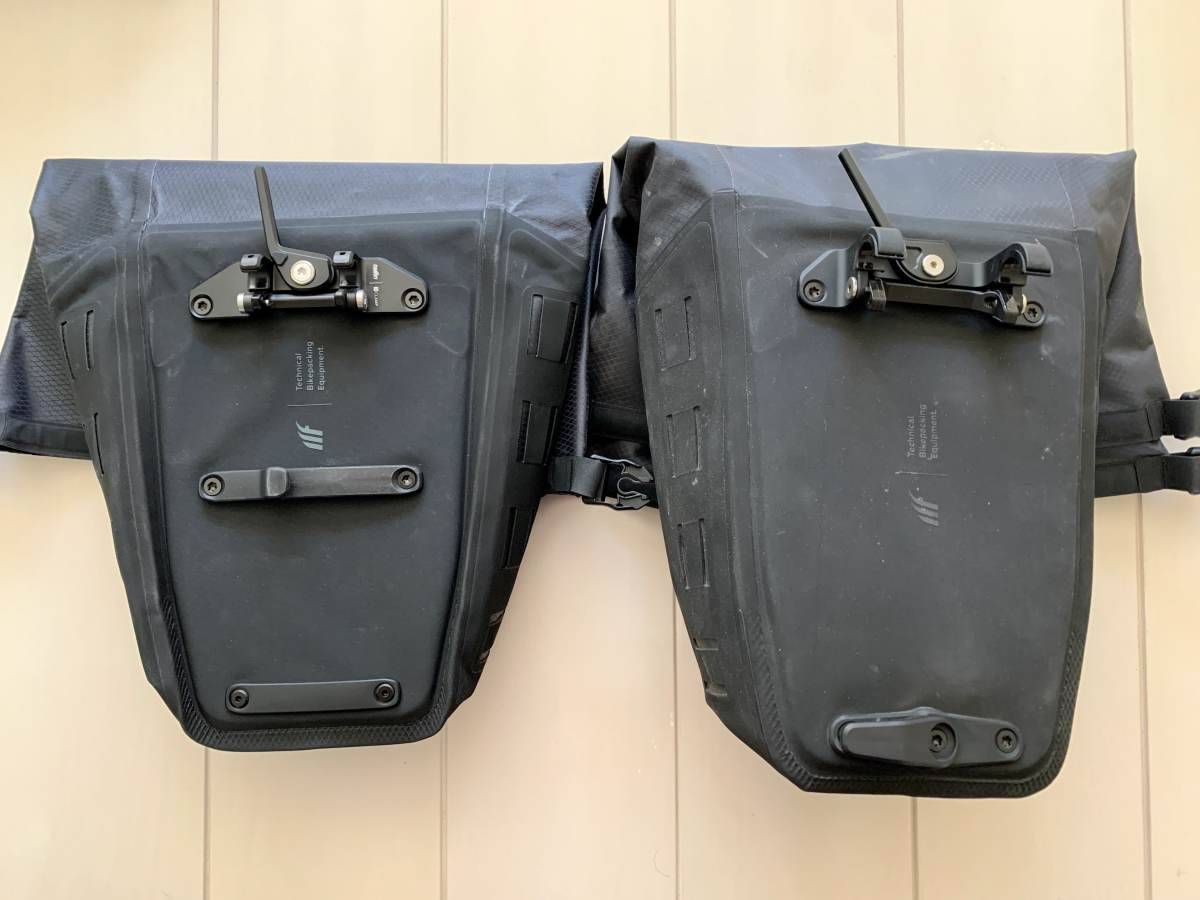
The Fork Pack is essentially the same bag as the Mini Pannier that I previously reviewed, but Fork Pack comes with updated hardware that allows it to be mounted to the Fork Mount. If you already have the Mini Pannier and want to convert it to be used on the Fork Mount, Fork Pack conversion kits should be available soon. Go to the Tailfin website to sign up for the waitlist.
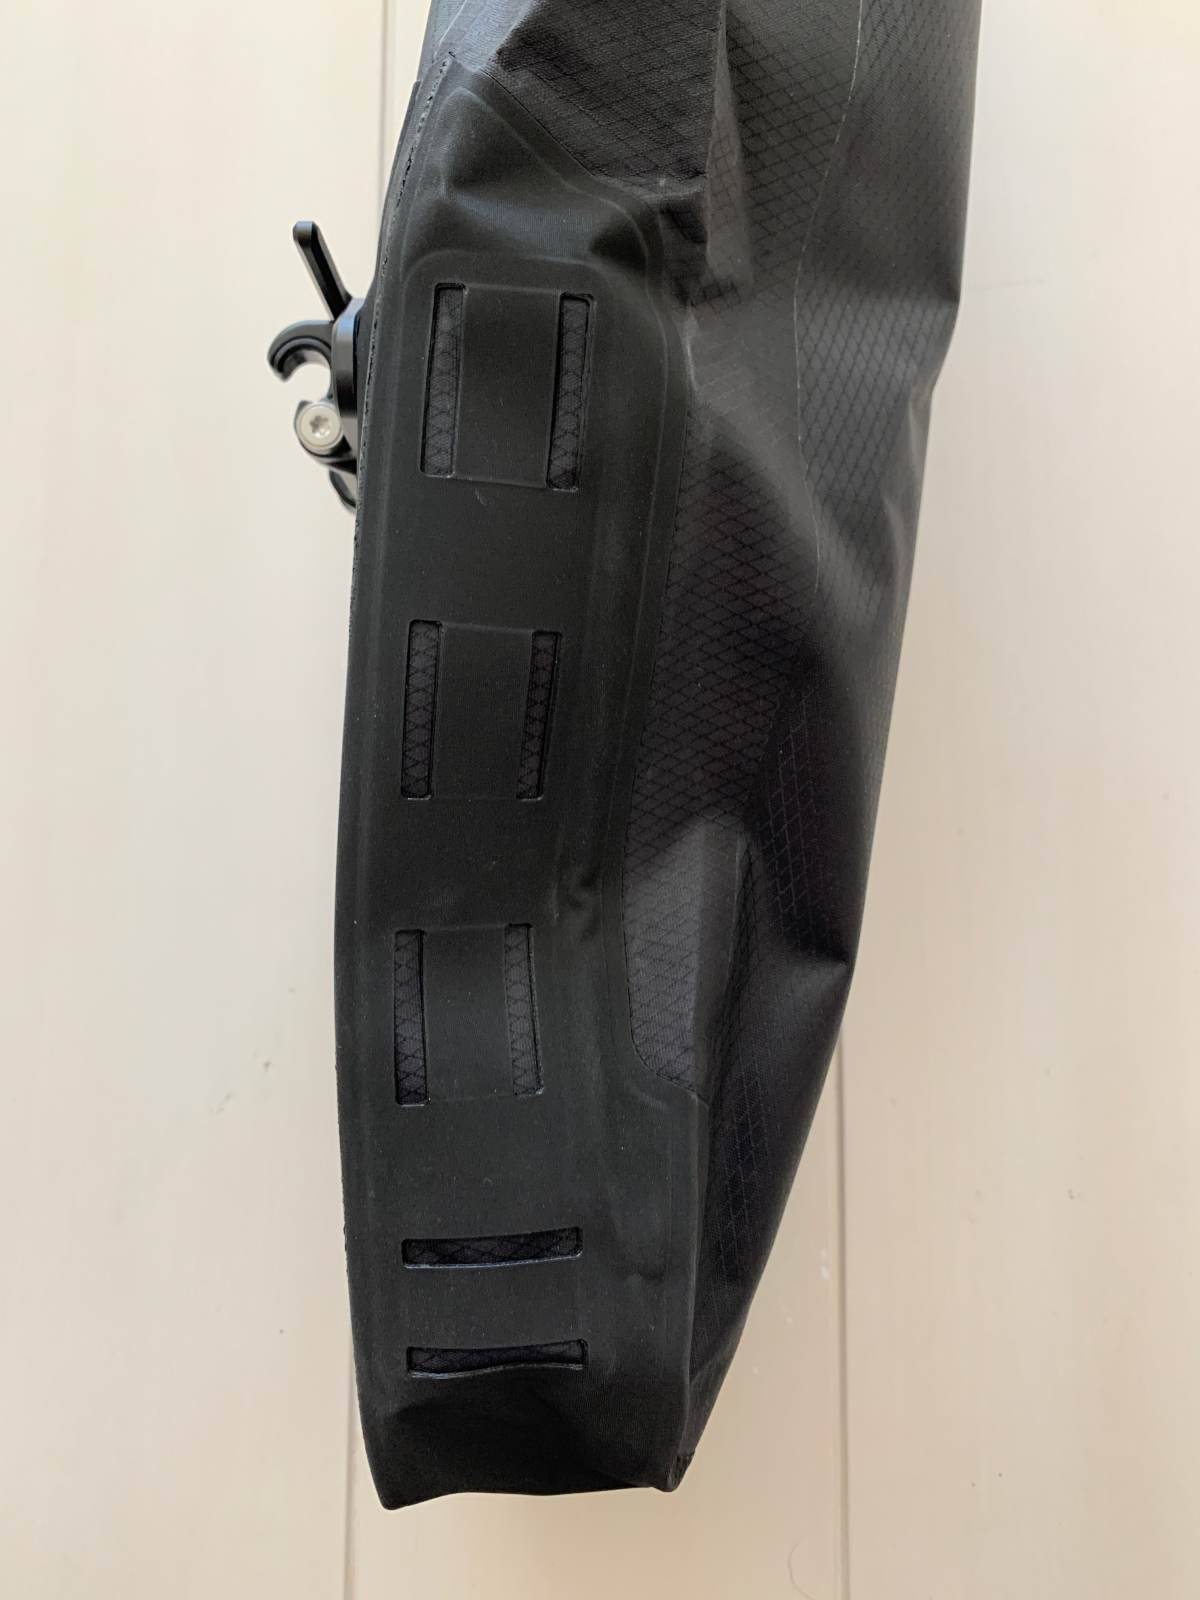
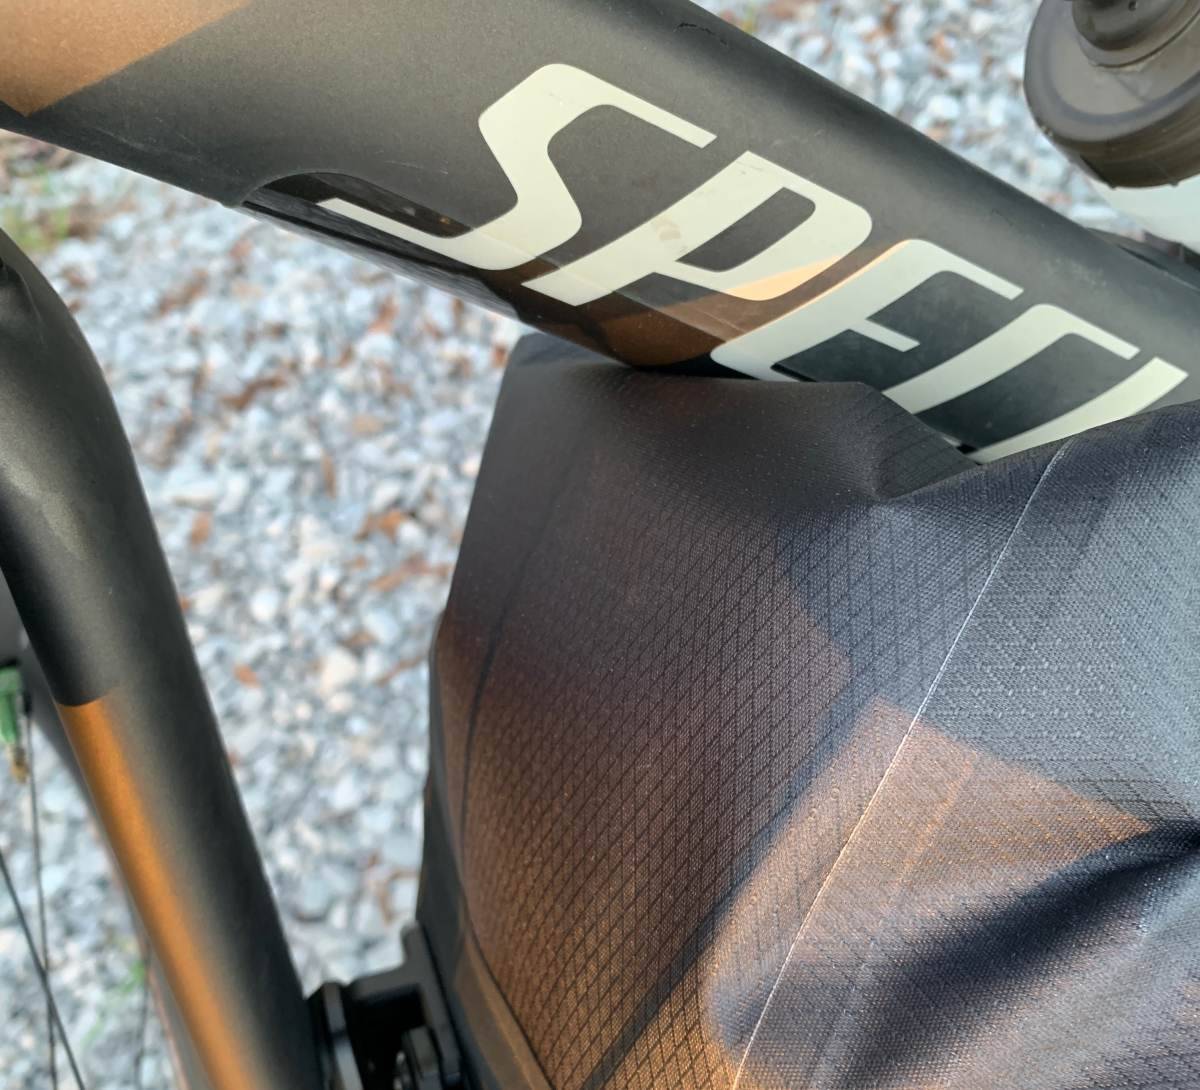
The bags are made from 210D Hypalon & 210D Diamond RipStop. The seams are fully welded making a fully waterproof bag once the top is rolled and snapped closed. There is really no need to test the waterproofness of these bags, once you close the bags you can feel the trapped air still in the bags. Even when you squeeze the bags there is no air loss. The 5L pack is 387 g and the 10L pack is 467 g (including the mount).
If you are upgrading your Mini Pannier to Fork Packs this will require you to disassemble and reassemble the bags. The X-clap is tightened to the bag frame to 5 Nm and lower hook is tightened to 2 Nm. Make sure to point the hook against the direction of travel (e.g., for the drive side Fork pack the hook points right.)
Mounting the Fork Mount
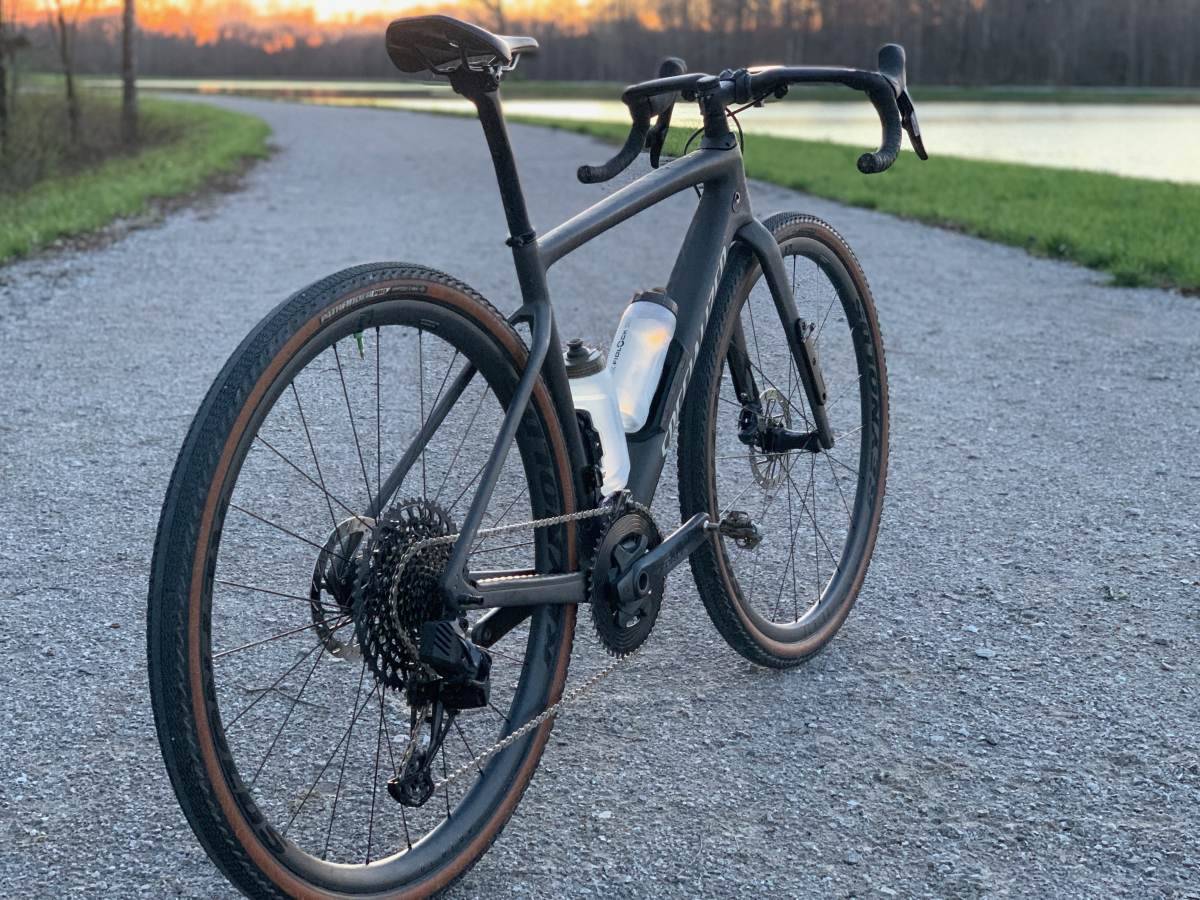
The Fork Mount is designed to be installed using either two or three bolts. If using the two-bolt mounting option, make sure to use the top two holes on the Fork Mount. The carrying capacity with two bolts is 3.0 kg (6.6 lb) and when using three bolts the carrying capacity is 4.5 kg (9.9 lb) per bag. But be careful loading the bike/bags to the max carrying capacity.
Even though the Tailfin Fork Pack is rated to carry up to 4.5 kg per bag, the bike’s fork may not be rated to that capacity. The fork on my Specialized Diverge only has two mounting holes on the fork and the rated carrying capacity is 6 kg (13.2 lb) total. The Diverge STR has three mounting holes on the fork, but it has the same carrying capacity.
The Fork Mount comes with three M4x16mm T25 Torx button head screws and washers. Use the provided bolts to install the Fork Mount to the bicycle’s fork. Apply a bit of grease to the screw threads and then install the Fork Mount. Make sure that the washer is placed between the screw head and the Fork Mount. Tighten the screws to 5 Nm (verify the bike’s torque specs).
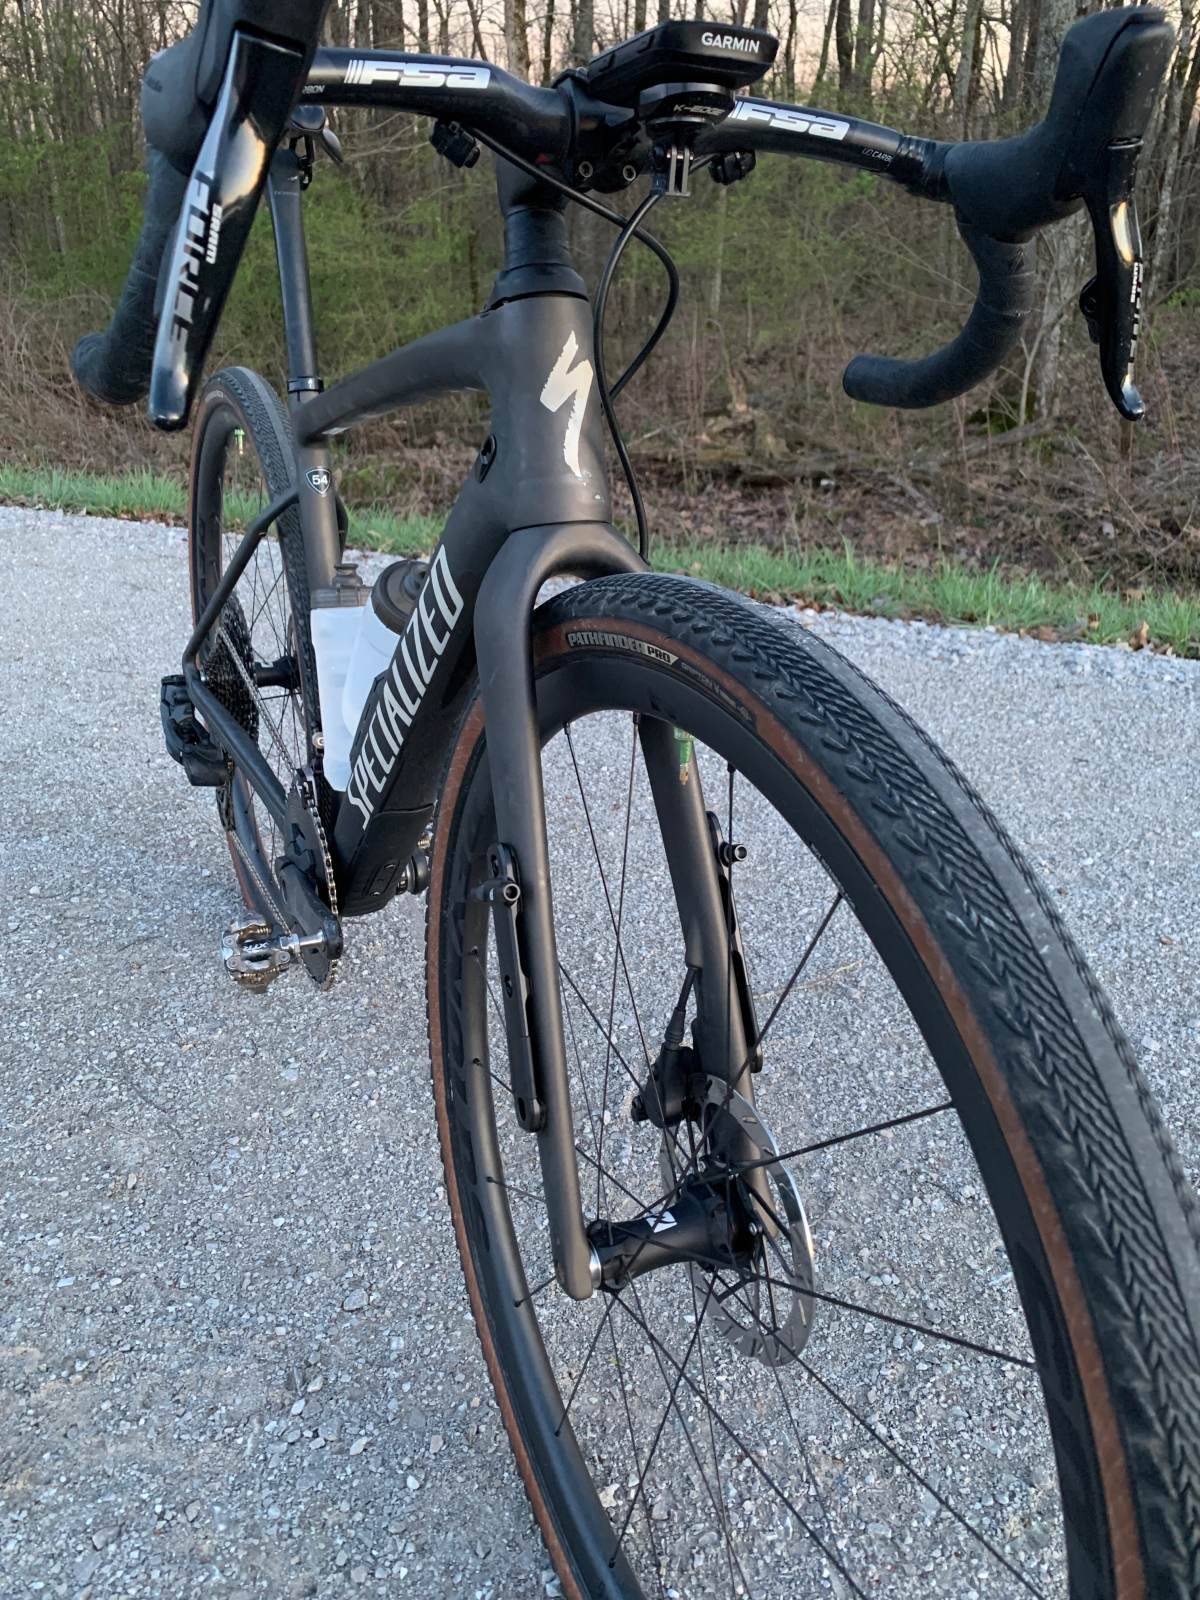
As you can see in the pictures below, there is a little bit of vertical adjustability so if your eyelets aren’t perfectly spaced at 64 mm the Fork Mount should still line up.
Mounting the Fork Pack
With the Fork Mount properly installed, it is time to install the Tailfin Fork Packs. It may seem a little tricky at first when mounting the Fork Packs, but after a few times it becomes second nature.
The first step is to flip the X-Clamp lever upward to open the clamp. Next, align C-shaped portions of the clamp to the upper bars on the Fork Mount bracket. Next, engage the lower hook on the pack to the mount. Then, close the X-Clamp to lock it down to the Fork Mount. After using the bags for a while, removing/mounting the Fork Pack is possible with one hand.
Initial Thoughts
Much like all the other Tailfin products tested here on the GravelCyclist.com website, this is another well-made product. The bags are made from high quality materials and the craftsmanship is top notch. The seams are well sealed. The machined parts are very nicely made and feel quite solid. The way the different materials are integrated together is very purposeful. These bags are very well thought out. They seem like they have been meticulously designed and tested.
I really like how the aluminum frame is bult into the bag. This makes the back of the bag ridge, which makes stuffing the pack with gear much easier.
Why use the Fork Pack?
The Tailfin Fork Packs would be great for carrying extra water, food, camping supplies, or extra clothing, just to name a few things. Using the Fork Packs allow for a more even weight distribution by not just loading the rear end of the bike with gear. Though loading up the front of the bike will make handling feel sluggish, the extra carrying capacity is quite worth it.
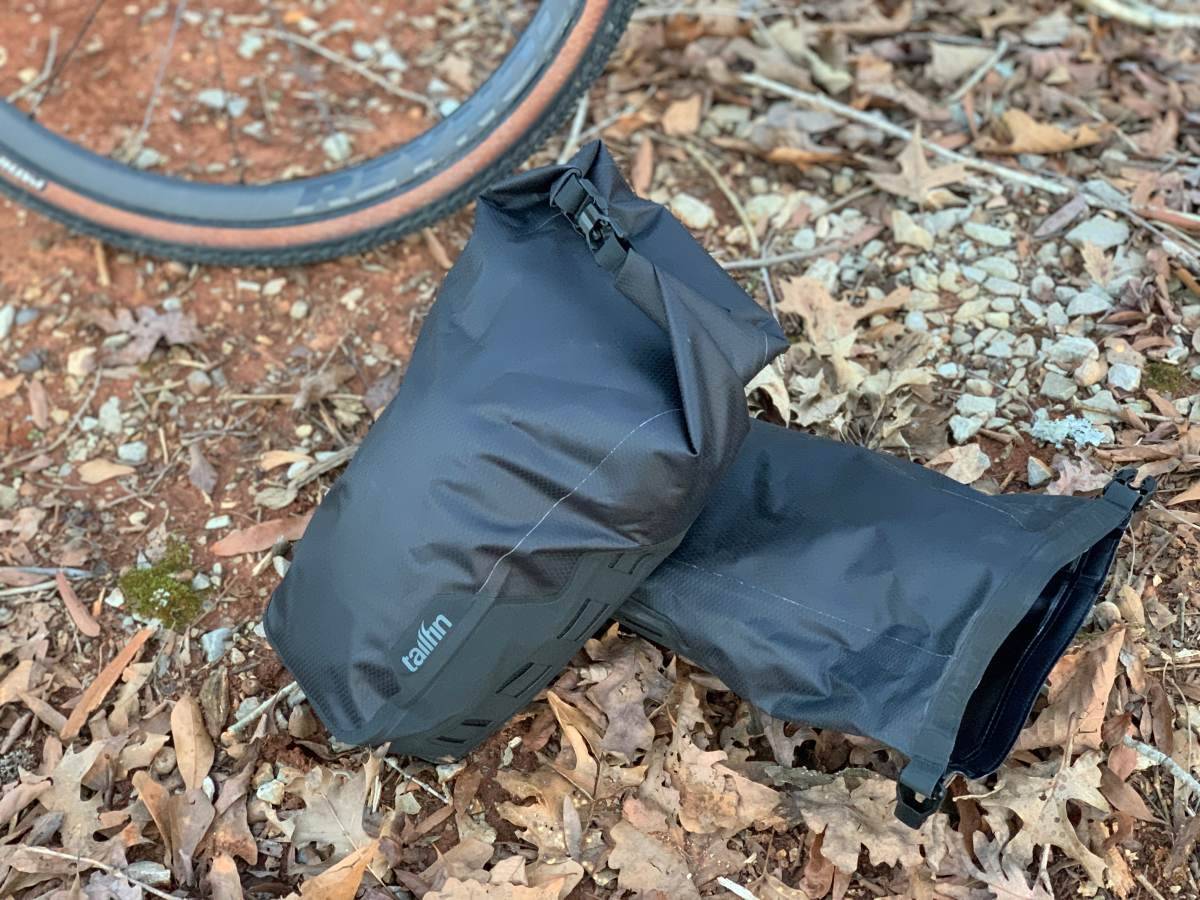
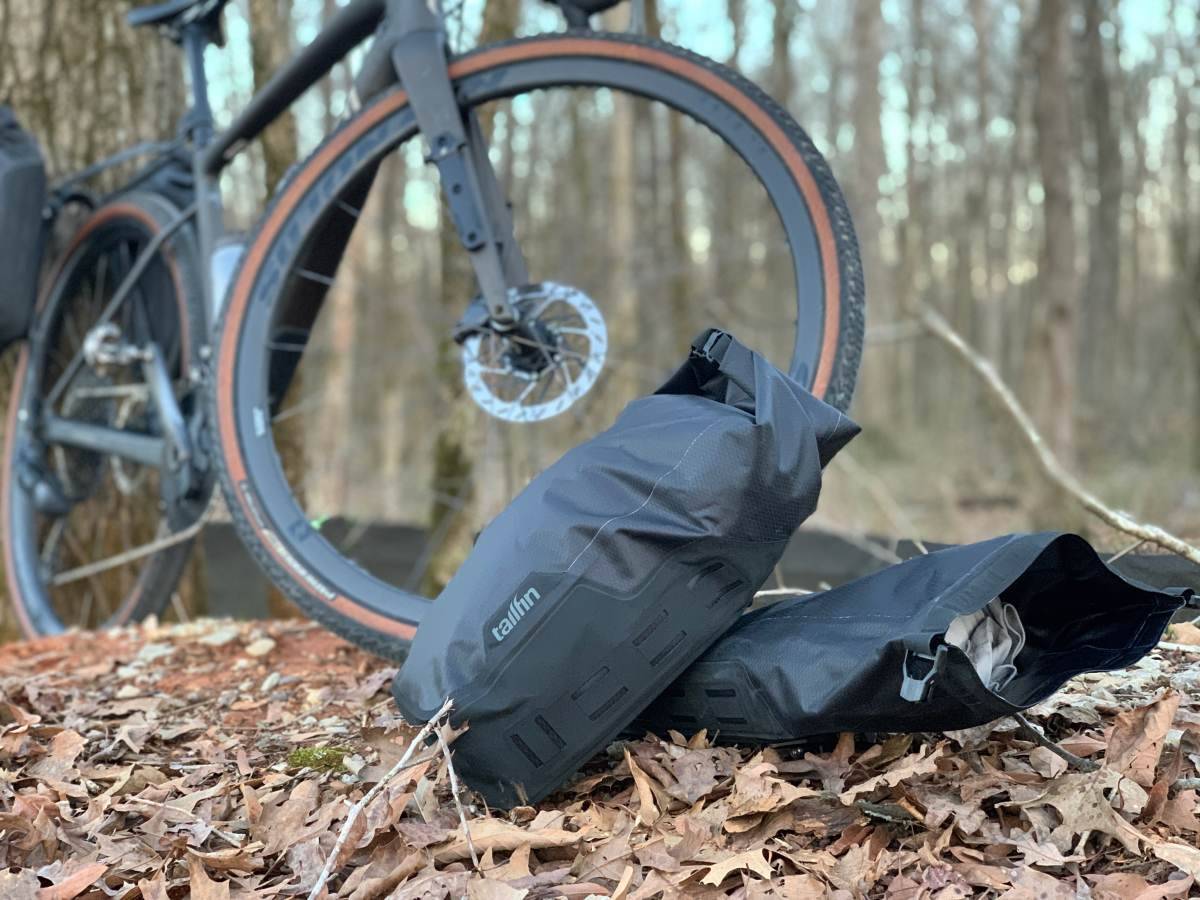
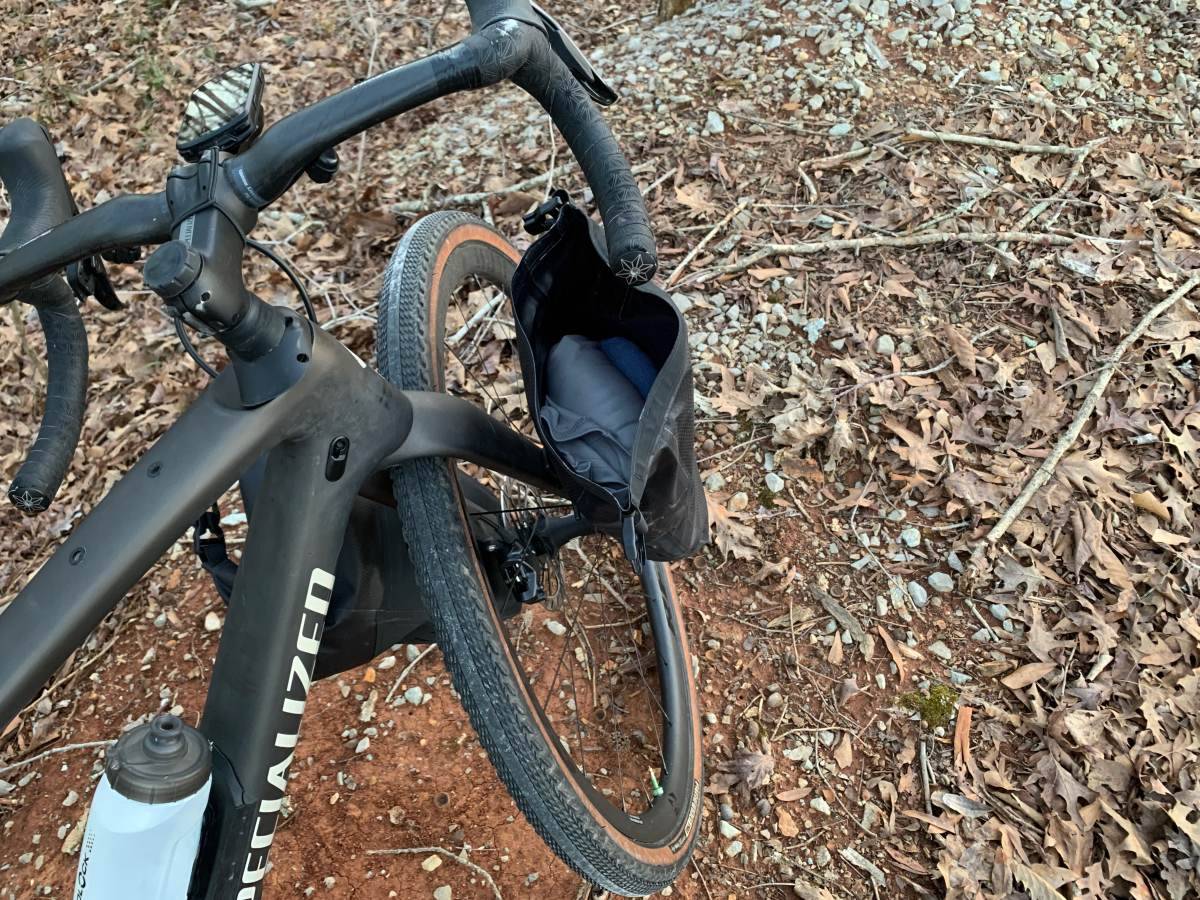
Three Ways to Close
Depending on how loaded the bag is, Tailfin devised a bag that offers multiple closing configurations to ensure the bag is compressed and securely closed for the different conditions.
Option 1 uses no compression straps. This method uses only the clips at the top of the pack for closing the bag. Roll the rim of the bag and fold it to connect the two clips together. This is a simple closing method is probably the best method if the bag is very full.
Option 2 uses 2 side compression straps. This is my preferred method for most situations since it is quick to secure and provides compression to the bag. Insert the compression straps into the horizontal side slots, roll the top of the bag, and fold each end downwards to connect to the clips. Grab the compression strap and pull downwards to compress the bag as much as needed. When installing the compression straps make sure to install the strap on the correct side.
Option 3 uses four compression straps. First, close the top of the bag using Option 1. Next, insert the compression straps into the vertical slots on the side of the pack. Using this method, allows you to carry additional items by strapping the items to the face of the bag with the compression straps. Or if you want to just compress the bag down more tighten down the compression straps.

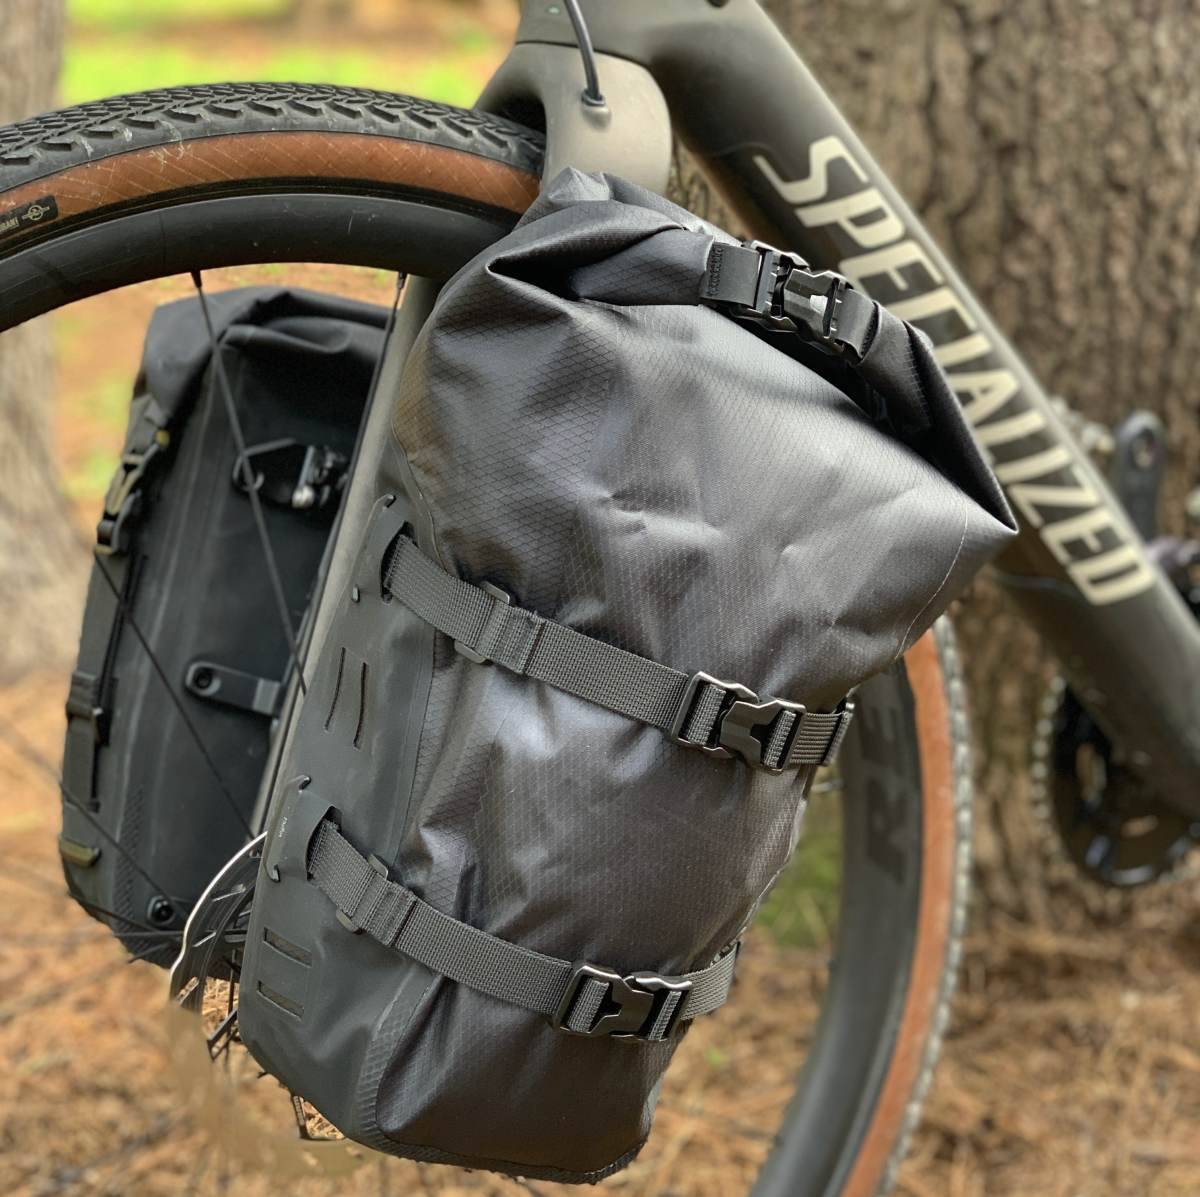
Technically, there are only three closing options, and this is because the bags only come with two sets of compression straps. If you get two Tailfin Fork Packs you will get four sets of compression straps, which will allow for an extra closing method that uses the spare compression strap from the second Fork Pack (assuming you use a set of compression straps for the side closure, option 2, for one bag).
As mentioned above, I prefer option 2 closure method the most for various reason. I think it looks cleaner, and it allows you to compress the bag down better. It also seems like it would be a little more aerodynamic. Another benefit is that it provides more frame clearance. Therefore, if you combine closure methods 2 and 3, you get the cleaner more compressed look also with the extra carrying capabilities with the compression straps on the face of the bag.
Ready to Explore
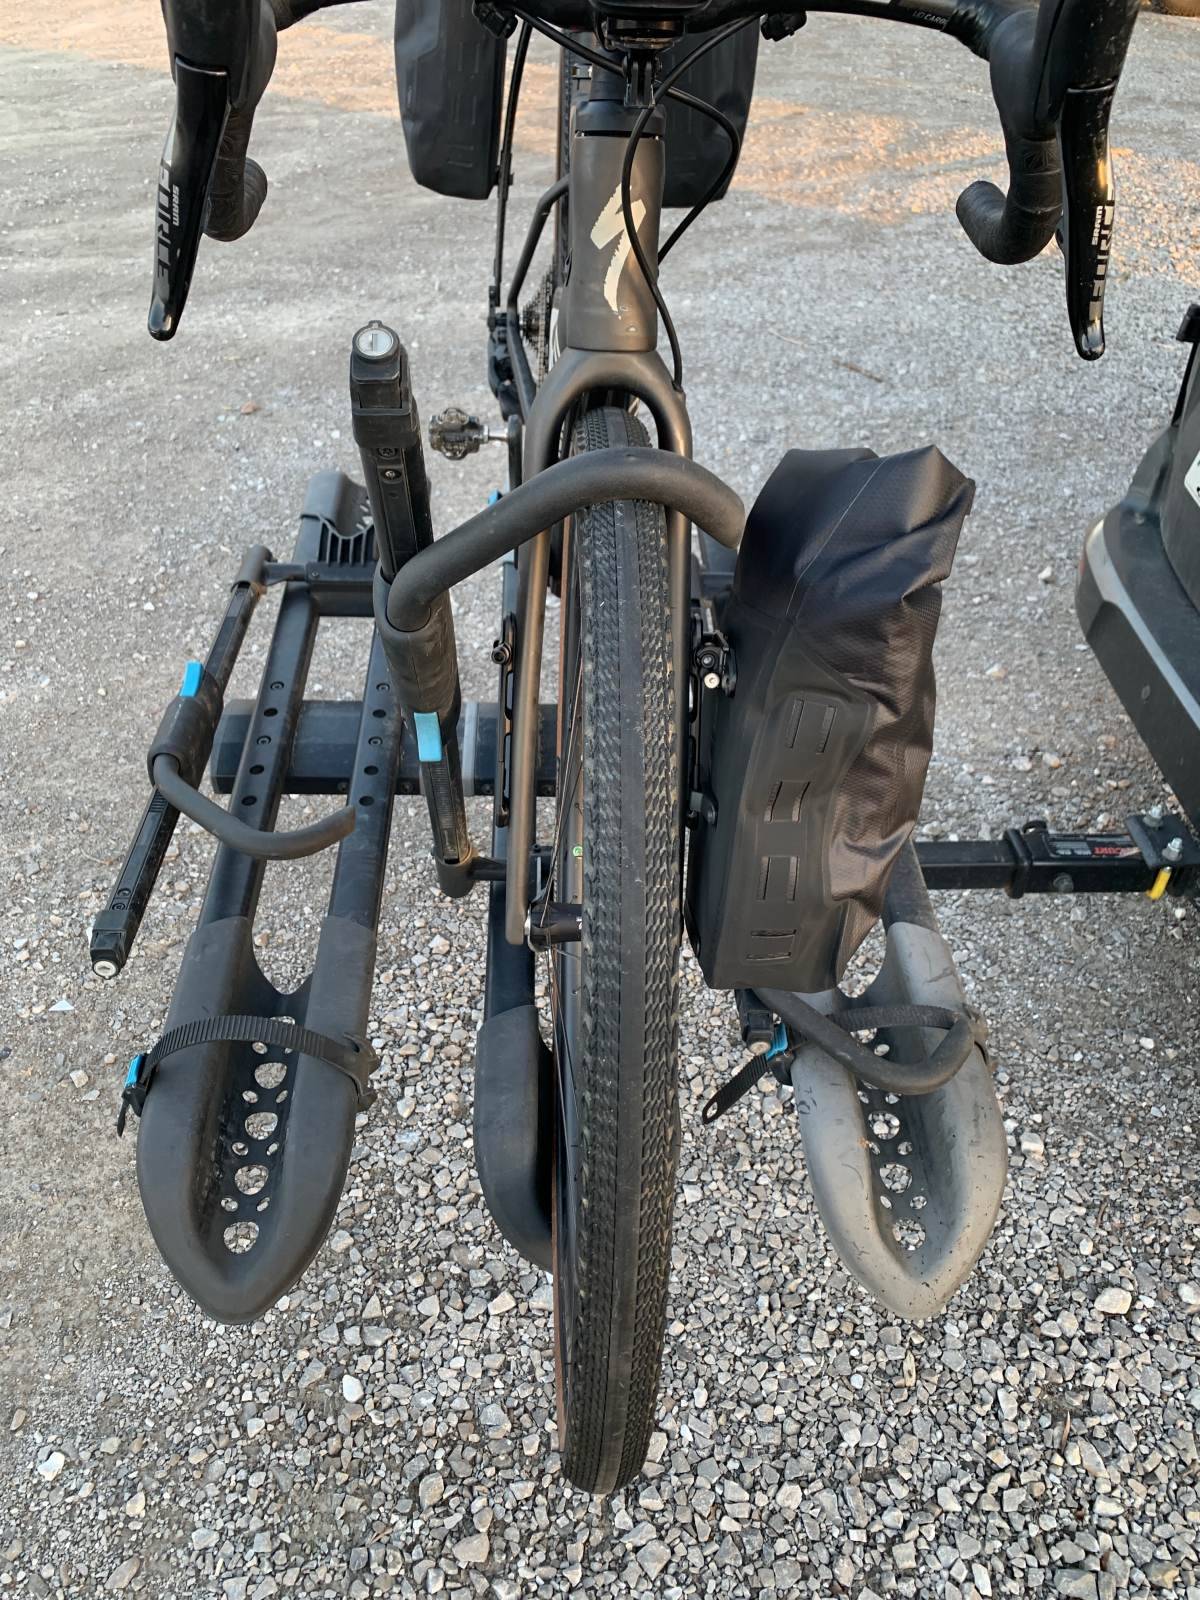
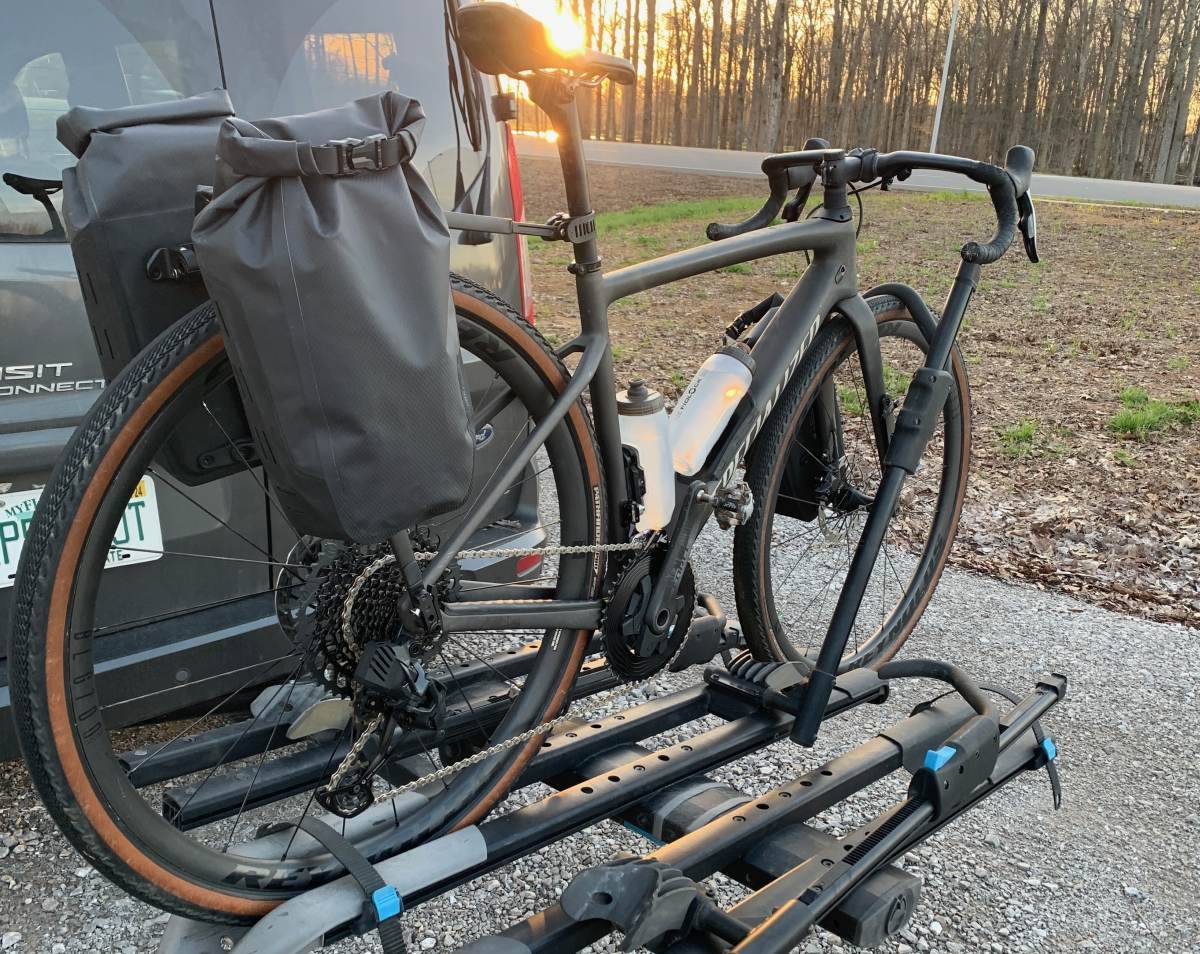
As mentioned before, the Fork Mounts are very low profile. Mounting my bike onto the bike rack with the Fork Mounts installed was no issue. There was plenty of space between the bike rack arm and the Fork Mount.
When heading out for my adventure, I mounted my bags to the bike and put the bike on the bike rack. After a few speed bumps, bumpy roads, and some gravel I got to my destination. All bags still intact.

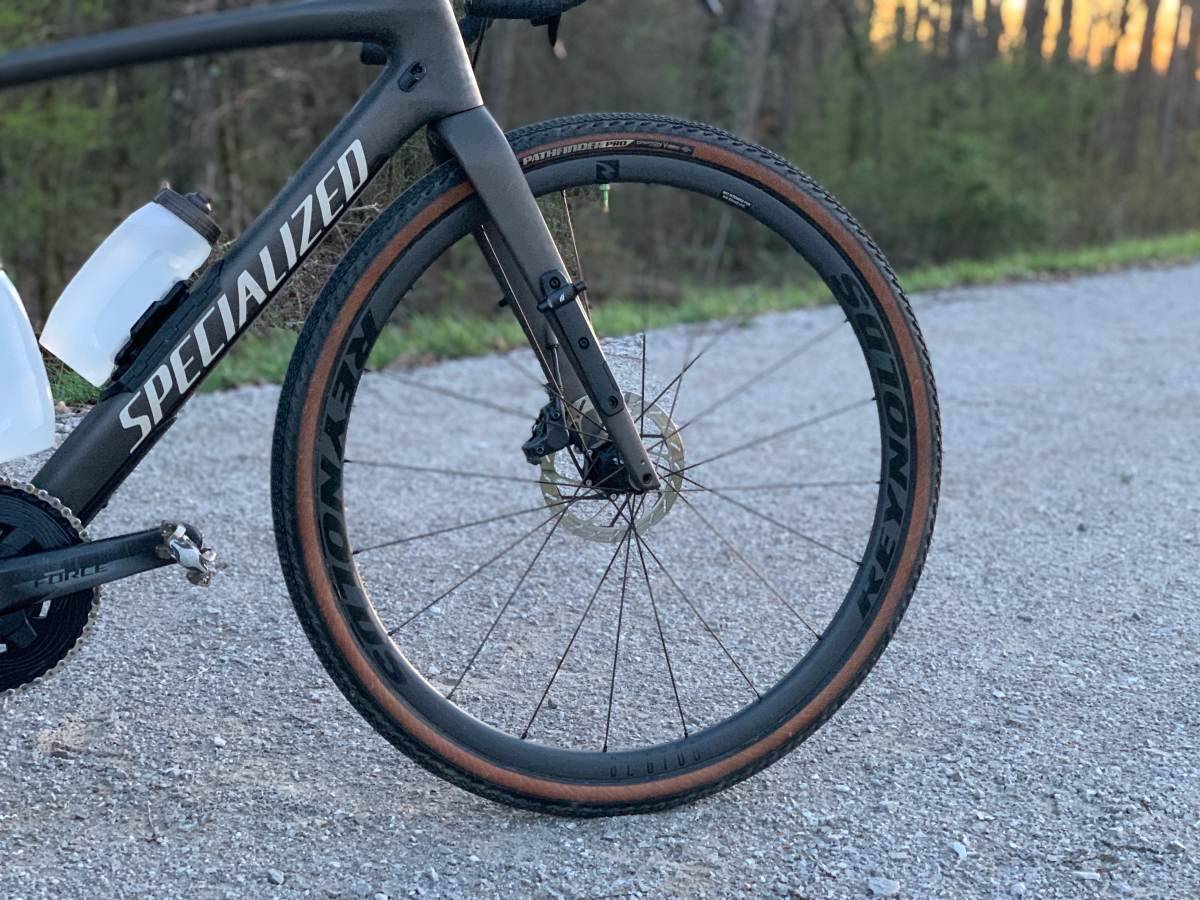
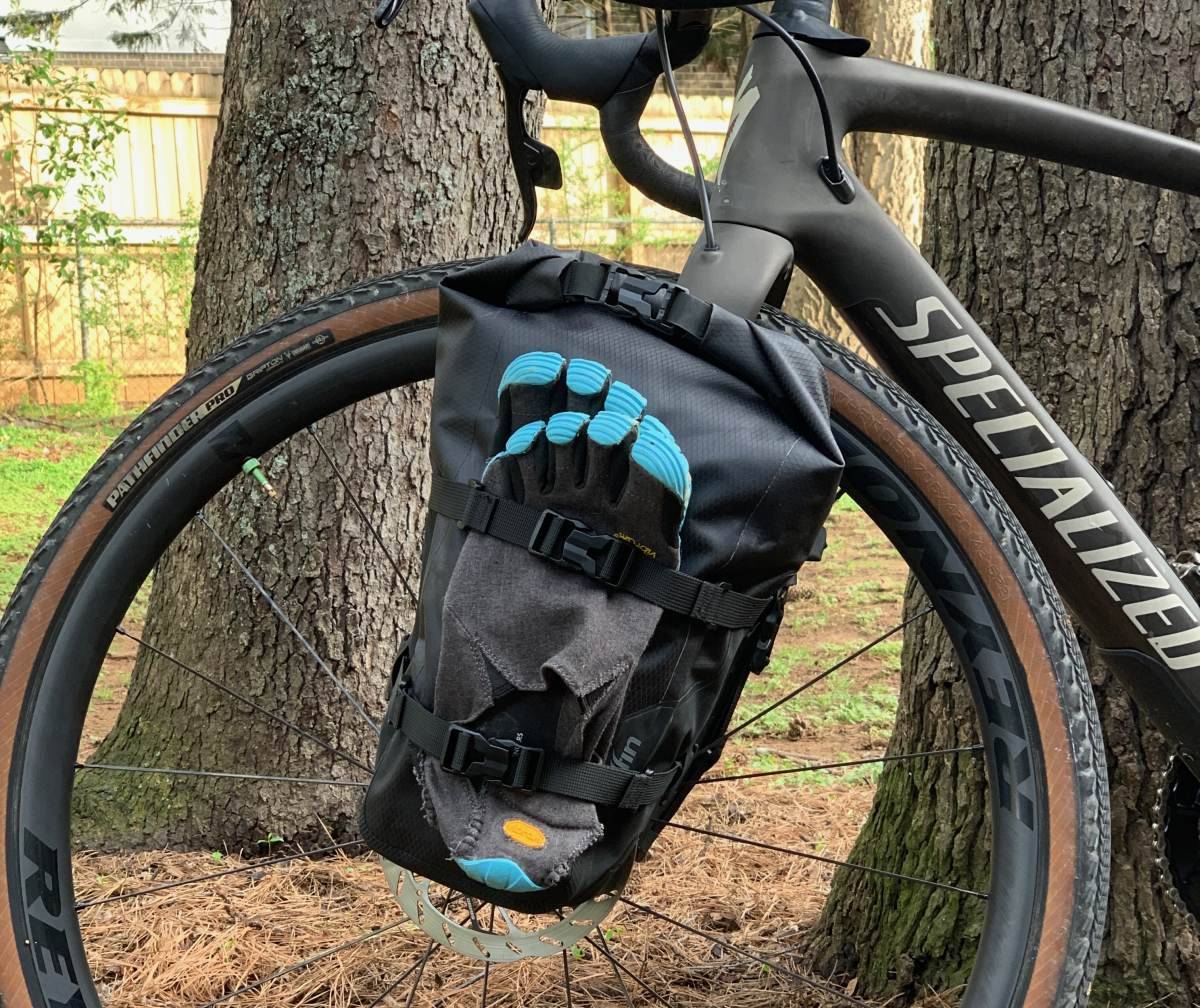
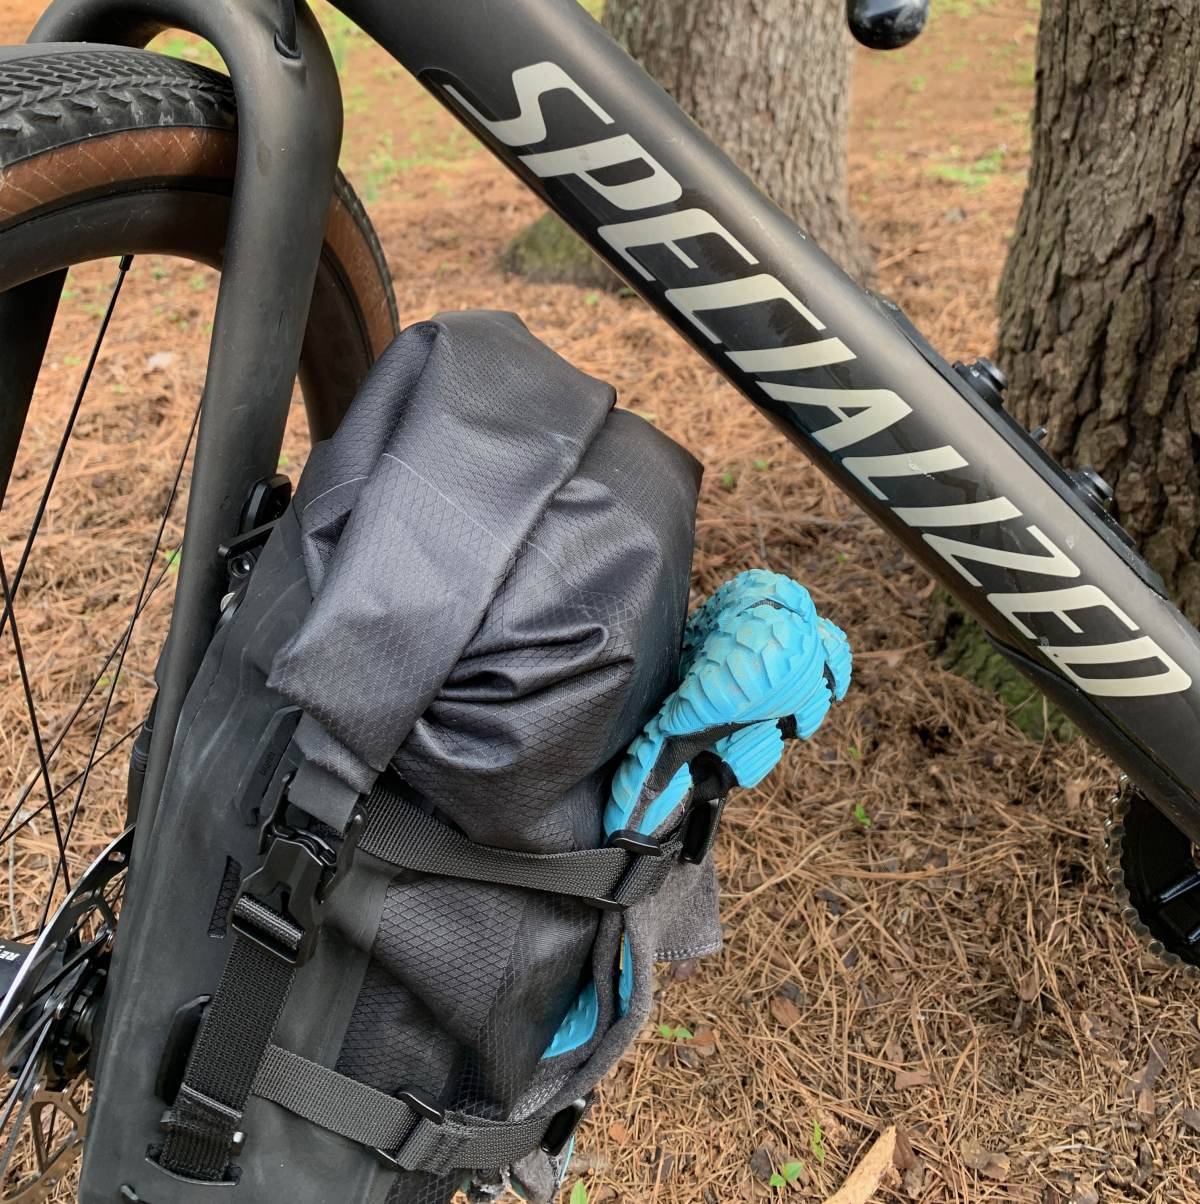
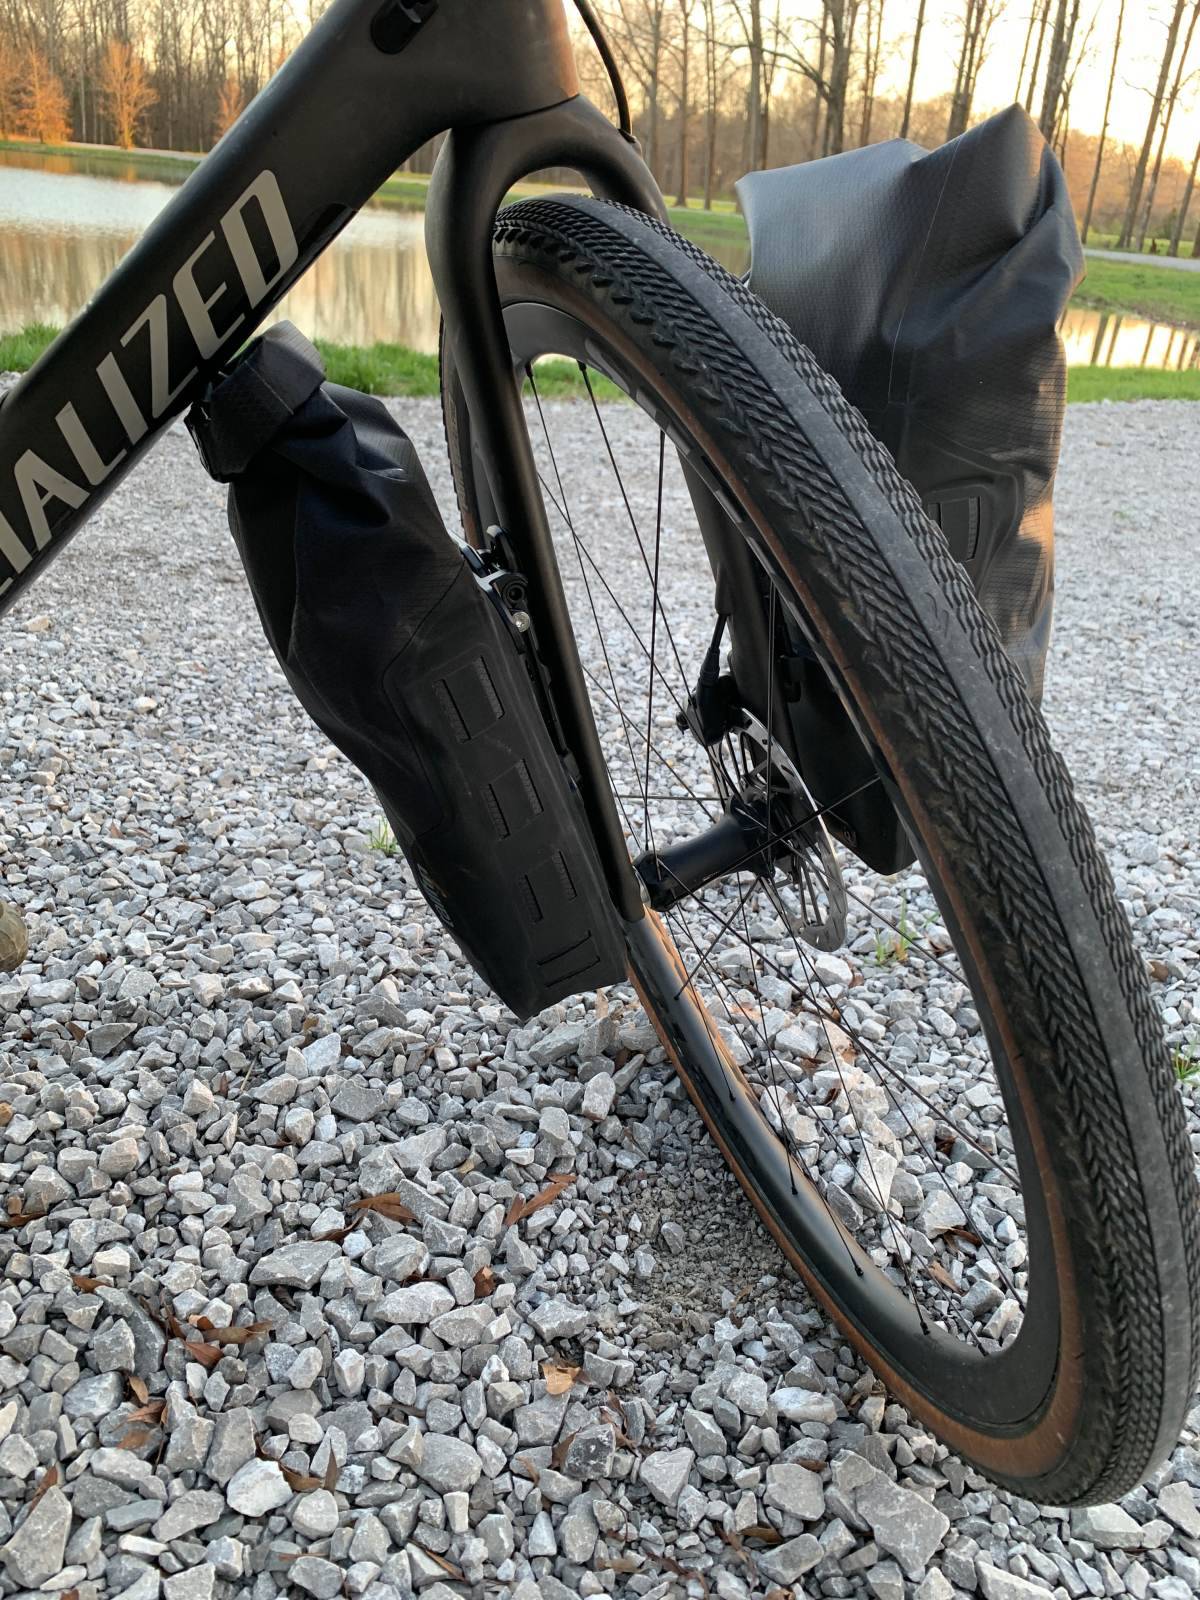
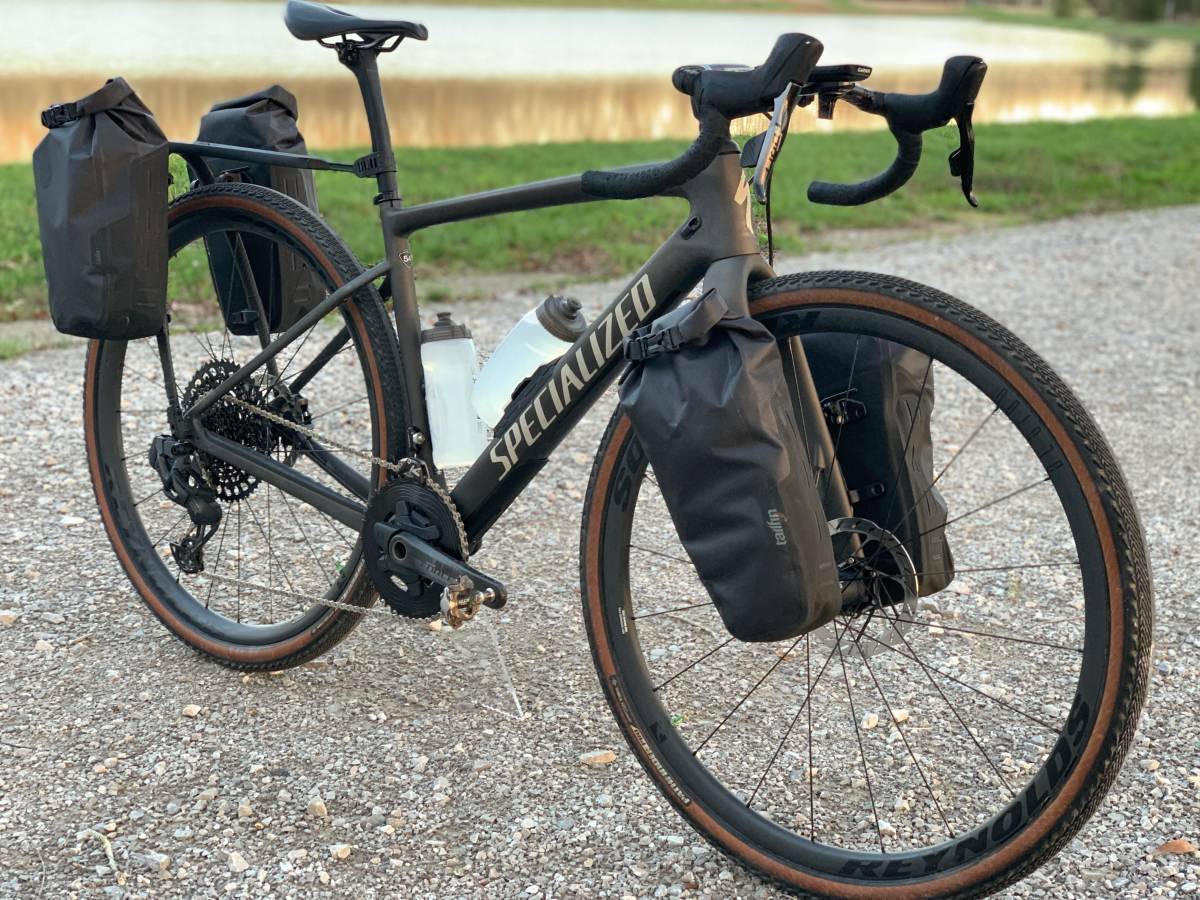
As for toe clearance, there is plenty. Shown below is the fork turned completely and there is still plenty of room between the bag and my shoe. Though, as mentioned above, when using the closure method 1 there isn’t as much frame clearance. I am riding a 54 cm frame; larger bicycle frames might not have this issue. But if closure method 2 is used and the same things are placed in the bag, frame clearance isn’t an issue.
Riding with the Fork Packs
Riding with the extra weight on your fork is going change the feel of how your bike rides, but this is going to happen no matter the fork mounting system you use. Where the Tailfin Fork Packs excel is their ease of installation, lower profile, and low weight. This system doesn’t require adding a rack, which personally I don’t like the look of.
Taking the Tailfin Fork Packs on my adventure went surprisingly well. I was amazed how stable and firmly the Fork Packs stay attached to the Fork Mount. My initial expectation was that the hook might disengage from the Fork Mount, but no matter what, it stayed attached. This system is design to handle rugged terrain, so don’t be afraid of some epic adventures.
With the compression straps, it is very easy to compress the Tailfin Fork Packs down. This keeps the items in the bags from shifting around and giving you a more stable ride.
In some of the pictures shown above, when the fork is turned to about 60 degrees, it is possible that the bag may rub the frame. This is just an extreme example of turning the fork. Under normal riding conditions, most of your turns will be only a few degrees from center, so the bags don’t touch the frame. As mentioned before, using the side compression straps will compress the bags down and keep them from hitting the bike frame even when the fork is turned 90-degrees.
What Can/Should I store in the Fork Packs?
When I reviewed the Tailfin Cargo Cages and bags, I recommended to store things that you were only going to use once a day since getting in and out of the bags took a little more time. With these bags my opinion on what to store in them is a bit different. These bags are so easy to get in and out of, and they are so easy to take on and off you can store quite anything in these.
In the 5L bag I was able to store about five tightly rolled T-shirts in it. In the 10L bag I was able to fill it with two large towels. Also, a 230 g (8.9 oz) propane canister with a Jetboil fit perfectly in the 5L bag. If you are going on a long adventure and won’t have access to water, I think carrying an extra bladder of water in the Fork Pack would work nicely. Remember though, if you are only using two bolts on the Fork Mount you can only carry 3 L of water because of the weight rating. I wouldn’t necessarily take five T-shirts or two large towels on a bikepacking trip, these items are just to give a size reference of the Tailfin Fork Packs.
Really the possibilities are endless of what you can carry. The good thing about using the Tailfin Fork Packs is that you can help distribute the weight evenly on the bike. Also, with the extra storage on the front of the bike, you could probably get away with using smaller bags in the rear, especially for shorter trips.
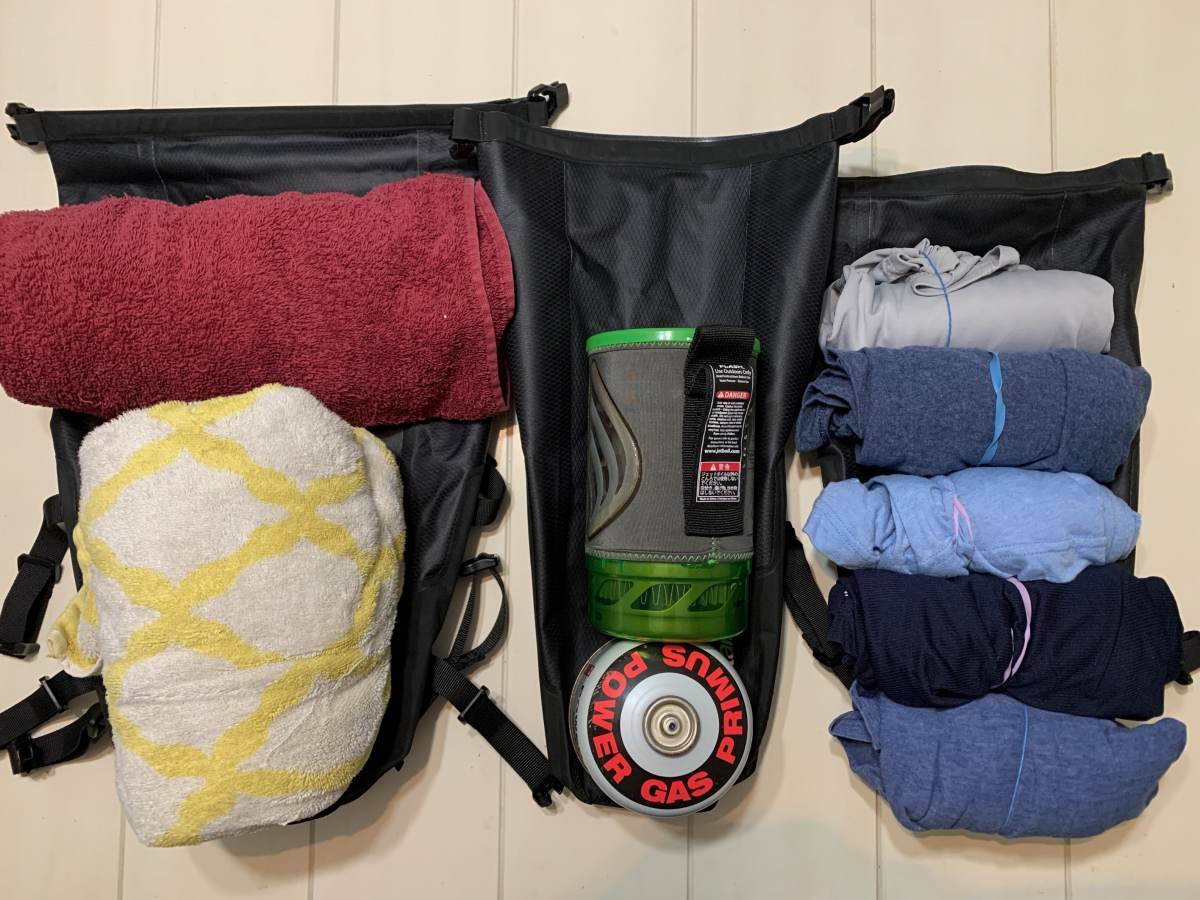
The 10L bag with two large towels, (center of photo above) the 5L bag with a 230 g propane canister and a Jetboil, (right of photo above) the 5L bag with five large T-shirts.
What Could Be Improved
I wish these bags had an air vent. I had a similar complaint when reviewing the previous Cage Packs and the Mini Panniers, and I’m not quite sure Tailfin’s reasoning for not including them on these. Though the air vent isn’t a make-or-break feature, I just think it would make closing and compressing the bag down just a little bit easier.
Final Thoughts
I think Tailfin has really made another amazing product. The Tailfin Fork Packs are so easy to mount and unmount from the bike. The Fork Mount is made from aluminum and isn’t a cheap plastic mount. You won’t have to worry about breaking it if you lean your bike on something or if it accidently tips over.
With all that, these are high quality products that are made very well, but as we know, nice things come at a price. The 5L Fork Packs are $100 USD per bag and the 10L are $120 per bag. In my opinion, the performance of these bags makes them worth every penny.
I have a strong feeling that these bags will last a long time. I really like how the bags are made from two different materials; the back, sides, and bottom of the Fork Packs use a thicker material to protect that bag from wear and tear. These areas are likely to see more wear specifically when the bags are set on the ground while the bags are being unloaded.
A nice thing about these bags is that you don’t need to remove them if you don’t want to. You can unclip the bags and open the top and access all your things. This is nice if there are in muddy conditions or if you don’t really have a place to set down your bags.
The plastic buckles are designed nicely. They connect very easily, and they are easy to disengage. I have yet to have a buckle pop loose while riding and I don’t expect them to. When using the compression straps, they hold together perfectly and allow for the bags to be sinched down tightly.
I think the key when bikepacking, is to really optimize the number of things you are taking with you. Take things with you that serve multiple purposes to help cut down on weight. I think the Tailfin Fork Packs will really help with that. These bags are the perfect size to allow you to carry the extra things you need but aren’t too large that will allow you to get carried away and take too much with you.
I believe that the journey is the adventure, and that is especially true when bikepacking. Though it is important to be able to carry everything you need for your destination. Bikepacking is a great way to explore and to travel by bicycle and Tailfin Fork Packs are going to make your journey much more enjoyable. These bags have been thoroughly tested to stand up to the outdoors giving you piece of mind for your journey. Once you lock down the Tailfin Fork Packs, you can just focus on the path ahead.
More information at the Tailfin Cycling Website
About Jason Lopez
Jason Lopez of JayLo Cycling is a Structural Design Engineer based in Huntsville, AL. He is an avid cyclist and has over 10 years of combined experience between riding, training, and racing. His first love is road cycling, but he will have a heavy focus on gravel riding and racing this year. When not riding his road or gravel bike, you can probably find him somewhere lost in the woods on his MTB or on another bikepacking adventure.