

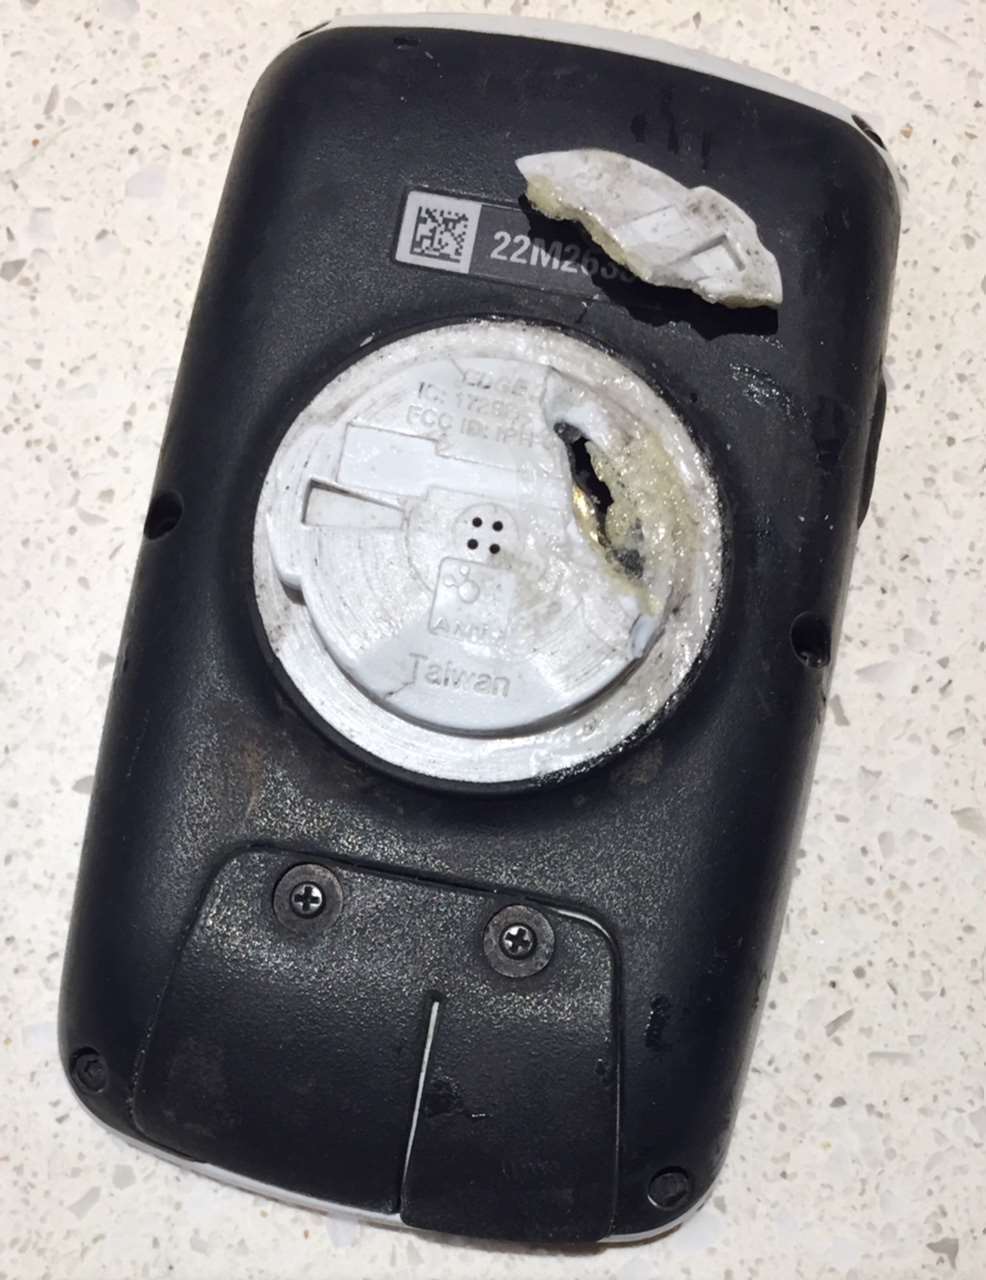
If you treat your Garmin unit right, it can last for years. But even when you do, sometimes problems arise. In my case, after more than 4 years of switching the 800 Edge unit between gravel, road and mountain bikes, eventually, the tabs on the bottom disc began to crack. Noticing the beginnings of this failure, I went thru several months of attempting to hold it together with multiple applications of super glue. Eventually, no matter how super the glue, the torque involved in regular use of the mount mechanism caused a complete separation.

What you will need:
A hand rasp or Dremel tool; a small Phillips head screwdriver, and super glue gel (use only gel type!).
Step 1 – File off the remaining mount tab so the DOGEARS replacement plate could fit over the disc. I chose to use a small toothed hand rasp over the quicker Dremel tool option. It took a few minutes of careful work to round down the tab to fully flush with the disc. Next decision was whether to re-glue the broken disc piece into place or leave it off before securing the replacement plate. Despite making the project time longer, I went ahead and re-glued the broken piece in hope of keeping the unit more weatherproof. Filing off the tab on the re-glued piece took longer, requiring a more delicate touch.
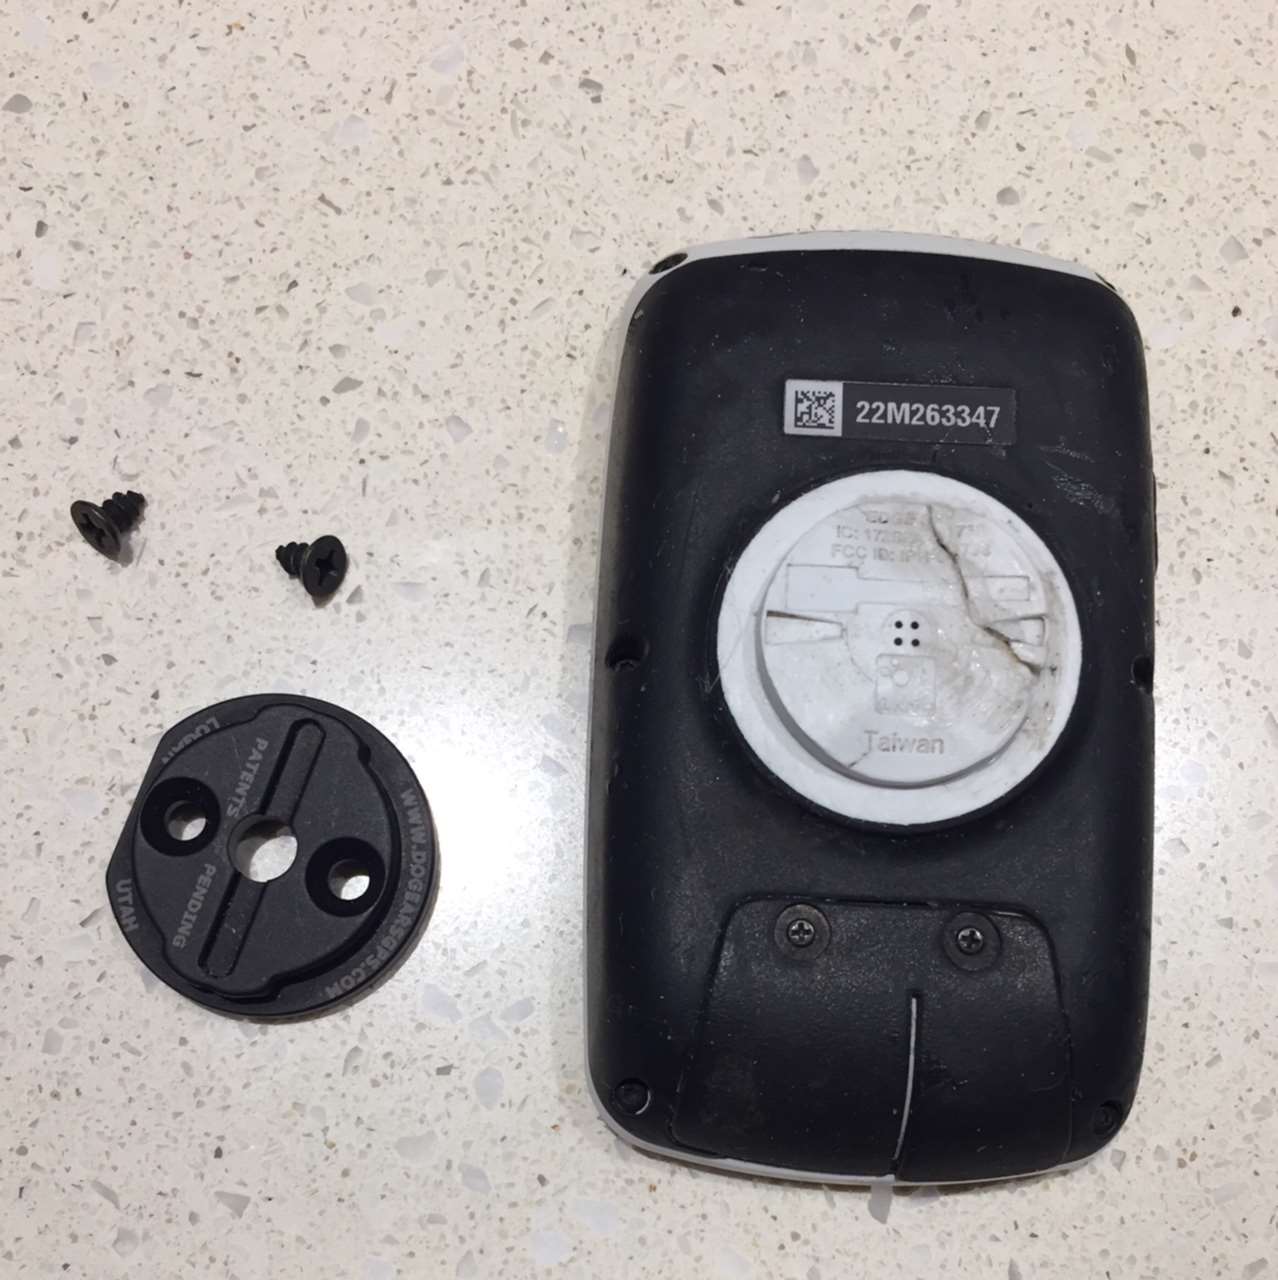
Step 2 – Fit the replacement plate over the disc, lining up the flat edge with the unit serial number to ensure correct positioning of the mounting tabs.
Step 3 – Partly drive the two screws into the back of the Garmin disc. Do not screw all the way down, only until the screw bites into the plastic. Then remove screws and replacement plate before scuffing up the plastic disc mount to promote better adhesion for glue.
Step 4 – Place a few drops of super glue gel in each of the holes made by the two screws you just removed. Place a few drops in each of the indentations of the plastic disc (3 o’clock and 9 o’clock). While the instructions do not call for any more adhesive, I went a bit further, also placing a drop at 2/4/8/10 o’clock. Be careful that no gel winds up in the speaker at center of disc. The gel formula usually has a working time of 5-10 minutes so there is no rush to get through the next step.
Step 5 – Position replacement plate once again onto disc and install screws, being careful not to over tighten. Once the screw head is flush with plate surface, add no more than a quarter turn otherwise you will strip out the hole in the plastic base and your screws then become useless. Or as DOGEARS says: “you will cry.”
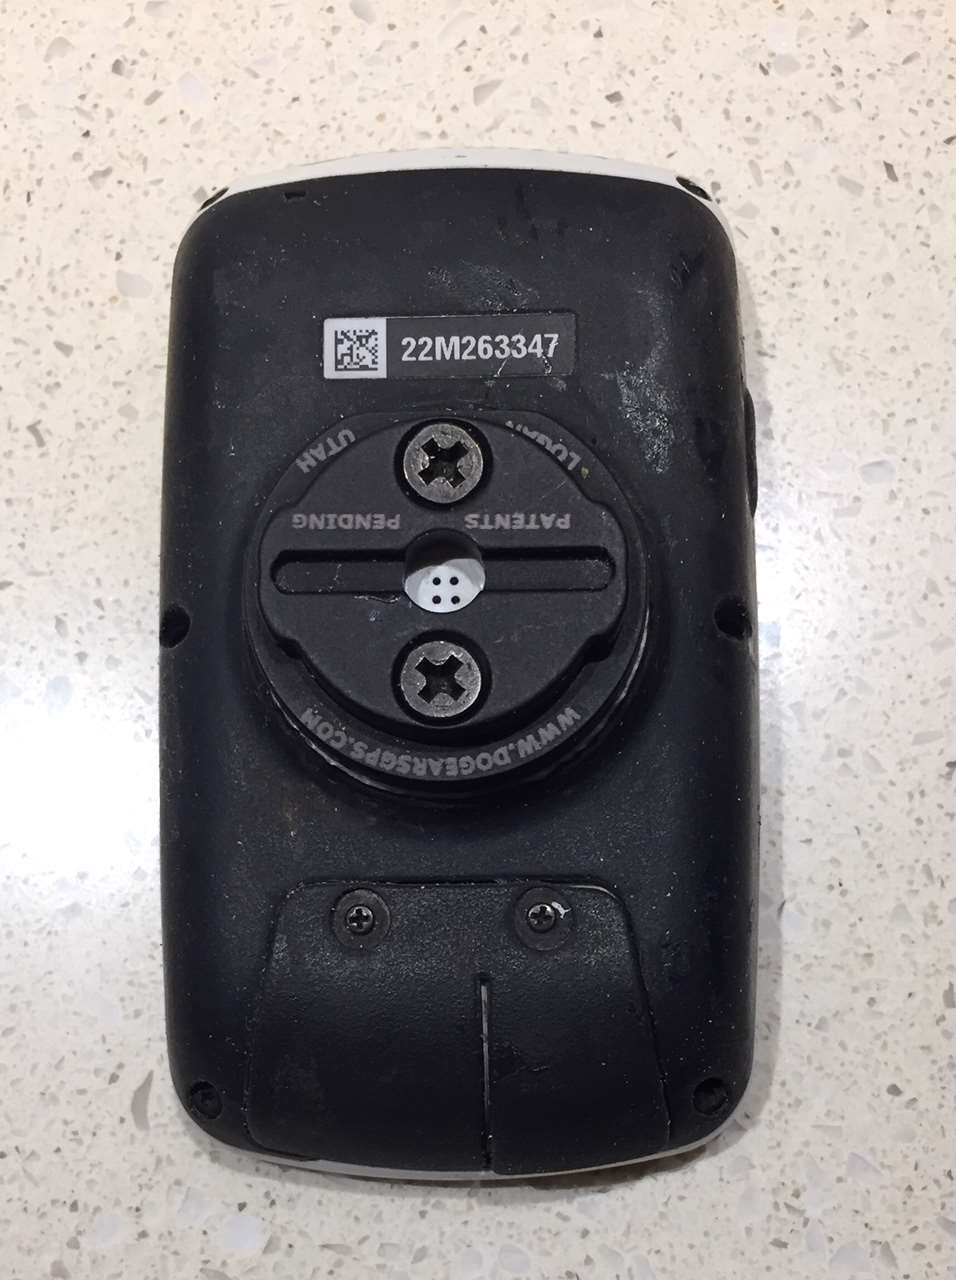

Once the screws are installed, set the unit aside for the gel to cure fully. Probably overkill, but I gave it a full 30 minutes to set before handling further. Upon returning to examine the work, I could see that at least on this unit, a slight gap of perhaps 0.5mm existed between the bottom edge of replacement plate and the white plastic base. Again, probably overkill but I broke out the super gel once more to fill this gap all the way around, effectively creating a smooth seal that would both add strength and resist water/dirt. Another 30 minutes of cure time before testing the new mount.

- When you notice the onset of cracking around your mount tabs, order a replacement plate kit then and there – if you want to keep the unit going strong. Once cracks have begun, it’s only a matter of time until outright failure. Installation of a replacement plate will be much easier and quicker if performed before complete failure of original mount.
- If I installed this again, I’d probably use a Dremel on the tabs to speed up the job. But if you do, be careful not to remove too much material around tabs as you want the replacement plate to fit on snugly when you are trying to insert the screws for the first time. The screws require significant pressure while turning to get started – yet using a drill driver is a no-no since it is too easy to over tighten and strip the holes. So having the plate moving around while trying to get the screws started in proper location only makes this step more difficult.
- Remember to use only a gel formula of super glue as specified in the DOGEARS instructions. Non-gel formulas will be both too runny and set up too quickly for this application.
Very useful and thanks so much! Excellent photos too.
Never heard of this – thanks so much for sharing!
Wish I could grab one of these here in my country. I haven’t any broken Garmin but… I’ve got two GPS, a Garmin Edge 1000 and a Wahoo Elemnt Bolt. The “Ears” on both are inverted, horizontal in one of them and vertical in the other. So… you cannot use the same bike mount for both and you need to change the mount if you change your computer (pretty upsetting, being identical “ears” otherwise). I’ve seen someone (Think it was Dustin Klein) use this Dogears to change the direction of his Wahoo computer ears and use it on Garmin mounts. That’s really practical IMHO. Thanks.
Thanks for the review. I just discovered it plus the Dog Ears repair plate a week ago. Thanks to both, I installed the plate yesterday on my Garmin Edge 1000. It went fine, but I want to emphasize the need to make sure those two flat head screws are perfectly flush with the plate. The plate’s machine tolerances are so tight, that even the slightest protrusion will make securing the repaired Garmin to the handlebar mount difficult. I found that out the hard way, because even though the screws *looked* flush, they weren’t exactly due to operator error (me). Some working with a file just now cured the problem, even if it did score the nice anodized finish a bit. Now, I can smile.